👑 DIY Divine Costume: How to Dress Like the Queen of Filth
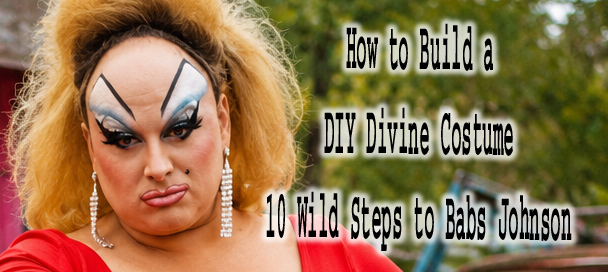
Meet Divine: The Icon Behind Harris Glenn Milstead
Harris Glenn Milstead was born in Baltimore, Maryland, on October 19, 1945. He grew up in a conservative, middle class household far removed from the persona he would later create. As a teenager, Milstead was bullied for his weight and gentle personality, and those years left a lasting mark. Everything changed when he met a young filmmaker named John Waters, who lived nearby in Baltimore. Waters saw something in Milstead that nobody else had noticed yet. A DIY Divine Costume celebrates the incredible transformation that followed that friendship.
Waters gave Milstead the stage name Divine, along with the tagline the most beautiful woman in the world, almost. Divine began appearing in Waters’ earliest short films during the mid 1960s, including Roman Candles and Eat Your Makeup. These low budget, underground projects introduced Divine to Baltimore’s countercultural film scene. Divine joined Waters’ loose collective of performers known as the Dreamlanders. That small group of friends went on to create some of the most notorious films of the twentieth century.
Divine’s true breakthrough arrived with Pink Flamingos in 1972, a film that shocked audiences across the country. The movie followed Divine’s character Babs Johnson, who proudly claimed the title of filthiest person alive. Pink Flamingos became a hit on the midnight movie circuit, building a devoted cult following almost overnight. The film’s ending remains genuinely infamous among fans of underground cinema. It helped cement Divine’s reputation for total shock value. A DIY Divine Costume honors that fearless, boundary breaking spirit without needing to reenact any single scene.
Divine continued working with Waters throughout the 1970s and into the 1980s, starring in Female Trouble and Polyester. These films built on the same outrageous energy while slowly reaching wider audiences than the earliest underground shorts. Costume designer Van Smith developed Divine’s signature look throughout these years. He refined the exaggerated eyebrows, dramatic makeup, and towering hair into something instantly recognizable. That collaboration between Divine and Van Smith created one of the most distinctive visual styles in film history.
By the late 1980s, Divine had crossed over into genuinely mainstream success with Hairspray in 1988. The film introduced Divine’s talent to audiences who had never seen the earlier underground work. Tragically, Divine passed away just days after the film’s premiere, at only forty two years old. Divine’s influence reportedly helped inspire the design of Ursula, the villain from Disney’s The Little Mermaid. That legacy continues to reach far beyond the cult film world where it began. A DIY Divine Costume keeps that larger than life spirit alive for a whole new generation of fans.
👗 Create the Base
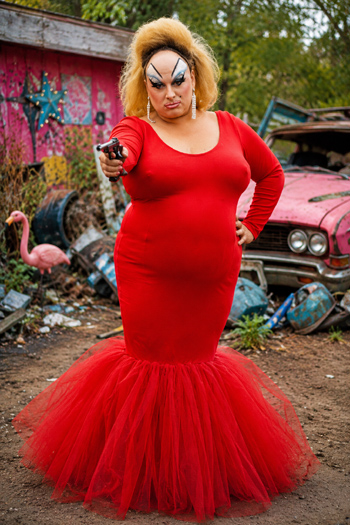
Start a DIY Divine Costume with a fitted red long sleeve maxi dress. Look for stretchy fabric, since the dress needs to hug the body through the torso and hips. A simple red bodycon dress or maxi style from a thrift store makes an excellent starting point.
You do not need to track down Divine’s exact original dress for this costume to work. What matters most is the fitted red silhouette up top, paired with a huge, dramatic flare at the bottom. That flare comes from layered red tulle, which gets attached separately in the next section.
Choose a dress with long sleeves if possible, since Divine’s look rarely showed bare arms. If long sleeves are unavailable, simple red gloves can fill that same visual gap easily. Keep the overall fit snug through the body, since the exaggerated shape depends on a fitted base underneath everything else.
🧵 Adding the Tulle: A Simple No Advanced Sewing Tutorial
The dramatic tulle flare is one of the most important parts of a convincing DIY Divine Costume. This section walks through two simple methods for attaching it, so choose whichever feels more comfortable for you.
For the glue method, gather several rolls of inexpensive red tulle from a craft store. Cut the tulle into long strips, each roughly twice the width you want the finished flare to be. Fold each strip in half lengthwise to create a bit of natural volume before attaching it. Use a flexible, washable fabric glue rather than hot glue for this entire project.
Hot glue tends to dry stiff and can crack or pop loose with movement, since tulle is so lightweight. It also often leaves a visible hard blob underneath the netting, which looks messy up close and in photos. A flexible fabric glue, like Aleene’s Fabric Fusion or a similar permanent fabric adhesive, dries much more flexible. It also dries closer to clear, so it disappears far more convincingly underneath the layers of tulle.
Apply a thin line of fabric glue around the dress at or just below the knees, working in small sections. Press each folded strip of tulle firmly into the glue, slightly overlapping the previous strip as you go. Continue all the way around the dress, adding as many layers as needed for a full, dramatic shape. Let the glue cure completely, following the product’s instructions, before wearing or moving the dress.
For anyone comfortable with a needle and thread, a simple hand sewn gathering stitch offers a more durable option. Cut your tulle strips the same way described above for the glue method. Thread a needle with strong thread and sew a simple long running stitch along the top edge of each strip. Gently pull the thread to gather the tulle into soft, natural looking ruffles. Pin the gathered tulle around the dress at your chosen height, then stitch it directly onto the fabric.
This gathering method takes longer than glue. It holds up far better through a long night of dancing and movement. It also allows the tulle to move and poof naturally, rather than sitting flat against a glued line. Either method creates the same dramatic effect. Choose based on your own comfort level and the time you have available.
Add as many layers of tulle as your budget and patience allow. More volume always reads better from a distance. Divine’s silhouette depended entirely on scale, so resist the urge to keep this part subtle or restrained.
Find other Easy DIY Costume Ideas Here
🎈 Padding and Shaping: Building the Divine Silhouette
Divine’s exaggerated shape came from careful padding, not simply from clothing alone. This section covers chest, hip, and thigh padding, since all three areas work together to create the correct silhouette for a DIY Divine Costume.
For chest padding, start with a well fitting bra in a size slightly larger than your natural size. Stuffing a bra convincingly is about shape, not just volume, so avoid simply cramming fabric into each cup. Fill each cup gradually, starting with a small amount of stuffing. Press it toward the outer edge and bottom of the cup. This mimics the way breast tissue sits. It avoids creating two obvious round lumps sitting too high or too centered.
Polyester fiberfill from a craft store works well and stays lightweight throughout a long night. Some performers prefer filling a nylon stocking with fiberfill first, then tucking that filled stocking into the bra cup. This creates a more rounded, natural shape than loose stuffing alone and helps prevent lumps from shifting. Add stuffing gradually, checking your silhouette in a mirror as you go. Avoid filling both cups completely before checking either one.
For hip padding, a simple foam hip pad set, often sold for cosplay or costume purposes, works extremely well. These pads typically attach with a fabric band around the waist, sitting directly over the hips underneath your clothing. If padded hip forms are unavailable, try fabric pouches filled with fiberfill instead. Pin or safety pin them to a pair of high waisted underwear. Position the padding at the widest part of the hip for the most dramatic, exaggerated silhouette.
Thigh padding works similarly to hip padding and helps smooth the transition between the hips and the dress. Small fabric pouches filled with fiberfill can be safety pinned to shapewear or leggings worn underneath the dress. Focus this padding on the upper, outer thigh area rather than spreading it evenly around the entire leg. This targeted placement helps create that classic exaggerated curve without adding unnecessary bulk elsewhere.
Once all padding is in place, put the fitted dress on over everything and check the overall silhouette carefully. Adjust any padding that looks uneven or lumpy before moving on to hair and makeup. A few extra minutes spent here makes an enormous difference in how convincing the final costume looks in photos.
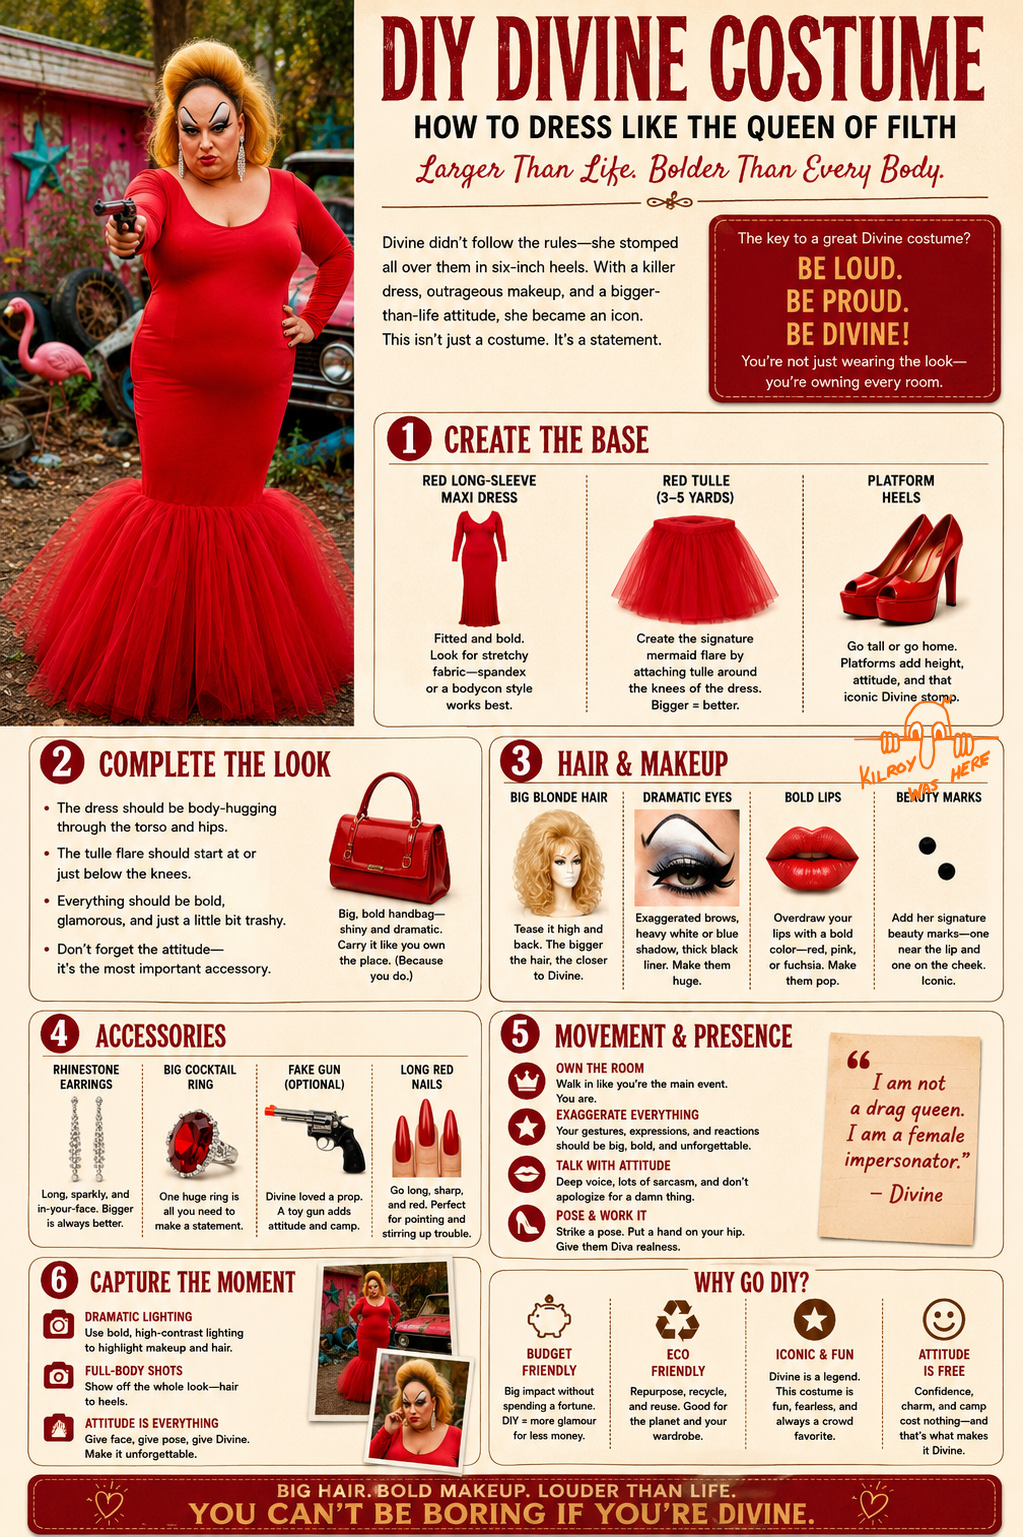
💇 The Bald Cap and Wig Stacking Technique
Divine’s pushed back hairline is one of the most recognizable parts of the entire look. Achieving it requires either a bald cap or a clever wig stacking technique. This section covers both options for a DIY Divine Costume.
A costume bald cap, available online or at most costume shops, creates the cleanest and most convincing result. Pull your own hair back tightly and secure it flat against your head before applying the cap. Stretch the bald cap gently over your head, starting at the forehead and working backward toward the neck. Trim any excess material around the edges once the cap is positioned correctly.
Blend the edge of the bald cap into your skin using foundation or cap specific makeup in a matching shade. A stippling sponge helps create a smooth, seamless transition where the cap meets your natural hairline. This blended edge is exactly what lets the exaggerated painted hairline read convincingly later during the makeup process.
If a bald cap is not available, a simple wig stacking method offers a quick, effective alternative. Pull your own hair back completely and secure it flat using pins, gel, or a wig cap. Place a plain, close fitting wig cap over your hair as the first layer. Add a second, larger wig directly on top of the first cap, positioned slightly further back than a natural hairline.
This double layer creates extra volume and pushes the visible hairline back significantly, mimicking the bald cap effect. The seam between your forehead and the wig will be somewhat visible up close using this method. Careful foundation blending along that edge, along with strategic makeup placement, helps minimize how noticeable that seam appears in photos.
Whichever method you choose, secure everything firmly with bobby pins or wig clips before starting your makeup. A wig that shifts partway through the night can undo hours of careful work in just a few seconds.
31 Halloween Superstitions You Didn’t Know About – Fascinating Fears & Hidden Truths
💄 Hair and Makeup: Divine’s Signature 1960s and 1970s Technique
Divine’s makeup style drew directly from the exaggerated, theatrical techniques popular in the 1960s and 1970s. Understanding this era helps explain why the look reads as intentionally over the top rather than simply messy or careless. This section builds a DIY Divine Costume face step by step.
Begin with a full face of foundation applied heavily and evenly across the entire face and neck. This era’s makeup relied on flat, even coverage rather than any contouring, highlighting, or sculpting. Apply your foundation shade evenly, blending carefully down onto the neck and chest for a seamless match.
If wearing a bald cap or stacked wig setup, blend foundation directly over the cap’s forehead area too. This step visually connects your real skin to the prosthetic piece, creating one continuous, believable surface. Set this entire base with translucent powder, paying special attention to the forehead, since heavy eye makeup is coming next.
Cover your natural eyebrows completely using a strong concealer, then set that concealer with powder. This step is essential, since Divine’s eyebrows sat dramatically higher than a natural brow line. Using a dark eyeliner or brow pencil, draw thin, sharply arched eyebrows well above your natural brow bone. Keep the arch high and dramatic rather than soft or rounded for the most accurate, striking effect.
For the eyes, apply a pale white or light colored eyeshadow across the entire lid. Blend it up toward the newly drawn eyebrows. This pale base helps the next layers of color stand out with real intensity. Add classic blue eyeshadow through the crease and across a wide area of the upper lid. Blend only minimally, since this era’s makeup often looked deliberately unblended and graphic rather than soft.
Draw a bold, exaggerated crease line using black eyeliner, extending it well beyond your natural eye shape. Add loose glitter or chunky glitter flakes over parts of the eye area for extra drama and shine. A liquid glitter base or a bit of eyeshadow primer helps the glitter stick without needing separate glitter glue.
Line the lower lash line with black eyeliner as well, keeping the overall eye makeup bold and heavily defined. Apply dramatic false lashes, layering multiple pairs if you want an even more exaggerated finished result. Finish the eye area with a bold, gaudy blush application, blending bright pink or red tones high on the cheeks.
For the lips, use a lip liner in a deep burgundy or dark red shade. Draw an exaggerated lip shape well beyond your natural lines. Overdraw both the top and bottom lip significantly, extending the line well beyond your natural lip edge. Divine’s lips typically featured a dramatic dip in the cupid’s bow and a bold, sharp outer line. Fill the overdrawn shape with a bright, glossy lipstick in red, pink, or fuchsia for maximum visual impact.
Finish the face with one or two small drawn on beauty marks using a fine tipped eyeliner pencil. These small details genuinely help sell the look up close, even though they seem minor from a distance. Take your time with each step, since this dramatic makeup look rewards patience far more than speed.
Vintage Halloween Collectibles: 31 Creepy Treasures Worth Collecting
💍 Accessories
A DIY Divine Costume comes together through several bold, oversized accessories. Add long, sparkling rhinestone chandelier earrings to frame the face dramatically. Choose the biggest pair you can comfortably wear, since subtlety was never part of this look.
One large, oversized cocktail ring is often all you need to make a genuine statement on the hands. Long, pointed red nails finish the look and make every gesture and pose feel more dramatic. Press on nails work perfectly if your natural nails are short, and they can be applied quickly before the event.
If you want to include a campy prop nodding to the Pink Flamingos era, keep it obviously theatrical. Choose something clearly fake rather than realistic. Keep any prop entirely safe for a party setting, avoiding anything that could be mistaken for real or dangerous. A prop pistol clearly marked as a toy, held playfully rather than seriously, can work well for photos.
None of these accessories need to be expensive or difficult to source. Most items turn up quickly at a costume shop, a discount jewelry retailer, or a well stocked thrift store.
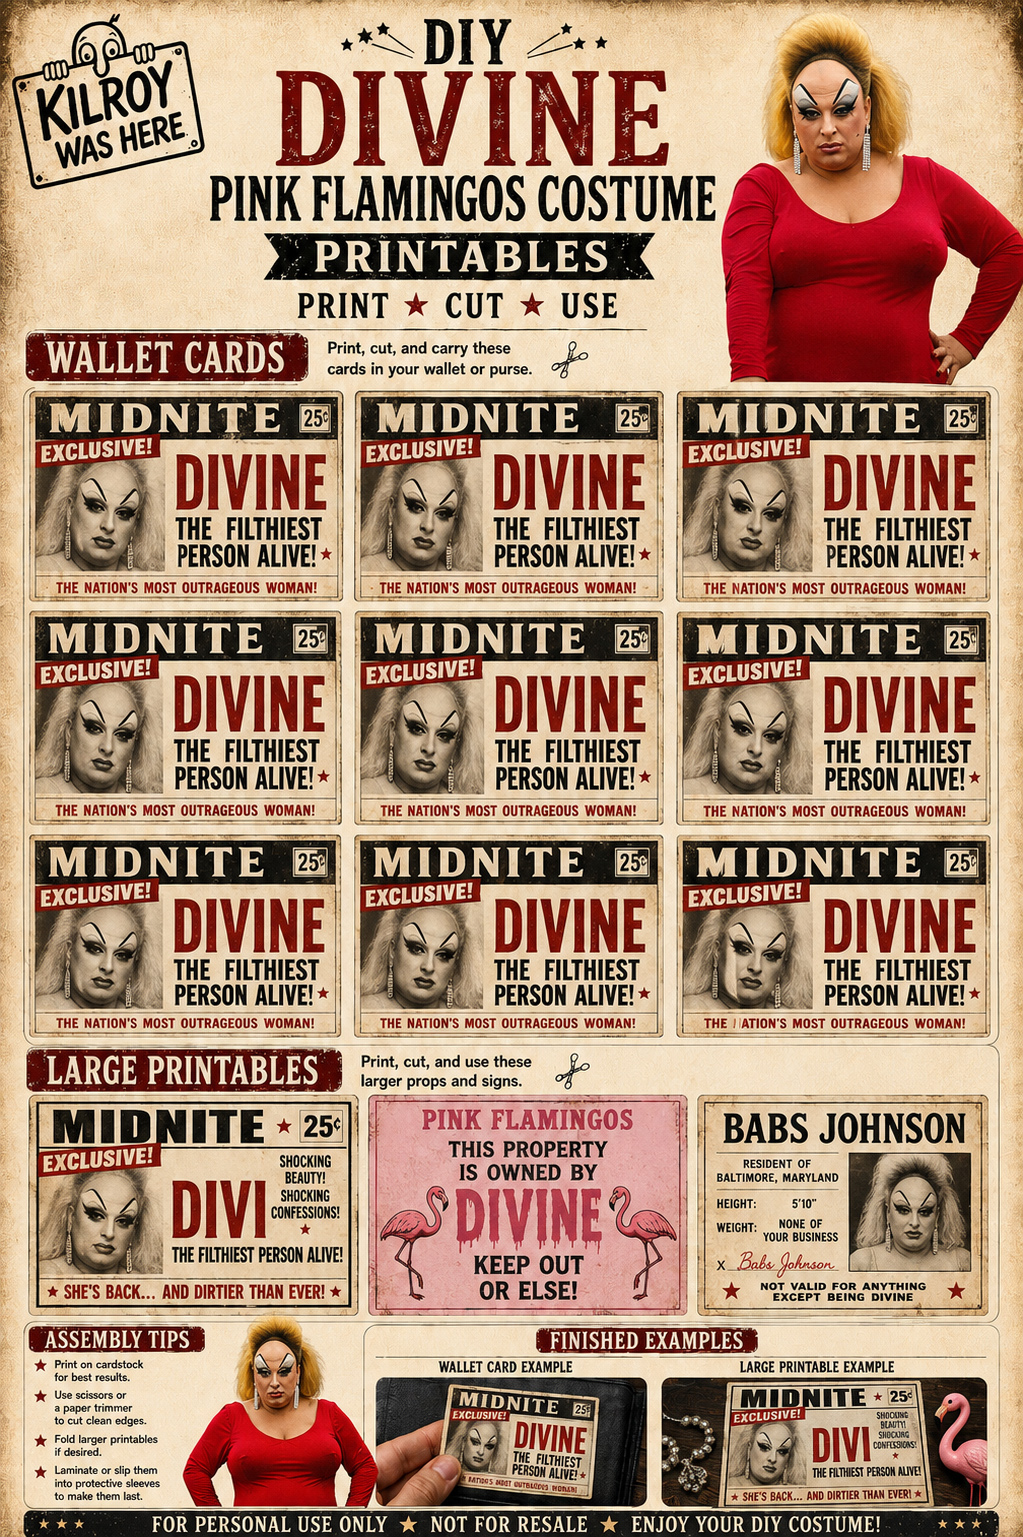
👠 Shoe Shopping Guide: Understanding Men’s and Women’s Sizing
Platform heels are an essential part of any convincing DIY Divine Costume, but shoe shopping can get confusing quickly. Many people assume a size ten in men’s shoes matches a size ten in women’s shoes. That assumption causes real problems while shopping. Men’s and women’s shoe sizing scales are genuinely different systems, not simply the same numbers applied differently.
As a general guideline, women’s shoe sizes typically run one and a half to two sizes larger. That difference applies compared to the equivalent men’s size. That means a men’s size eight roughly corresponds to a women’s size nine and a half or ten. If you typically wear a men’s shoe and are shopping for women’s heels, size up accordingly. Do not simply order your usual number.
Keep in mind that women’s heels also tend to run narrower than men’s shoes, so look for wide-width styles if needed.
Because sizing can vary between brands, always check a specific size chart before ordering shoes online. Many retailers include a conversion chart directly on the product page, comparing men’s, women’s, and international sizing side by side. When shopping in person, trying shoes on directly remains the most reliable way to find an accurate, comfortable fit.
Red platform heels create the strongest visual impact for this particular costume. They add real height and drama to the finished silhouette. Choose a heel height that feels manageable for a full night of standing, walking, and posing. A slightly lower platform with good ankle support often photographs just as well as an extremely tall, less stable option.
Make Your Breasts Look Bigger for a Sexy Halloween Costume
🚶 Movement and Presence
Physical presence carries enormous weight in a convincing DIY Divine Costume. Walk into every room as though everyone there has genuinely been waiting for your arrival. That confident entrance instantly signals exactly who you are dressed as.
Exaggerate every gesture, expression, and reaction throughout the entire night. A raised eyebrow, a dramatic gasp, or a sweeping hand motion should all feel larger than normal life. Talk with real attitude, sarcasm, and personality, since Divine never once tried to disappear quietly into a crowd.
Pose often and confidently, with one hand resting firmly on your hip. Keep your chin lifted and your shoulders pulled back for the most commanding possible silhouette. Stop occasionally to give people a long, direct stare, holding it just a beat longer than feels entirely comfortable.
If you want a line ready for the party, borrow one from the icon herself. I am not a drag queen, I am a female impersonator captures her exact spirit and attitude. Deliver it with total confidence, as though daring anyone in the room to disagree.
Practice this larger than life energy a little before the event begins. Stand in front of a mirror and try a few dramatic poses and exaggerated expressions. A little rehearsal helps the whole performance feel confident rather than hesitant once guests actually arrive.
Halloween Costume Origins: A Historical and Cultural Examination
📸 Capture the Moment
The right setting makes photos of a DIY Divine Costume feel genuinely unforgettable. Use bold, dramatic lighting that catches the makeup, hair, jewelry, and bright red dress clearly. Colored gels or simple string lights can add real atmosphere to an otherwise plain indoor space.
Always take full body photos rather than cropping out the dramatic silhouette below the waist. The giant red tulle flare is one of the most important visual elements. Let it show clearly from hair to heels. Cutting off the bottom of the costume loses much of what makes this particular look so striking.
Look for a slightly wild, outrageous backdrop that matches the spirit of the Pink Flamingos era. A junkyard, an old trailer, a weathered building, or a vintage car all fit that same rebellious, campy mood. If none of those settings are available, a bold, colorful wall or a dramatic staircase works as an easy substitute.
Give the camera a real stare, sneer, or larger than life expression rather than a polite, restrained smile. A completely ordinary, school picture style smile does not match this character’s entire personality. Try a few different dramatic expressions across several photos to capture the full range of this bold, exaggerated character.
🎃 Why Go DIY
There are several strong reasons to build a homemade DIY Divine Costume rather than buying something premade. Starting with thrift store clothing and inexpensive craft supplies keeps the total cost genuinely low. A basic red dress, tulle, and simple padding materials add up to far less than a licensed costume ever would.
Reusing and altering secondhand clothing also supports a more sustainable approach to Halloween overall. Taking a plain thrifted dress and transforming it into something completely unforgettable reduces unnecessary waste. It keeps usable clothing in circulation instead of sending it straight to a landfill.
This character remains one of the most iconic, instantly recognizable figures in cult film history. A DIY Divine Costume introduces that fearless, boundary breaking legacy to a whole new audience every single year. Few costumes reward bold creative choices as generously as this one does.
Finally, remember that confidence and camp attitude cost absolutely nothing at all. Those qualities do more work than any single accessory or prop ever could. Combined with dramatic red tulle and exaggerated makeup, a DIY Divine Costume comes alive instantly. It happens the moment you walk in the door.
A little practice with posture, expression, and attitude makes the whole performance feel natural. Try a dramatic pose and a confident stare in front of a mirror beforehand. Small rehearsals like this help the character feel like true second nature by the big night. Most people find that a few minutes of practice builds real, larger than life confidence quickly. That confidence shines through clearly in every photo and every conversation for the rest of the evening. By the time the party starts, the whole performance should feel loud, proud, and completely unapologetic.
🕸️ Related Costumes to Try
DIY Milton Berle Drag Costume
DIY Flip Wilson Costume
DIY Mimi Bobeck Costume
DIY Dr. Frank N Furter Costume
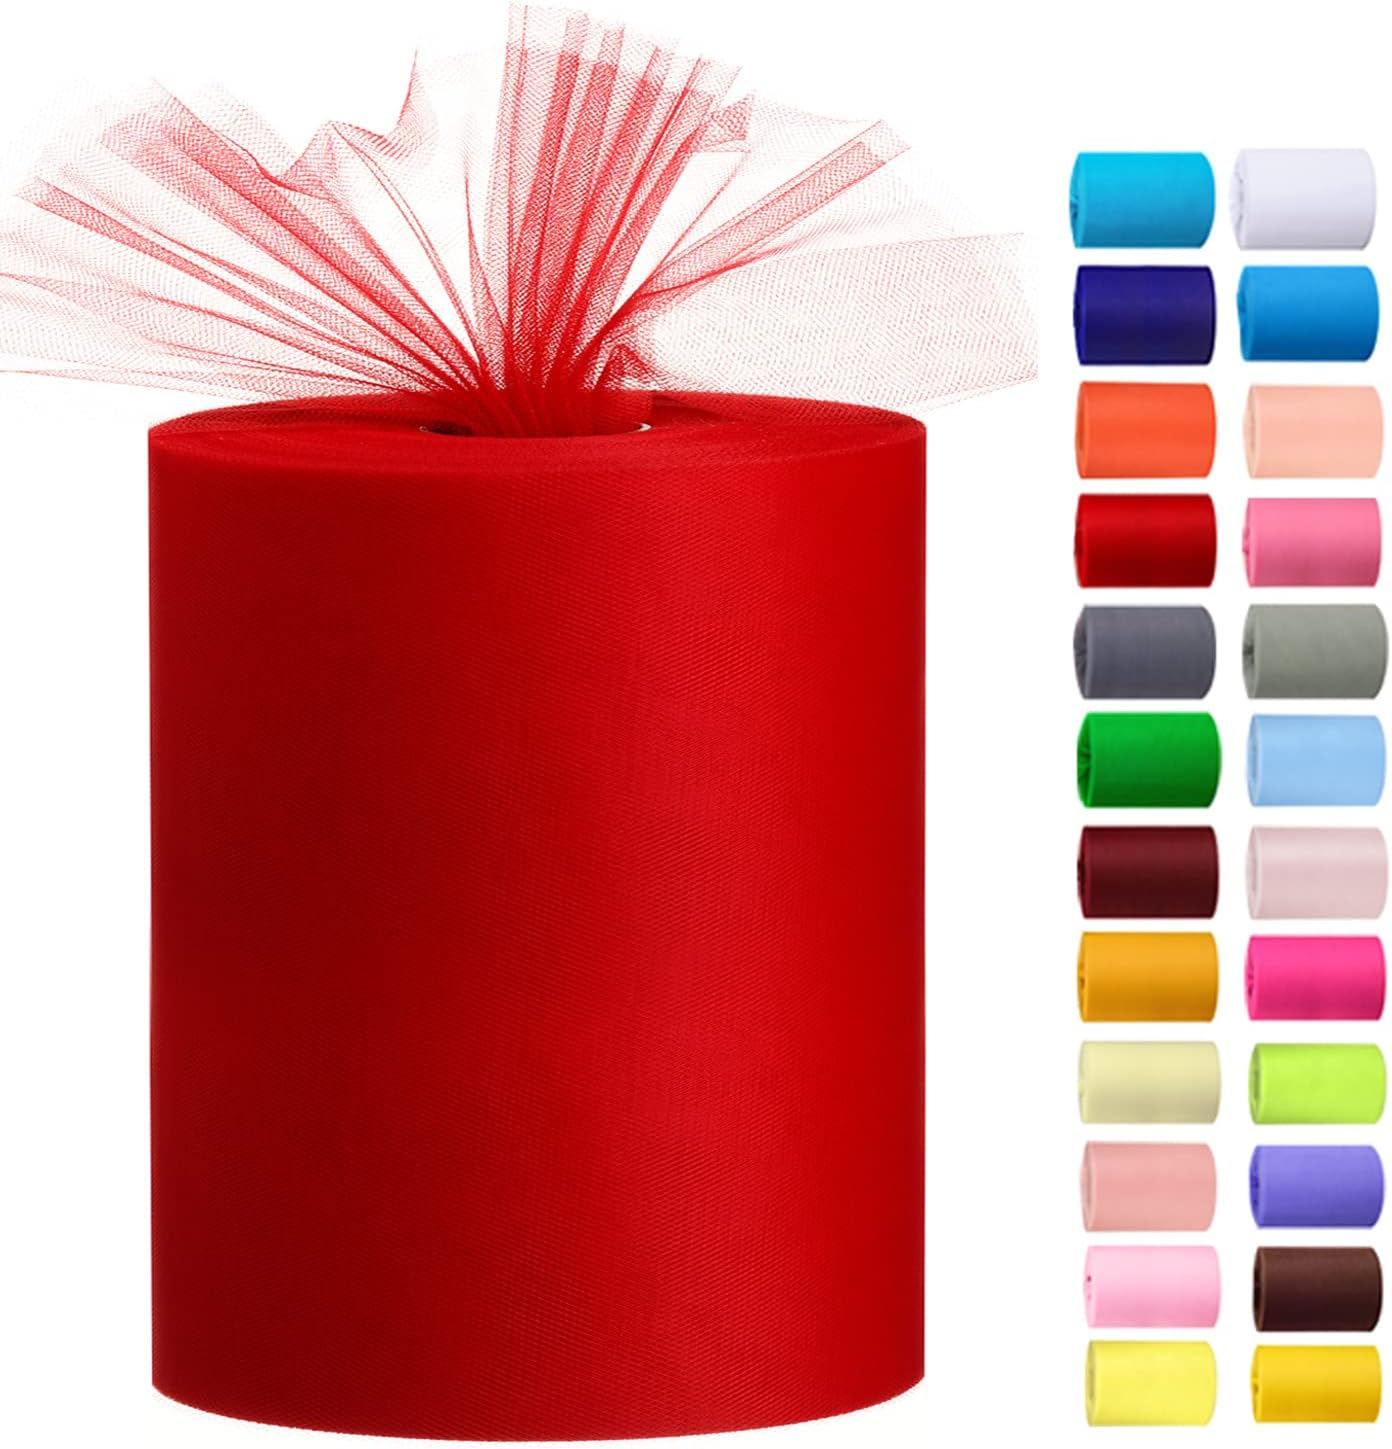
Red Tulle Fabric Roll
Product Description:
One of the easiest ways to recreate Divine’s unforgettable oversized gowns is with layers of bright red tulle. This generous roll of fabric is perfect for building a dramatic DIY Divine Costume, adding the volume, flair, and theatrical style that made the legendary performer an icon. It’s lightweight, easy to shape, and ideal for creating eye-catching costumes without sewing.
Key Features:
• Extra-long 100-yard roll of bright red tulle
• Soft fabric with excellent drape and shape retention
• Won’t unravel, making it easy to cut and work with
• Lightweight and simple to layer for dramatic volume
• Perfect for Halloween, cosplay, drag performances, theater, costume design, and craft projects
Why This Works:
Divine was famous for larger-than-life fashion and bold silhouettes. Layering bright red tulle over a simple dress or costume base is an inexpensive way to create the dramatic volume associated with a DIY Divine Costume. The fabric can also be used for sleeves, ruffles, skirts, boas, or other theatrical accents that make the costume impossible to ignore.
Buy on Amazon
Further Reading & Resources
📺 See: Pink Flamingos
🔍 More: Divine (performer) – Wikipedia