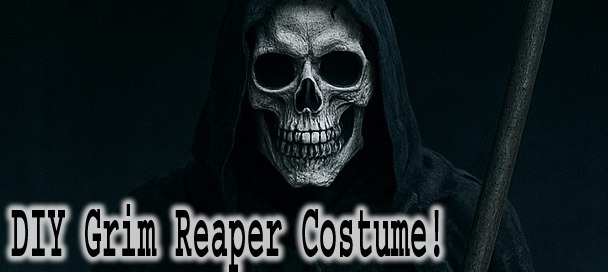
☠️ Summon Death Itself with a DIY Grim Reaper Look
DIY Grim Reaper look with skull makeup and tattered black robe
Some costumes whisper fear this one embodies it. With just a black robe, a skeletal face, and a steady stare, the DIY Grim Reaper Look brings death to life in the most chilling way possible. It’s simple, cheap, and endlessly effective.
Unlike gore-heavy monsters or glittery villains, the Grim Reaper terrifies with subtlety. Silent, faceless, and always watching, it’s a costume that gets under people’s skin without saying a word. And best of all you can build the entire look with a few basic materials.
This guide walks you through crafting your own personalized version of the Reaper, complete with distressed robes, bone-chilling face details, and a DIY scythe to finish the job. Let’s make death look good.
🧥 Step 1: Build the Cloaked Reaper Wardrobe
Every DIY Grim Reaper Look begins with the iconic black robe. It should be long, loose, and flowing something that hides your entire body and moves like a shadow. If you don’t have a robe, a long black coat, oversized hoodie, or even a thrifted graduation gown can work just as well.
Add texture with layered black scarves, old curtains, or gauzy fabric. You can safety-pin strips to the sleeves or back to mimic torn souls or drifting shadows. Black gloves and boots complete the silhouette and keep your hands and feet hidden in darkness.
The hood is essential it should cover most of your face and cast deep shadows. If your robe doesn't have one, sew or pin on a piece of black fabric to drape over your head. The more covered and faceless you appear, the more intimidating your DIY Grim Reaper costume becomes.
✂️ Step 2: Age & Distress Your Robe
A brand-new black robe won’t scare anyone it needs the look of something that’s been walking the Earth for centuries. Distressing your outfit adds realism and makes your DIY Grim Reaper Look feel authentic, worn, and ghostly.
Use scissors to fray the hemline, sleeve edges, and the bottom of the hood. Cut uneven strips and pull at the threads to create a shredded, decayed effect. If you're comfortable and safe, lightly singe some of the ends outdoors to give it a scorched, underworld feel.
Add torn mesh or ripped fabric to drape across the shoulders or trail behind you like lingering souls. You can also rub the robe with sandpaper or dab it with gray paint to dull the black and give it a dusty, tomb-like texture. The more aged your cloak looks, the more ancient and menacing your DIY Grim Reaper costume will feel.
The skeletal face is the soul of your DIY Grim Reaper Look whether you paint it on or wear a mask, it should look cold, hollow, and otherworldly. You don’t need pro tools to make it scary just black and white paint or a base mask and a few enhancements.
For face paint, start with a white base all over your face. Use black to hollow out the eyes, nose, and cheekbones, then draw skeletal teeth across your lips and jawline. Add cracks, shadows, or gray contouring for a more undead effect. The key is symmetry and sharp contrasts.
Prefer a mask? Grab a cheap plastic skull mask and upgrade it. Dry-brush white and black paint for a weathered look, or use matte spray paint to kill any shine. Cut the eye holes wider if needed and black out the inside with mesh or dark fabric so your eyes vanish into shadow. Either way, your DIY Grim Reaper costume now has a face that no one wants to meet in a dark hallway.
🪓 Step 4: Make or Upgrade the Scythe
Grim Reaper Scythe Prop for your DYI Grim Reaper Look at Amazon
No DIY Grim Reaper Look is complete without the infamous scythe the tool of death itself. Fortunately, it’s easy to make at home with a few basic materials or enhance a cheap plastic version for maximum visual impact.
To build one, start with a broomstick or sturdy wooden dowel for the handle. Cut a blade shape out of cardboard, foam board, or plastic, then wrap it in aluminum foil or spray paint it silver. Secure the blade to the handle with hot glue, zip ties, or duct tape wrapped in black cloth for a rustic, aged grip.
If you already have a plastic scythe, make it look battle-worn by roughing it up with sandpaper, adding black or rust-colored paint smudges, or even splattering fake blood along the blade’s edge. This final touch gives your DIY Grim Reaper costume the authority and fear factor that makes people move out of your way fast.
🧠 Step 5: Movement, Voice & Presence
With your cloak draped and scythe in hand, the final piece of your DIY Grim Reaper Look is how you carry yourself. The Reaper doesn’t rush or chatter it glides, it stares, it waits. Your movements and silence are what make the costume come alive… or rather, stay dead.
Walk slowly and deliberately. Drag the scythe behind you or carry it low. Keep your back straight, your shoulders relaxed, and your head tilted slightly downward for a menacing effect. Make your presence feel inevitable like death itself.
Speak only if absolutely necessary. A whisper, a slow rasp, or just a deep exhale can be far more unnerving than any words. Let the silence hang heavy. With the right body language, your DIY Grim Reaper costume becomes more than fabric and paint it becomes a walking omen.
📸 Step 6: Final Touches & Shadows for Photos
Now that your DIY Grim Reaper Look is complete, it’s time to capture the fear. The right lighting, pose, and setting can turn your costume from cool to downright chilling.
Choose dark, moody backgrounds alleys, doorways, stairwells, or wooded areas at dusk work perfectly. Use side lighting or an upward-facing flashlight to cast harsh shadows across your skull face or hood. For indoor shots, try standing in a doorway with light behind you to create a full silhouette effect.
Hold your scythe upright beside you or rest it on your shoulder like you're waiting. Keep your chin down, eyes in shadow, and body still. No smile, no expression just presence. Use a black-and-white or high-contrast filter to emphasize the bones and cloak. With just a few eerie adjustments, your DIY Grim Reaper costume becomes the stuff of nightmares.
☠️ Fun Fact The Grim Reaper first appeared in 14th-century art during the Black Plague as a symbol of death personified hooded, silent, and skeletal.
🏆 Why Go DIY?
Store-bought costumes can be flashy, overpriced, and lifeless but a DIY Grim Reaper Look gives you full control over the scare factor. You get to decide how dark, detailed, or deadly your version of Death will be.
By going DIY, you can tailor the entire costume to your style whether it’s sleek and cinematic or shredded and nightmarish. You also save money using items you already have: a broomstick becomes a scythe, black clothing becomes a cloak, and a little face paint turns you into a legend.
More than anything, a homemade DIY Grim Reaper costume feels earned. It carries a presence that no plastic mask can match and when you walk into a room cloaked in shadows, everyone knows who’s in charge.
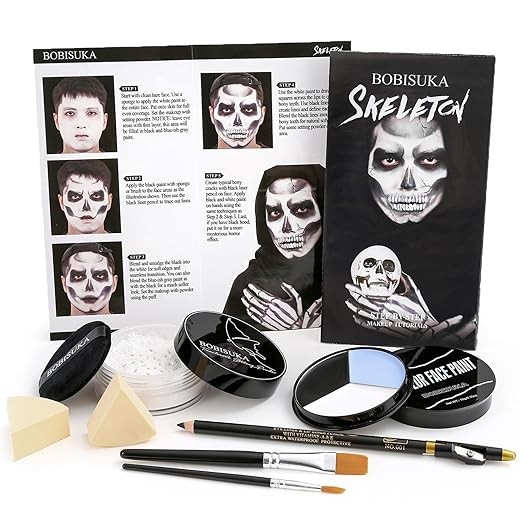
Complete Skull Makeup Kit for achieving a bone-chilling DIY Grim Reaper Look with full-face skeletal detail.
Includes: Tri-color Cream Face Paint Palette (black, white, gray-blue), Setting Powder with Puff, 2 Sponge Applicators, 2 Brushes (flat & detail), and a Black Liner Pencil. Step-by-step instructions included for flawless results.
Perfect for Reaper Looks: The oil-based paints blend easily and are gentle on skin, allowing you to create shadowed eyes, bony contours, and cracked skull effects that bring your DIY Grim Reaper Look to life. From teeth detailing to hollowed cheeks, every stroke adds skeletal precision.
Easy to Use & Safe: Non-toxic and suitable for all skin types, this kit is ideal for Halloween, stage shows, cosplay events, or haunted attractions. Washes off easily with makeup remover or oil, so your transformation can start and end smoothly.
ML Lamp is the owner of Kilroy Was Here. After his 20 years of working in Las Vegas in the entertainment promotions field, Mr. Lamp retired in 2002 from his job to pursue his passion for collectibles. Now as a guest speaker and author he’s living the dream, and sharing his warmth with You.