🤠 DIY Festus Haggen Costume: How to Dress Like Gunsmoke’s Most Beloved Scruffy Deputy
Before Ken Curtis ever set foot in Dodge City, he had already replaced Frank Sinatra. Born Curtis Wain Gates in Lamar, Colorado, and raised in Las Animas where his father served as county sheriff, Curtis came to show business through music rather than acting. In 1941 he stepped in as lead vocalist for the Tommy Dorsey Orchestra, filling the spot Sinatra had vacated, and from there built a singing career that included a run with the Sons of the Pioneers, performing Western hits including Room Full of Roses and Ghost Riders in the Sky, and an appearance at Carnegie Hall. The man who would become one of television's most beloved deputies had a smooth baritone speaking voice and a polished musical pedigree that nobody watching Gunsmoke would ever have guessed.
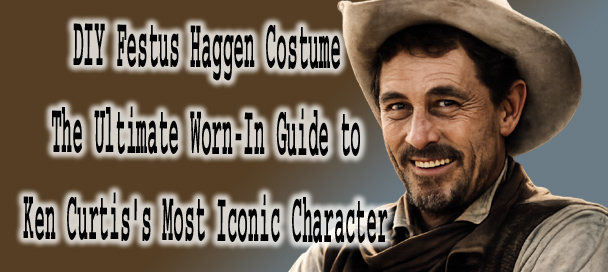
The DIY Festus Haggen costume draws from one of American Western television's most beloved and enduring characters, Festus Haggen, portrayed by Ken Curtis across eleven seasons and 304 episodes of Gunsmoke on CBS from 1964 through 1975. The character of Festus was patterned after a real person from Curtis's Colorado childhood, a cedar fence post cutter named Cedar Jack who regularly ended up in the jail where Curtis's father served as sheriff, giving Curtis years of direct observation to draw from in building one of television's most specific and fully realized character performances. The costume's combination of distressed and lived-in western clothing, aged cowboy hat, deputy badge, and scruffy beard has made the DIY Festus Haggen costume a beloved choice for fans of classic American Western television with broad generational appeal.
What Curtis brought to Festus Haggen when he joined the Gunsmoke cast permanently in 1964 was a character built from the ground up with a specificity that only someone who had grown up watching real people could achieve. Festus was patterned after a man from Curtis's Las Animas childhood named Cedar Jack, a cedar fence post cutter who lived out in the hills and periodically came to town, where he usually ended up drunk and in the sheriff's jail. Curtis had observed Cedar Jack many times from inside that jail, where his mother cooked for the prisoners and his father kept order. The nasally, twangy, high-pitched drawl that became Festus's most recognizable quality was entirely invented and bore no resemblance to Curtis's actual voice. That gap between who Ken Curtis was and who Festus Haggen was is one of the more remarkable performance achievements in the history of American Western television.
Festus held the deputy role for eleven seasons and 304 episodes, longer than any other deputy in the show's twenty-year run. He was scruffy, cantankerous, and illiterate, a man who had grown up hard and showed it in every line of his face and every piece of clothing he wore. He was also fiercely loyal to Marshal Matt Dillon, genuinely kind when the situation called for it, and capable of a warmth and a decency that appeared without warning and landed with real weight because the character had earned it. Ken Curtis played both sides of that with complete commitment, and the result was a character that audiences loved for eleven years and have not forgotten since.
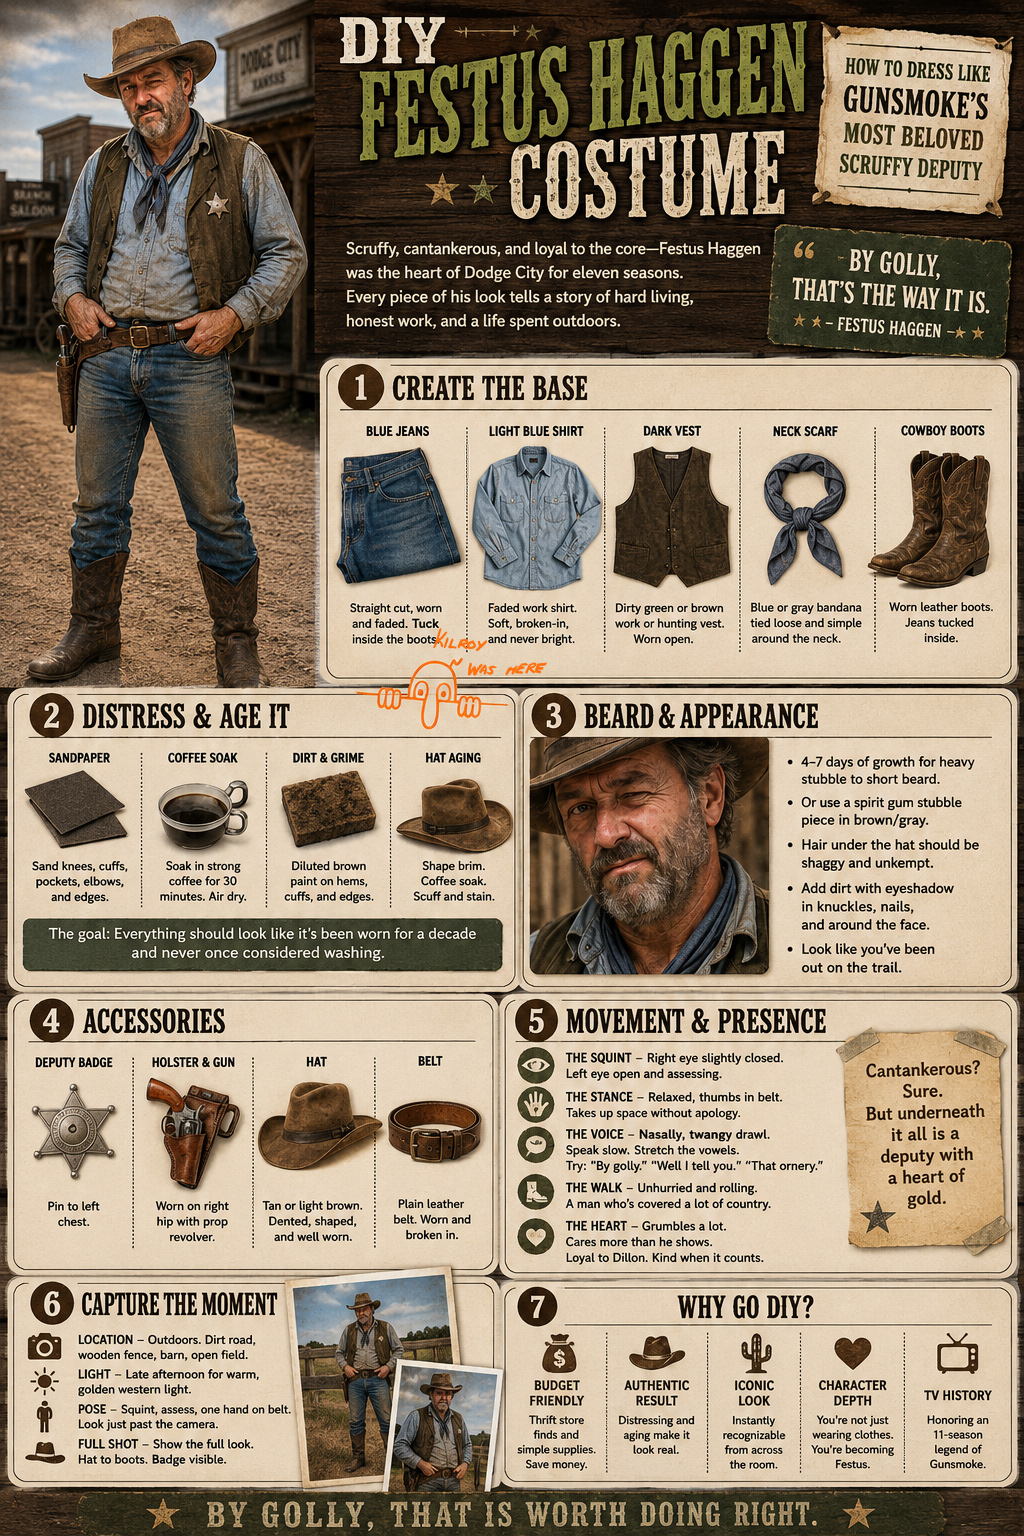
A DIY Festus Haggen costume is one of the most rewarding builds in this entire series because the work is not in the sourcing. Every piece of clothing is findable at a thrift store for almost nothing. The work is in what you do to those pieces after you find them, because Festus did not look like a man who had recently purchased anything. He looked like a man who had owned everything he was wearing for a decade and had never once considered washing any of it. Getting that quality right is the whole costume, and this article will tell you exactly how to do it.
🤠 Step 1: Create the Base
The foundation of a DIY Festus Haggen costume is built from the specific clothing of a man who sleeps in what he wears and wears what he slept in, and the pieces themselves are the easiest sourcing job in this entire series. Every item on the list is findable at a thrift store in an afternoon at minimal cost. What you cannot buy is the condition those items need to be in, and that condition is the whole costume.
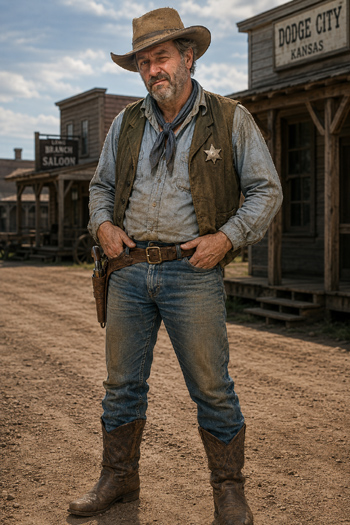
Start with blue jeans in a straight or slightly relaxed cut. Not skinny, not wide leg, not fashionably distressed in the way jeans are distressed now. Plain blue jeans that will be worn tucked inside the boots, which is the specific detail that immediately places the costume in the right era and the right character. Find a pair at a thrift store that already has some wear to them. The more faded and soft the denim, the better your starting point. If they are in too good a condition, the distressing section of this article will address that.
The light blue shirt goes underneath the vest and should be a simple work shirt in a faded, soft blue. A chambray or cotton shirt with a collar and buttons is correct. It should not be crisp or bright. It should look like it has been washed many times in hard water and dried in the sun and has arrived at the particular shade of faded that only years of honest use produce. Again, thrift stores are the right and honest source. Bright or stiff fabric will not read correctly no matter what else is right about the costume.
The vest is the silhouette piece that completes the upper body and it should be in a dark dirty green or brown, the color of something that was never clean to begin with and has only gotten further from clean over the years. A work vest or hunting vest in the right color range is the correct shape. It should be worn open, fit loosely through the body, and have the quality of something that has been put on and taken off a thousand times without ceremony. Thrift stores carry vests in this style regularly. Look in the men's outerwear section and the hunting and outdoor sections if the store separates them.
The blue or gray scarf is worn around the neck loosely, the way a working man wears a bandana, which is to say tied simply and without any decorative intention. A faded blue or gray bandana or neckerchief folded and tied at the throat is exactly right. This is findable at thrift stores, western wear shops, and farm supply stores at minimal cost.
Cowboy boots complete the base at the floor and the jeans go inside them. The boots should be brown or dark leather, worn and scuffed, with the kind of heel that reads as functional rather than decorative. Thrift stores in most parts of the country carry cowboy boots regularly. The more worn the leather looks, the more correct they are for this costume. Do not buy new boots and expect them to look right. Find old ones.
Find other Easy DIY Costume Ideas Here
🪡 Step 2: Distressing and Aging the Costume
This section is the most important in the entire article and it deserves real attention because it is where the DIY Festus Haggen costume either becomes Festus or remains a man in thrift store clothing. The distressing process is not complicated but it requires some time and some willingness to do things to clothing that feel wrong if you have spent your life taking care of what you own.
Start with the jeans. If your thrifted pair is already faded and soft, you have a good foundation. To add more wear, run a medium-grit sandpaper block along the thighs, the knees, the seat, and the cuffs in the direction of the fabric grain. Apply pressure at the knees especially, since that is where a man who spends time kneeling in dirt and hay would show the most wear. A cheese grater dragged lightly along the same areas will add a different texture of distress that reads as genuine rather than manufactured. For color, brew a strong pot of coffee, let it cool, and soak the jeans in it for thirty minutes before rinsing without soap and letting them air dry. This will add a subtle warm yellowing to the fabric that reads as accumulated grime without looking like a paint job.
The shirt gets the same sandpaper treatment at the elbows and collar, which are the points of highest wear on a working shirt. The collar especially should look soft and slightly frayed at the edge. A light application of the coffee soak will age the fabric color. If you want to add actual dirt, a small amount of brown or tan acrylic craft paint diluted heavily with water and sponged onto the lower hem and cuffs and then allowed to dry will add the look of ground-in dirt that does not brush off. Apply it unevenly and let it dry completely before wearing.
The vest needs the most aggressive treatment because it is the most visible piece and it carries the most character. Sandpaper along every edge, at the pockets, and across the back. The coffee soak will darken and age the fabric. If the vest has any bright or clean-looking hardware, buttons, or snaps, a light rub with steel wool will dull the metal quickly. A small amount of the diluted brown paint applied at the lower edges and pocket openings and allowed to dry will add the finishing layer of grime that completes the piece.
The hat is its own project and it is worth doing correctly because the hat is the most visible single element of the costume and it will read from across a room before anything else does. A tan or light brown cowboy hat is the starting point. Thrift stores carry them occasionally and western wear shops carry them at a range of prices. Once you have the hat, shape it by wetting the brim slightly with warm water and bending it into a relaxed, slightly asymmetrical curve. Let it dry in that shape. Then work the crown with your hands, pressing and squeezing until it has the dented, settled quality of a hat that has been grabbed by the crown a thousand times.
Run sandpaper lightly along the brim edge and the crown crease to rough up the surface. The coffee soak works on felt hats as well. Dip the hat briefly, squeeze gently, reshape, and let it dry. A small amount of the diluted brown paint along the sweat line where the brim meets the crown will add the specific discoloration that reads as years of honest wear.
🪒 Step 3: The Beard and Appearance
The scruffy beard is the face piece that completes the Festus character before a single gesture is added, and it should look like something that happened to him rather than something he chose. Festus was not wearing a styled beard. He was wearing the result of not shaving for an indeterminate period while having more important things to think about, which was always.
If you can grow facial hair, stop shaving four to seven days before the event. The goal is heavy stubble to a very short, uneven beard that covers the jaw, the upper lip, and the chin without being a full groomed beard. It should look like it started growing without permission and has not been addressed since. If your facial hair grows in patches or unevenly, that is actually more accurate to the character than a uniform growth would be.
For readers who cannot grow facial hair or prefer not to, a spirit gum stubble beard is the practical solution. Costume shops and online retailers carry spirit gum stubble pieces in brown and gray tones that apply directly to the face and photograph convincingly when applied correctly. Choose a brown with some gray mixed in to read as the salt-and-pepper growth of a man who does not spend time looking in mirrors. Apply the spirit gum to the jaw, chin, and upper lip area following the package instructions, press the piece into place, and hold it firmly for the full recommended setting time. A light dusting of translucent powder along the edges where the piece meets the skin will help blend the join and extend the wear through an evening. Keep the spirit gum remover accessible.
The hair visible beneath the hat should be slightly shaggy and unkempt at the ears and the back of the neck. Festus was not getting regular haircuts. If your natural hair is short and manageable, roughing it up with a small amount of product and letting it dry without combing will produce the right quality. The hat will cover most of the crown anyway, so the visible edges at the sides and back are what matter most.
The overall appearance should read as a man who has been out on the trail and has not had access to a mirror, a razor, or a washbasin in longer than is probably advisable. Clean hands and a freshly washed face will undermine the whole costume. A small amount of brown or gray eyeshadow rubbed into the creases of the knuckles and along the nail edges will add the look of ground-in dirt without requiring actual dirt. Apply it lightly and blend it so it reads as embedded rather than painted on.
🎀 Step 4: Accessories
The deputy badge is the accessory that gives the costume its official status and it should be pinned to the vest in the position Festus wore it, which was on the left chest. A simple star badge in silver or tin is the correct shape for Dodge City law enforcement. Costume shops, western wear shops, and online retailers carry these at low prices. It does not need to be elaborate. Festus's badge was a working badge on a working man and it looked exactly like that.
The holster and gun are the second accessory worth sourcing if you want the full Festus silhouette. A worn leather holster worn on the right hip with a prop revolver is the correct configuration. Festus drew and fired with his right hand, which is the detail the trivia pages confirm, and the holster should sit accordingly. Costume shops carry prop gun and holster sets at accessible prices. The holster should be brown leather, worn and darkened with use, not a bright or decorative western showpiece.
Everything about the accessories should follow the same rule as the clothing. Nothing looks new. Nothing looks cared for beyond the minimum required to keep it functional. Festus was not a man who polished his badge. He was a man who did his job and left the polishing to people who had time for that sort of thing.
🤠 Step 5: Movement and Presence
Festus Haggen moved through Dodge City with the particular physicality of a man who had spent his life outdoors and had never been told to stand up straight by anyone whose opinion he respected. The posture is slightly forward, the walk is unhurried and slightly rolling, the walk of a man who has covered a lot of ground on foot and on horseback and has arrived at a pace that suits him without concern for whether it suits anyone waiting for him.
The squint is the most specific physical gesture in the character's repertoire and it is worth practicing before the event. Festus squinted with his right eye partially closed while keeping his left eye open and engaged, the result of being right-handed but left-eye dominant, a real physical characteristic that Ken Curtis built into the character from his own observation. It reads as suspicion, as assessment, as a man who is looking at something and forming a view about it that he has not yet decided to share. Practice it in a mirror until it feels natural in the face rather than performed.
The hands should hang loosely at the sides or hook into the belt or the waistband when at rest. Festus was comfortable in his own body in the way of someone who has never been self-conscious about taking up space. When making a point, he gestured with his whole arm rather than just the hand, broad and unrestrained in the way of someone whose conversations have always happened outdoors where small gestures get lost.
The voice is the most challenging element to get right and it is worth attempting even imperfectly because it completes the character in a way that nothing else can. The nasally, twangy, high-pitched drawl that Curtis invented for Festus is specific enough that even an approximate version of it reads immediately to anyone who watched the show. Speak from the nose rather than the chest, pull the vowels out long, and let the consonants go soft at the ends of words. Practice a few Festus-specific phrases before the event. By golly. Well I tell you, Mister Dillon. That ornery. Deliver them slowly, with the confidence of a man who has never been in a hurry to finish a sentence in his life.
Festus was cantankerous but he was not mean, and the character's warmth should be accessible beneath the gruffness when the moment calls for it. He argued with Doc Adams constantly and with genuine feeling, but the audience always understood that the arguing was affection expressed in the only language both of them fully trusted. At a party, let both sides of the character show. Be the deputy who grumbles about everything and means well about everything simultaneously.
📸 Step 6: Capture the Moment
For photography, the DIY Festus Haggen costume belongs outdoors and specifically in the kind of outdoor setting that reads as wide, dry, and western. An open field, a dirt road, a wooden fence line, a barn exterior, any of these will give the photograph the period atmosphere that the costume deserves and that an indoor background will never provide.
Late afternoon light is ideal because it produces the warm, slightly golden quality that western television cinematography relied on and that makes earth tones and worn fabrics look their best. Position yourself so the light comes from slightly to one side rather than directly behind or in front. That angle will bring out the texture of the distressed clothing and give the hat the shadow quality that makes it read as genuinely worn rather than costumed.
The squint-and-assess pose is the strongest single image this costume can produce. Stand with your weight slightly back on one hip, thumbs hooked in the belt, the right eye squinted, looking at something just past the camera with an expression that says you have not made up your mind about it yet but you are getting there. That image reads as Festus immediately to anyone who watched the show.
A three-quarter shot that shows the full costume from hat to boot tops, with the jeans visibly tucked inside the boots and the badge catching the light on the vest, captures the complete silhouette in a single frame and documents the distressing work in a way that a close portrait cannot.
🏆 Why Go DIY? Wrap-Up
Building a DIY Festus Haggen costume from thrift store pieces and a sandpaper block and a pot of coffee means doing something that rewards patience and attention in a way that purchased costumes never do. The distressing process takes time. The beard takes days. The hat takes effort. What you end up with is a costume that looks like it has been lived in because you put in the work to make it look that way, and that quality reads from across a room before you have said a word or attempted the squint.
Festus Haggen mattered because Ken Curtis built him from a real person observed over years, brought a singing baritone's ear for rhythm and timing to a character who spoke in a nasally twang, and played the warmth underneath the cantankerousness with enough conviction that eleven seasons of audiences never stopped rooting for the scruffy deputy from the hills. That is not a small achievement. It is the result of a performer taking a character seriously enough to build him from the ground up and mean every moment of it.
Gunsmoke ran for twenty years and produced some of the best Western television ever made, and Festus was at the center of eleven of those years for a reason. The audience recognized something true in him, something that Ken Curtis put there on purpose and maintained with complete commitment every episode. When you put on that hat and tuck those jeans into those boots and squint at the room with your right eye and hook your thumbs in your belt and say by golly in the right voice, you are doing something in the tradition of one of the great character performances in American Western television.
By golly, that is worth doing right.
🕸️ Related Costumes to Try
DIY Walter White Heisenberg Costume
DIY Bob Ross Costume
DIY Doc Brown Costume
DIY Professor Abronsius Costume
Further Reading & Resources
📺 See: Gunsmoke: The Complete Series
🔍 More: Ken Curtis - Wikipedia