🎃 How to Build a DIY Halloween Decorations People Actually Stop For
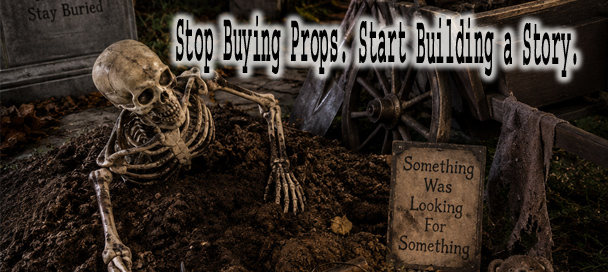
Great Halloween displays don't just fill a yard with props. They make people stop, look closer, and wonder what happened. A simple skeleton becomes much more interesting when it is part of a story. DIY Halloween decorations built around a real narrative outperform random scattered props every time. Follow these seven steps to build a haunted scene your visitors will remember. This approach works whether you have a full front yard or just a small porch.
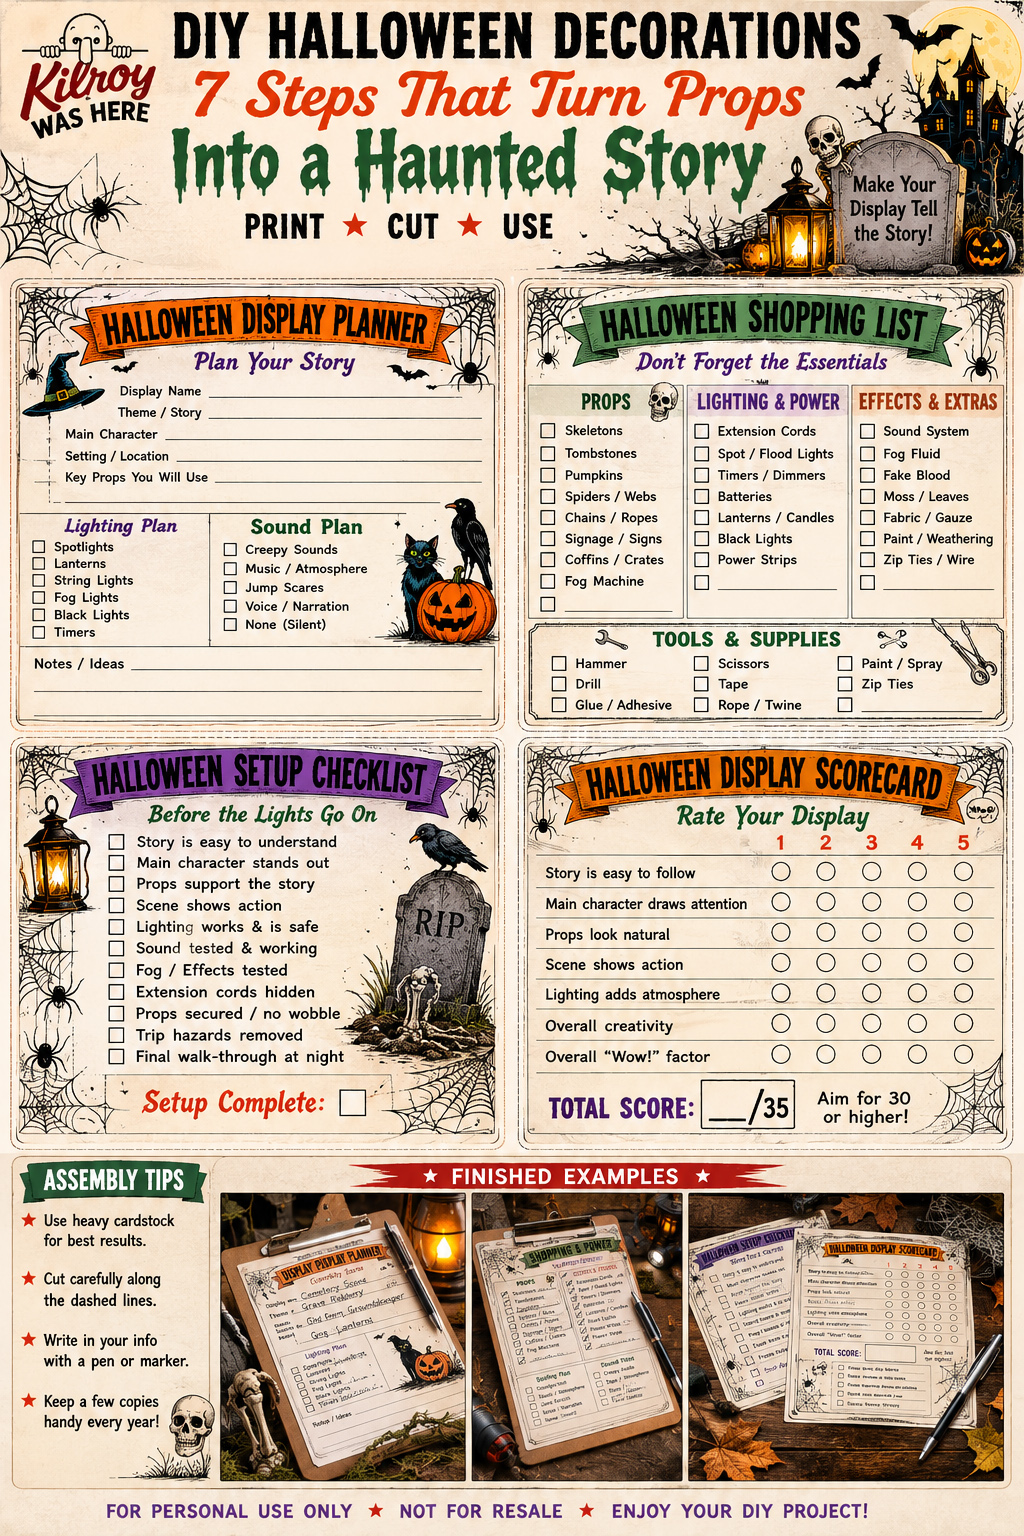
This DIY Halloween decorations guide walks readers through building a full haunted yard scene using a story driven approach rather than scattered props. It covers choosing a narrative, selecting a main character, prop selection, staging action, aging techniques, sightline design, and final atmospheric details. The guide is written for Halloween decorators looking to build a more memorable, story driven display without a large budget.
Every prop in a great DIY Halloween decorations setup should answer a question, or create one.
"The best Halloween displays don't just decorate. They tell a story."
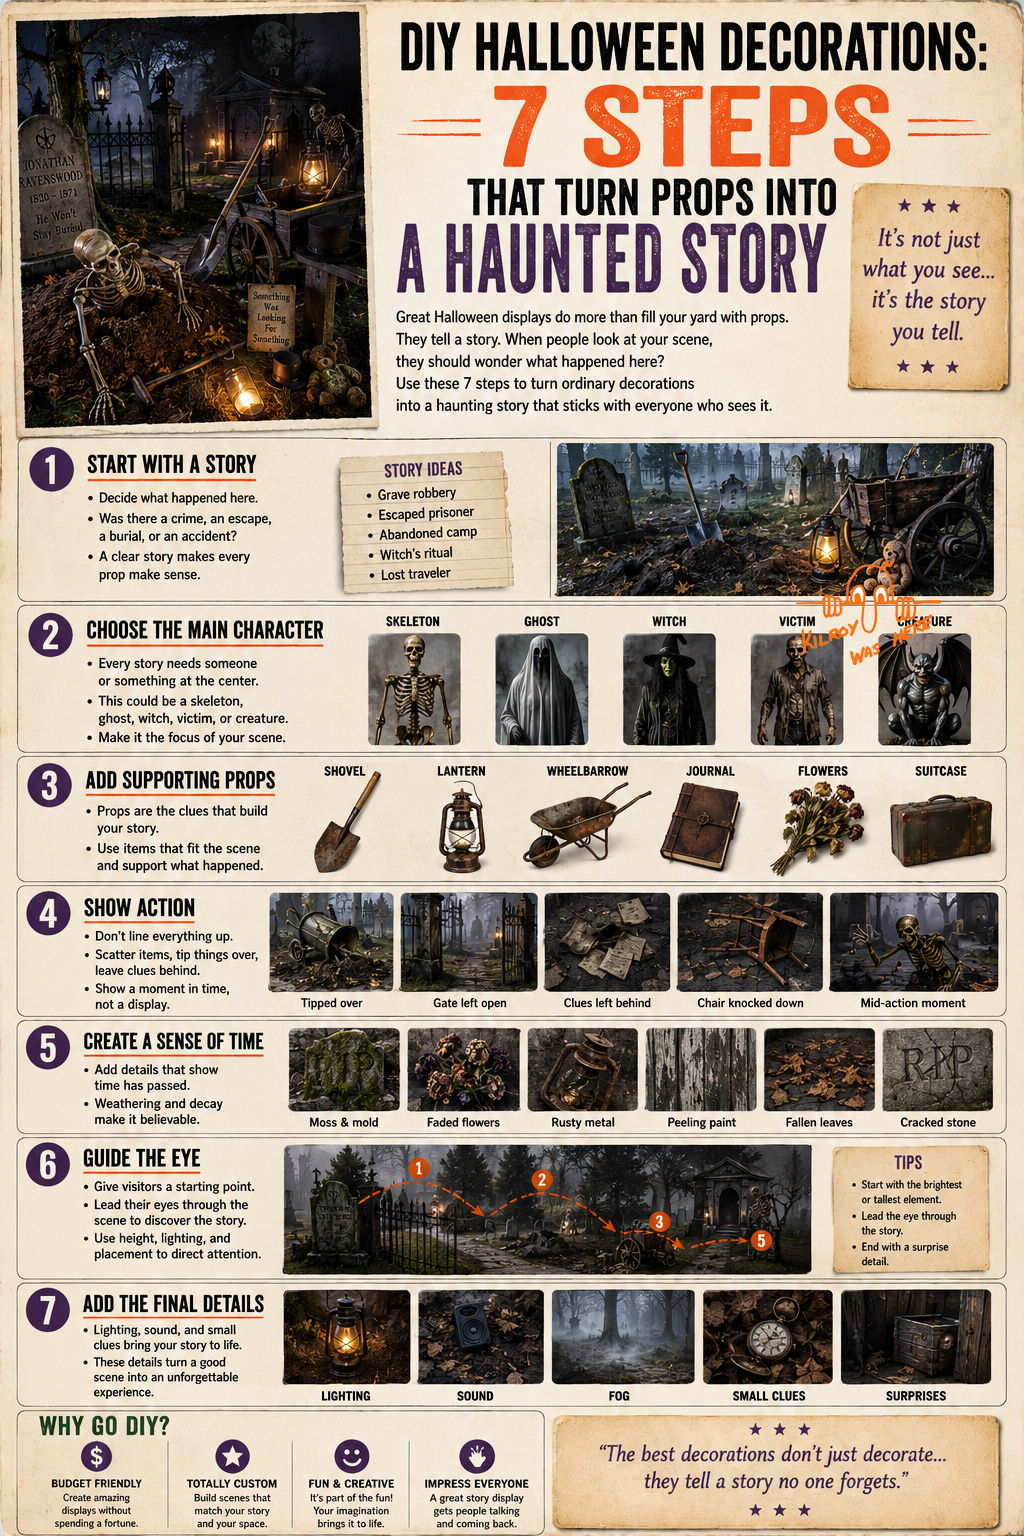
📖 Step 1: Start with a Story
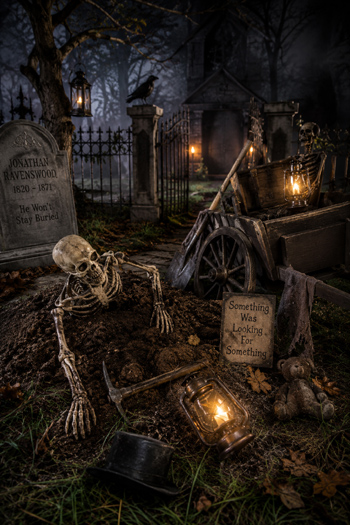
Decide exactly what happened in your scene before you place a single prop. Choose a simple story anyone can understand within a few seconds of looking. Keep every decoration connected directly back to that one central idea. Write the story down in a single sentence before you buy or build anything.
A grave robbery scene practically writes itself with shovels and disturbed earth. An escaped prisoner story works beautifully with broken chains and a torn jumpsuit. A haunted family plot suggests generations buried together, slowly forgotten by time. A forgotten groundskeeper leaves behind tools, a chair, and an unfinished task. A witch's ritual calls for candles, herbs, and a scattered circle of stones. A lost traveler leaves behind a suitcase, a map, and a single abandoned shoe.
Pick one story and commit to it fully. DIY Halloween decorations work best when every single piece supports the same clear narrative. Resist the temptation to add a prop simply because it looks spooky on its own.
🎭 Step 2: Choose the Main Character
Every great display needs one clear star to anchor the entire scene. A skeleton works as a versatile, endlessly customizable centerpiece for almost any story. A ghost suits quiet, mournful scenes with pale fabric and soft lighting. A witch anchors ritual and spellcasting scenes with real theatrical flair.
A vampire brings elegance and old world menace to a display. A zombie suggests recent, violent disturbance rather than something long forgotten. A scarecrow fits rural, harvest themed scenes with a unsettling twist. A monster or a victim both work depending on which side of the story you want to tell. Think about whether your visitors are meeting the threat, or meeting its aftermath.
Build every other prop and detail around this one central character. DIY Halloween decorations lose focus fast when there's no clear star holding the scene together. If a visitor can't identify your main character within a few seconds, the display needs simplifying.
Find other Easy DIY Costume Ideas Here
🔨 Step 3: Add Supporting Props
Props tell the story without using a single word of explanation. A shovel beside disturbed earth instantly suggests recent digging. A lantern hanging from a post adds both light and narrative weight. A wheelbarrow tipped on its side suggests interrupted, unfinished work. Even something as small as an overturned watering can adds a small clue.
An old journal left open on a table invites visitors to imagine its contents. Wilted flowers scattered near a grave add real emotional weight to the scene. A suitcase left behind suggests someone who never made it to their destination. A broken fence section implies something got in, or something got out. A rusty chain draped across a gate adds both texture and implied danger. Look around your own garage first, since half of what you need is probably already there.
Every prop should look like it belongs in that exact spot. Nothing in DIY Halloween decorations should look randomly placed or purely decorative. Ask yourself what job each object was doing before the story's central event happened. If an object can't answer that question, it probably doesn't belong in the scene.
🏃 Step 4: Show Action
Don't line every prop up neatly along a fence or a porch railing. Instead, leave gates open, as though someone recently passed through in a hurry. Tip over a chair or two, suggesting a struggle or a sudden departure. Scatter tools loosely rather than arranging them in a tidy row.
Leave footprints leading toward or away from your central scene. Place objects exactly where someone might have dropped them mid escape. A lantern knocked onto its side tells a very different story than one standing upright. Even a single overturned bucket can suggest an entire moment of panic.
Make the entire scene feel frozen in a single, specific moment. That frozen in time quality is what separates memorable DIY Halloween decorations from ordinary yard clutter. Walk through your own scene as a visitor would and ask what moment you're actually looking at.
15 DIY Haunted House Tricks: Simple Ways to Create Frightful Fun
🕸️ Step 5: Create a Sense of Time
Show visitors that this scene has clearly been sitting undisturbed for a while. Moss is one of the most effective aging tools available for outdoor props. Real or artificial moss tucked into cracks and corners adds instant, convincing age.
Dirt rubbed into fabric and props adds real, believable grime fast. A handful of dry dirt worked into the seams of clothing or wood reads as genuine wear. Rust, whether real or painted on with a rust colored wash, ages metal props convincingly. Dead leaves scattered around the base of your scene suggest an entire season has passed unnoticed.
Broken wood, deliberately cracked or splintered, adds real texture to fences, crates, or furniture. Faded flowers, left to wilt naturally or dyed a dull brown, reinforce the passage of time. Cracked stone, achieved with a chisel or even a hammer on foam props, adds genuine age. Weather stains, created with diluted craft paint dabbed unevenly across a surface, mimic years of rain and sun. A light spray of watered down brown paint across any surface adds convincing grime in minutes.
Layering several of these aging techniques together always reads more convincingly than relying on just one. DIY Halloween decorations built with real, layered age feel discovered rather than assembled. A single technique looks like a costume choice, while several stacked together looks like real history.
👁️ Step 6: Guide the Eye
Lead visitors through your story the way a good film leads an audience. Start with one bold, attention grabbing object placed near the entrance of your scene. That first piece should immediately signal what kind of story visitors are about to encounter.
From there, use props, lighting, fences, paths, or lanterns to guide people naturally forward. Each new element should feel like the next clue in an unfolding mystery. Avoid spreading your best details evenly across the whole display. A single strong focal point works better than five competing ones.
Let visitors discover the story one detail at a time as they move through the scene. That sense of gradual discovery is what makes DIY Halloween decorations memorable rather than just visible. Think of your yard as a hallway with a beginning, a middle, and a payoff at the end.
31 Halloween Superstitions You Didn’t Know About – Fascinating Fears & Hidden Truths
✨ Step 7: Add the Final Details
The smallest details often make the single biggest difference in how a scene reads. Warm lantern light adds real atmosphere without requiring anything complicated or expensive. Fog, whether from a machine or a simple dry ice setup, adds genuine mystery to any display.
Sound effects, even a short looping track of wind or distant footsteps, deepen the immersion significantly. Hidden clues, small details visitors only notice on a second or third look, reward close attention. Small personal items, a child's toy, a wedding ring, a pair of glasses, add real emotional weight instantly. Unexpected surprises, a hand that moves, a sound that triggers on approach, give visitors something memorable. They'll be talking about it long after they leave.
These small final touches are what make visitors stop, lean in, and look closer. DIY Halloween decorations succeed or fail almost entirely in these last, careful details. Give yourself extra time for this step, since rushing it undermines everything built in the steps before it.
7 Scary Ghost Stories That Will Keep You Up on Halloween
💡 Why Go DIY?
This approach is truely budget friendly compared to buying a premade display. Building your own DIY Halloween decorations lets you create real impact without spending a fortune. Thrift stores, craft stores, and your own garage can supply most of what you need. Many of the best aging techniques described above cost almost nothing beyond a little time.
Every scene you build this way is one of a kind. Nobody else on your street will have built the exact same story with the exact same details. DIY Halloween decorations built around a specific narrative feel personal in a way premade props never do.
This approach is also far more memorable for anyone who stops to look. People remember a story long after they've forgotten individual decorations entirely. A scene with a clear beginning, middle, and end sticks in memory the way scattered props never do. Visitors are far more likely to photograph and share a scene that actually tells a story.
Finally, this method offers endless creativity year after year. Every Halloween can tell a completely new story using many of the same core props. A skeleton from a grave robbery scene one year becomes an escaped prisoner the next. Just a few new details make all the difference. That flexibility means your DIY Halloween decorations never have to feel repetitive, even using the same basic materials. A single well built skeleton and a handful of props can serve many stories. Five or six completely different scenes can come from the same basic materials.
If you're looking for a specific prop to anchor a story, our DIY Halloween Coffin guide is a great fit. It pairs beautifully with a grave robbery or forgotten groundskeeper scene. A DIY Dracula Costume or DIY Dracula's Bride Costume can also stand in as living characters. Either one adds a real, breathing presence to a larger yard display.
A great Halloween display isn't measured by how many props you own. It's measured by the story your visitors remember.
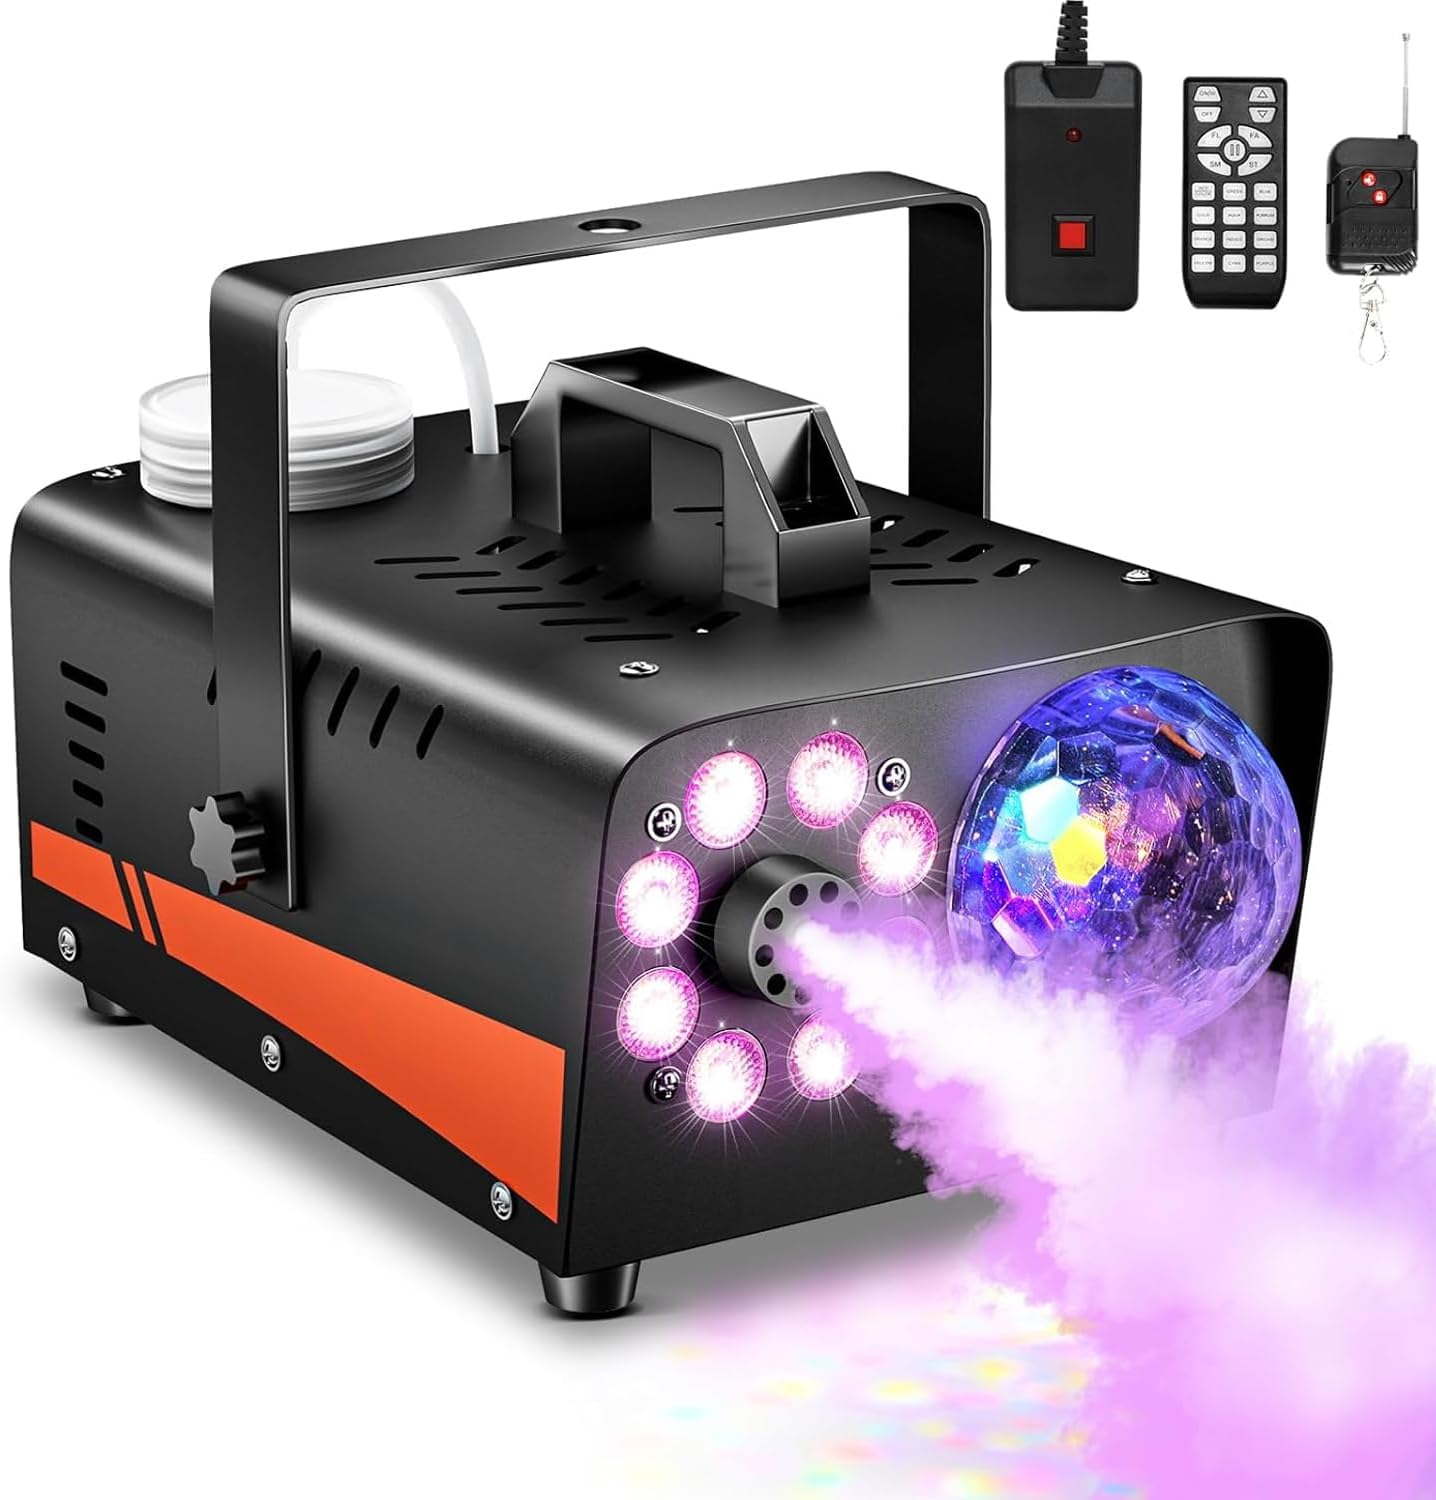
800W Fog Machine with Remote Controls
Product Description:
Nothing transforms a yard display faster than a fog machine. This high-output model is a perfect addition to DIY Halloween Decorations, creating thick ground fog that adds mystery to cemeteries, haunted walkways, graveyards, monster scenes, and front porch displays.
Key Features:
• Powerful 800W heater produces up to 4,500 CFM of fog output
• Fast 3–5 minute warm-up time
• Automatic fog mode for continuous operation
• Includes both wired and wireless remote controls
• Wireless range up to approximately 20 meters (65 feet)
• Perfect for Halloween displays, haunted houses, parties, stage effects, and special events
Why This Works:
Fog instantly makes skeletons, tombstones, pumpkins, and spooky lighting look more dramatic. Add this machine to your DIY Halloween Decorations with orange or purple lights, eerie sound effects, and a few hidden monsters to create a professional-looking haunted display that guests will remember long after Halloween night.
Buy on Amazon