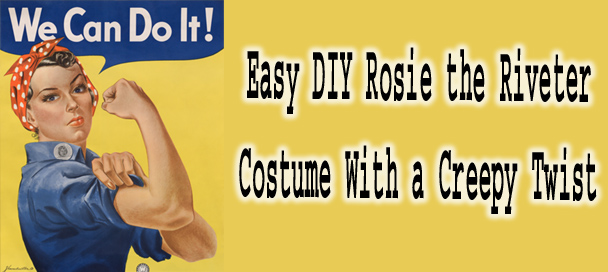
🧰 DIY Rosie the Riveter Zombie Costume: Icon Meets Undead
DIY Rosie the Riveter Zombie Costume with denim shirt, red bandana, and zombie makeup.
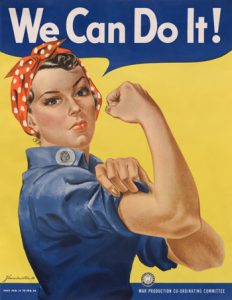
Rosie the Riveter is more than a character she’s a cultural touchstone. Born during World War II from the now-famous “We Can Do It!” poster, Rosie became a rallying cry for women entering the workforce while men fought overseas. With her denim work shirt, rolled sleeves, and that bold red bandana, she was equal parts grit and glamour. Over time, Rosie has come to symbolize feminism, resilience, and the power of women to hold their own in any field.
This DIY Rosie the Riveter Zombie Costume tutorial blends history with horror, showing you how to build an iconic look from denim, bandanas, and zombie makeup. From WWII origins to modern feminist symbolism, Rosie remains timeless and this version adds a chilling Halloween twist. Readers can choose between a classic Rosie style or a zombified version, making the costume both versatile and unforgettable. With step-by-step instructions, you’ll create a look that’s powerful, affordable, and packed with personality.
But what happens when this icon gets a Halloween twist? Enter the DIY Rosie the Riveter Zombie Costume. By combining the classic thrift-store-friendly Rosie look with gory zombie makeup, you create a mash-up that’s as clever as it is creepy. The best part is, you get to choose your path: keep it classic and inspiring, or zombify Rosie into a shambling, bandana-wrapped nightmare. Both versions celebrate her place in history, and both will turn heads wherever you go.
👗 Step 1: Create the Base
Rosie the Riveter We can Do it Poster
The beauty of a DIY Rosie the Riveter Zombie Costume is how simple the base outfit is. All you need is denim a button-down chambray or denim shirt is perfect. Roll up the sleeves to just below the elbow, knot it at the waist if you like, and pair it with jeans, denim overalls, or even a denim skirt. Almost every piece can be thrifted, which makes this one of the most budget-friendly costumes you’ll ever put together.
For a zombie variation, don’t be afraid to rough things up. Tear small holes in the sleeves, scuff the knees of your jeans, or rub on some diluted black and brown paint to give a dirty, “crawled out of the grave” vibe. If you’d rather keep Rosie pristine, keep your denim crisp and clean iron it, button it neatly, and let the zombie side come from your makeup instead.
✂️ Step 2: Add the Details
Rosie’s most famous accessory is her bright red bandana. Tie it around your head with the knot on top and let the ends stick up slightly for that 1940s factory-girl look. Add sturdy shoes or work boots to finish off the base. The contrast between practical workwear and glamorous makeup is part of what has made Rosie so iconic.
If you’re going zombie, you can distress your bandana just as you did your clothes dab it with fake blood or shred an edge for effect. Add accessories like a tool belt, wrench, or ragged gloves to lean into the “Rosie the worker” side, then let the zombie details twist it into something darker. If you prefer a clean take, keep the bandana bright and bold, and pair it with classic pumps to highlight Rosie’s timeless look. Either way, the DIY Rosie the Riveter Zombie Costume gives you room to personalize.
For traditional Rosie, keep the makeup light but polished. Think classic red lipstick, softly arched brows, a little eyeliner, and maybe a sweep of mascara. Pin curls or neatly tucked hair under the bandana complete the look. This gives you the iconic poster-girl vibe, recognizable in an instant.
For zombie Rosie, this is where you unleash creativity. Pale foundation or white face paint sets the base. Darken the eyes with purple or green shadows for that sunken, undead effect. Add faux scars, cracks, or fake blood along the jawline or forehead. A smear of lipstick across the cheek can make it look like she was caught mid-battle with the apocalypse. Hair can stay tucked under the bandana, but leaving a few wild strands hanging adds to the disheveled effect. The split choice between polished and monstrous makes the DIY Rosie the Riveter Zombie Costume something few others will think to attempt.
🎀 Step 4: Accessories
Accessories give your DIY Rosie the Riveter Zombie Costume depth. A wrench tucked in your back pocket, a pair of safety goggles pushed up on your head, or a patch sewn onto your shirt can make the look even more authentic. These small touches root the costume in its WWII origins, reminding everyone why Rosie was created in the first place.
For zombie Rosie, accessories are another chance to push the undead theme. Splatter your wrench with fake blood, carry a severed doll hand or a “brain” prop for laughs, or tear your gloves so they look like they’ve been through a scrap or two. The accessories remind people you’re still Rosie, while the gore makes them do a double-take. That dual identity is what makes the DIY Rosie the Riveter Zombie Costume so memorable.
🕺 Step 5: Movement and Attitude
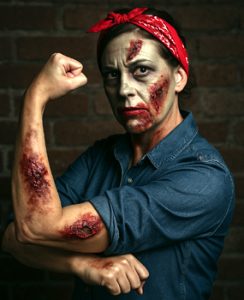
DIY Rosie the Riveter Zombie Costume Tutorial costume transformed with a zombie Halloween twist
Rosie’s pose rolling up her sleeve and flexing her bicep is one of the most recognized images of the 20th century. Strike that pose often, and you’ll have people nodding and smiling. For classic Rosie, move with strength and confidence, just like the women who stepped into factory jobs and kept the home front alive.
Zombie Rosie, however, flips the script. Imagine that famous flex, but with a vacant stare, head tilted, and a moaning groan. Mix slow, shambling steps with sudden jerks for comic effect. The contrast between Rosie’s power pose and a zombie’s stuttered movement makes this one of the funniest parts of the costume. Once again, the DIY Rosie the Riveter Zombie Costume lets you choose whether to inspire, horrify, or both.
📸 Step 6: Capture the Look
Don’t let all your work go undocumented. For classic DIY Rosie the Riveter Zombie Costume, take photos in front of a brick wall, a factory backdrop, or even a workshop bench. The more authentic the setting, the better. For zombie Rosie, a darker alley, graveyard, or broken-down lot makes the perfect background.
Pose with Rosie’s famous “We Can Do It!” flex, then take a second shot with zombie arms stretched forward and a creepy glare. Friends and family will love the split personality captured side by side. Whether you lean timeless or terrifying, the photos will tell the story of how you turned a symbol of resilience into a Halloween showstopper.
🏆 Why Go DIY?
Costumes are easy to buy, but they rarely carry meaning. When you make your own, you not only save money, you tap into history, culture, and creativity. Rosie the Riveter stood for strength and resilience in the 1940s, and she still does today. By making a DIY Rosie the Riveter Zombie Costume, you get the best of both worlds an instantly recognizable icon with a fresh Halloween spin.
The choice is yours: step into the night as Rosie in all her classic power, or twist her into an undead heroine of the apocalypse. Either way, the story is yours to tell, and the impact will be unforgettable.
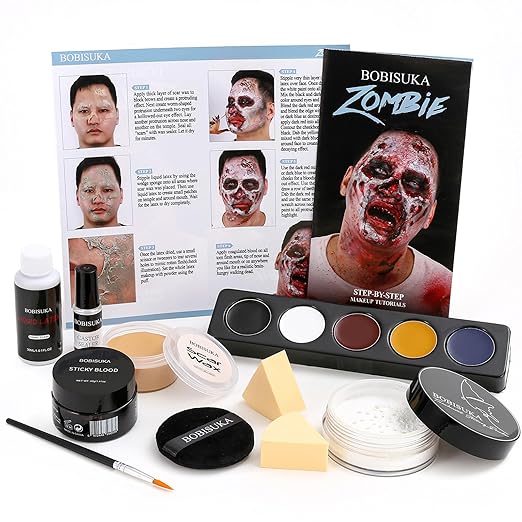
Complete Zombie SFX Makeup Kit by BOBISUKA – the essential set for building your DIY Rosie the Riveter Zombie Costume or any undead character.
Kit Contents: Five-shade cream palette (white, black, yellow, deep red, navy), 30g Liquid Latex, 30g Scar Wax with 5ml Sealer, 40g Coagulated Blood Gel, Setting Powder with Puff, 2 Wedge Sponges, Detail Brush, and full instructions.
Build Blend: Blend bruises, stretch wounds, sunken eyes, and rotting flesh with oil-based paints. Sculpt scars and texture with wax and latex, then layer in blood detail for maximum fright.
User-Friendly: Apply wax for raised skin, seal it, layer latex for peeling textures, shade with paint, and splash with blood gel to finish. Perfect for easy but effective SFX.
Ideal For:DIY Rosie the Riveter Zombie Costume, scary medical cosplay, haunted events, horror conventions, or stage makeup. Skin-safe and suitable for extended wear.
ML Lamp is the owner of Kilroy Was Here. After his 20 years of working in Las Vegas in the entertainment promotions field, Mr. Lamp retired in 2002 from his job to pursue his passion for collectibles. Now as a guest speaker and author he’s living the dream, and sharing his warmth with You.
 Complete Zombie SFX Makeup Kit by BOBISUKA – the essential set for building your DIY Rosie the Riveter Zombie Costume or any undead character.