⚰️ DIY Halloween Coffin: How to Build a Classic Toe Pincher Coffin From Old Westerns and Horror Films
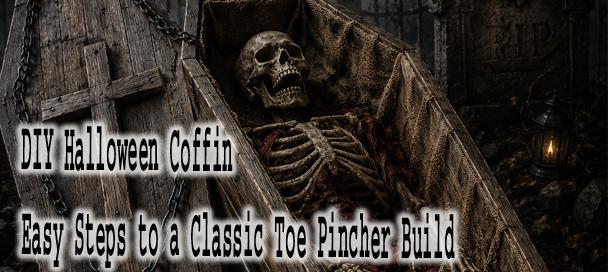
A DIY Halloween Coffin built in the classic toe pincher shape, aged and staged for a haunted yard display.
That narrow, six sided shape is instantly recognizable to almost anyone. Wide at the shoulders, narrow at the head, narrow again at the feet. Horror movies love it, haunted houses love it, and old Westerns loved it first. A DIY Halloween Coffin in this classic toe pincher shape brings that history home.
The toe pincher shape actually started as a practical choice, not a spooky one. Frontier coffin builders needed something cheap, fast, and easy to make from plain lumber. A six sided box uses less wood than a straight rectangular casket. It also fits the human body more efficiently, wide where shoulders need room, narrow where they do not. This simple, no frills style became closely tied to Old West burial culture. Plain pine, square cut nails, and absolutely no unnecessary decoration.
That connection between the toe pincher shape and frontier life shows up constantly on screen. Classic Westerns leaned on plain wooden coffins as a quiet, honest detail of the era. Films set in that world still use the same simple silhouette today for authenticity. Somewhere along the way, horror filmmakers noticed something else about that shape. Its unusual outline reads as unsettling even to someone who cannot say why. That single design borrowed from frontier practicality became a genuine icon of horror imagery.
Haunted houses and Halloween displays picked up on that same effect fast. A toe pincher coffin sitting in a yard or hallway immediately sets a tone. Nobody needs fog machines or jump scares to explain what it means. The shape alone tells a story before anyone even opens the lid. Building a DIY Halloween Coffin taps directly into that instant recognition.
This project is also refreshingly approachable for most home builders. It uses common pine boards, basic screws, and tools most garages already have. Nothing here requires advanced woodworking skills or expensive specialty lumber. A single afternoon, or a relaxed weekend, is usually enough to finish the build.
🪚 Step 1: Gather Your Materials
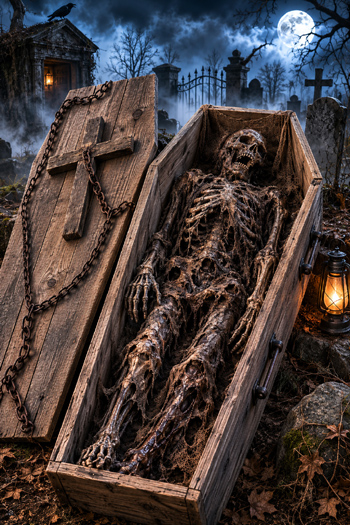
A DIY Halloween Coffin built in the classic toe pincher shape
Every good DIY Halloween Coffin build starts with getting organized first. Pull every material and tool together before making a single cut. This project stays simple and affordable by using common lumber and basic hardware. Building a DIY Halloween Coffin does not require a fully stocked woodshop to succeed.
You will need seven 1x10x8 foot pine boards for the entire build. A box of 1 and one quarter inch wood screws holds everything together. Wood glue reinforces every joint alongside the screws for real strength. These three items are genuinely all the raw material this project requires.
A few optional pieces add real character once the build is finished. Black barn door pull handles give the coffin an old fashioned, sturdy look. A length of decorative chain drapes nicely across the lid for effect. A small wooden cross is a nice optional touch for the lid as well. Reclaimed barn wood can replace new pine entirely for extra rustic texture.
On the tool side, keep things simple and practical. A circular saw or jigsaw handles every cut in this build. A drill and driver combo speeds up both drilling and driving screws. A tape measure, a carpenter's square, and a pencil keep your cuts accurate. Clamps hold boards steady while glue sets and screws go in. Sandpaper or a palm sander smooths edges before assembly begins. Paintbrushes or staining rags round out the list for the finishing steps.
📏 Step 2: Cut the Coffin Panels
This classic toe pincher coffin measures 74 inches long overall. It runs 24 inches wide at the shoulders, the widest point of the box. The head end narrows down to 16 inches across. The foot end tapers further, down to just 12 inches wide. Side walls stand 9 and one quarter inches high, matching a standard 1x10 board exactly. That measurement means you never have to rip a board down to size.
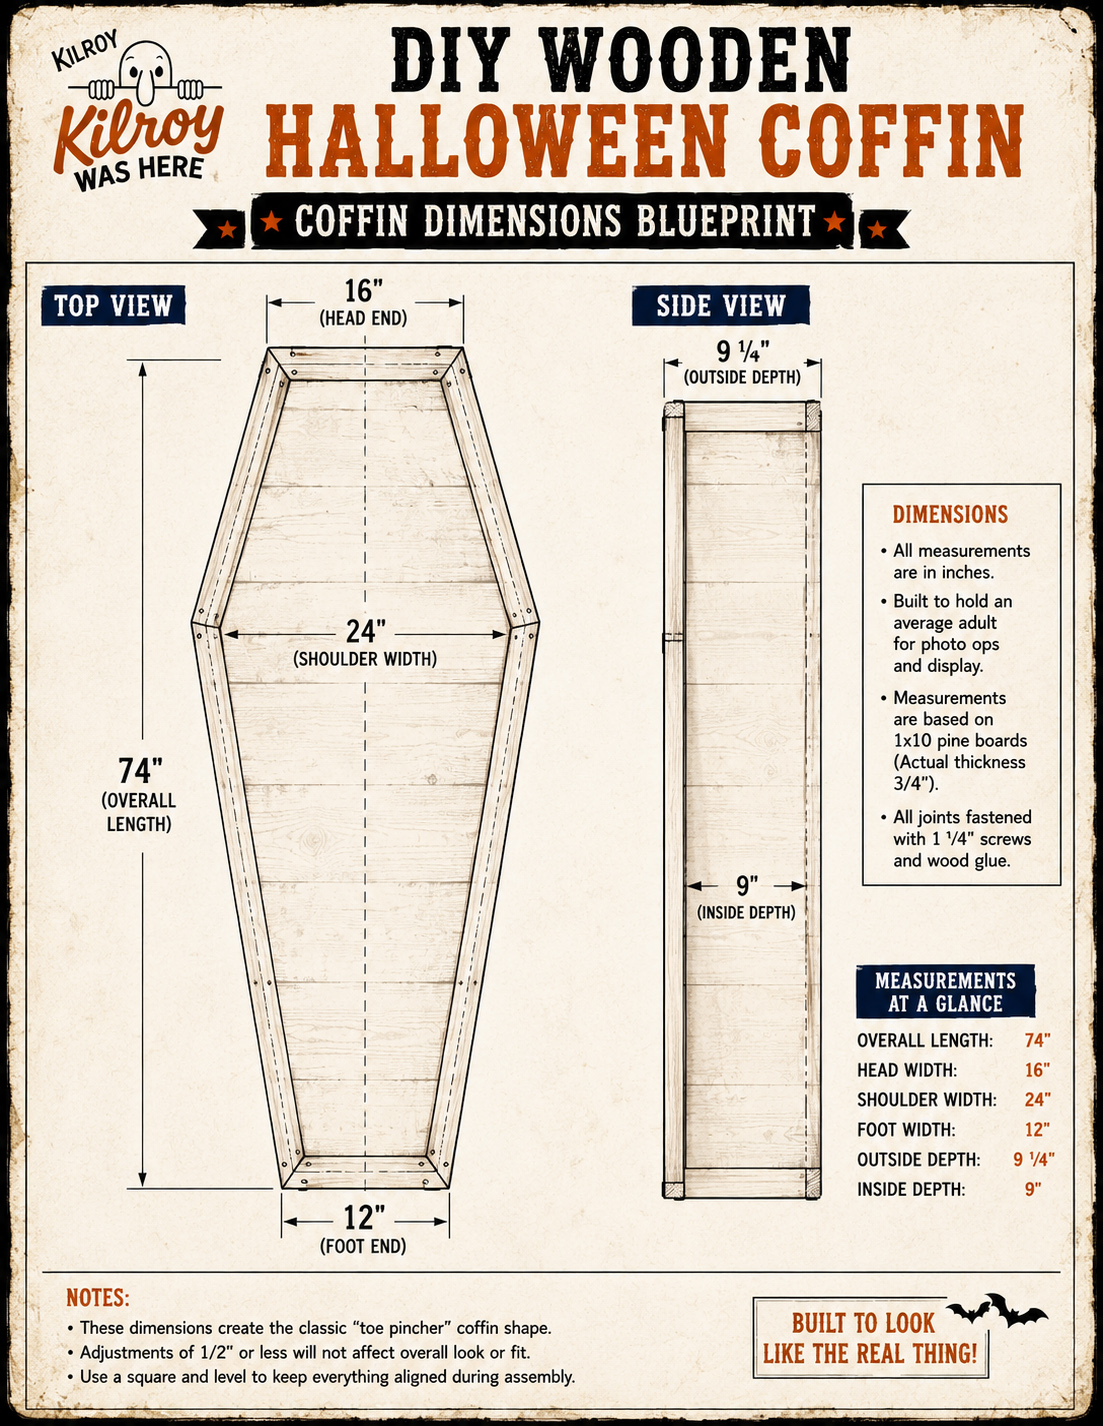
Click Image for full Blueprints of the DIY Halloween Coffin
Start the top and bottom panels by gluing three pine boards edge to edge. Clamp them firmly and let the glue dry completely before cutting anything. Once dry, you have one solid panel large enough for the full outline. Draw your six sided coffin shape directly onto that panel with a pencil. Use your carpenter's square to keep every angle clean and accurate.
Cut the shape out carefully with your circular saw or jigsaw. Save that finished panel to use as a template for the next piece. Trace its exact outline onto a second glued panel before cutting again. This keeps both the top and bottom perfectly matched in size and shape. Repeat the gluing and cutting process once more for the lid panel.
Lightly sand every edge once your panels are cut to remove splinters. Do not worry about an aged look at this stage of the build. That distressing work comes later, after the whole coffin is fully assembled.
Explore other Great Halloween Ideas Here
🔨 Step 3: Build the Box
With your panels cut, it is time to build the actual box. Stand the bottom panel on a flat, level work surface to start. Apply a bead of wood glue along each edge before adding any screws. Glue and screws together create a much stronger joint than either alone.
Attach the two long side pieces first, following the coffin's tapered outline exactly. Once those sides are secure, add the head and foot end pieces. Check every corner for a flush, tight fit before driving screws fully home. A few extra minutes checking alignment here saves real headaches later on.
Reinforce each interior corner with a small glued and screwed corner block. These blocks add real strength and help keep the whole box square. After the glue cures fully, inspect every joint one more time. Sand down any rough or uneven spots before moving forward with the build. A square, solid box here sets up the rest of the DIY Halloween Coffin build perfectly.
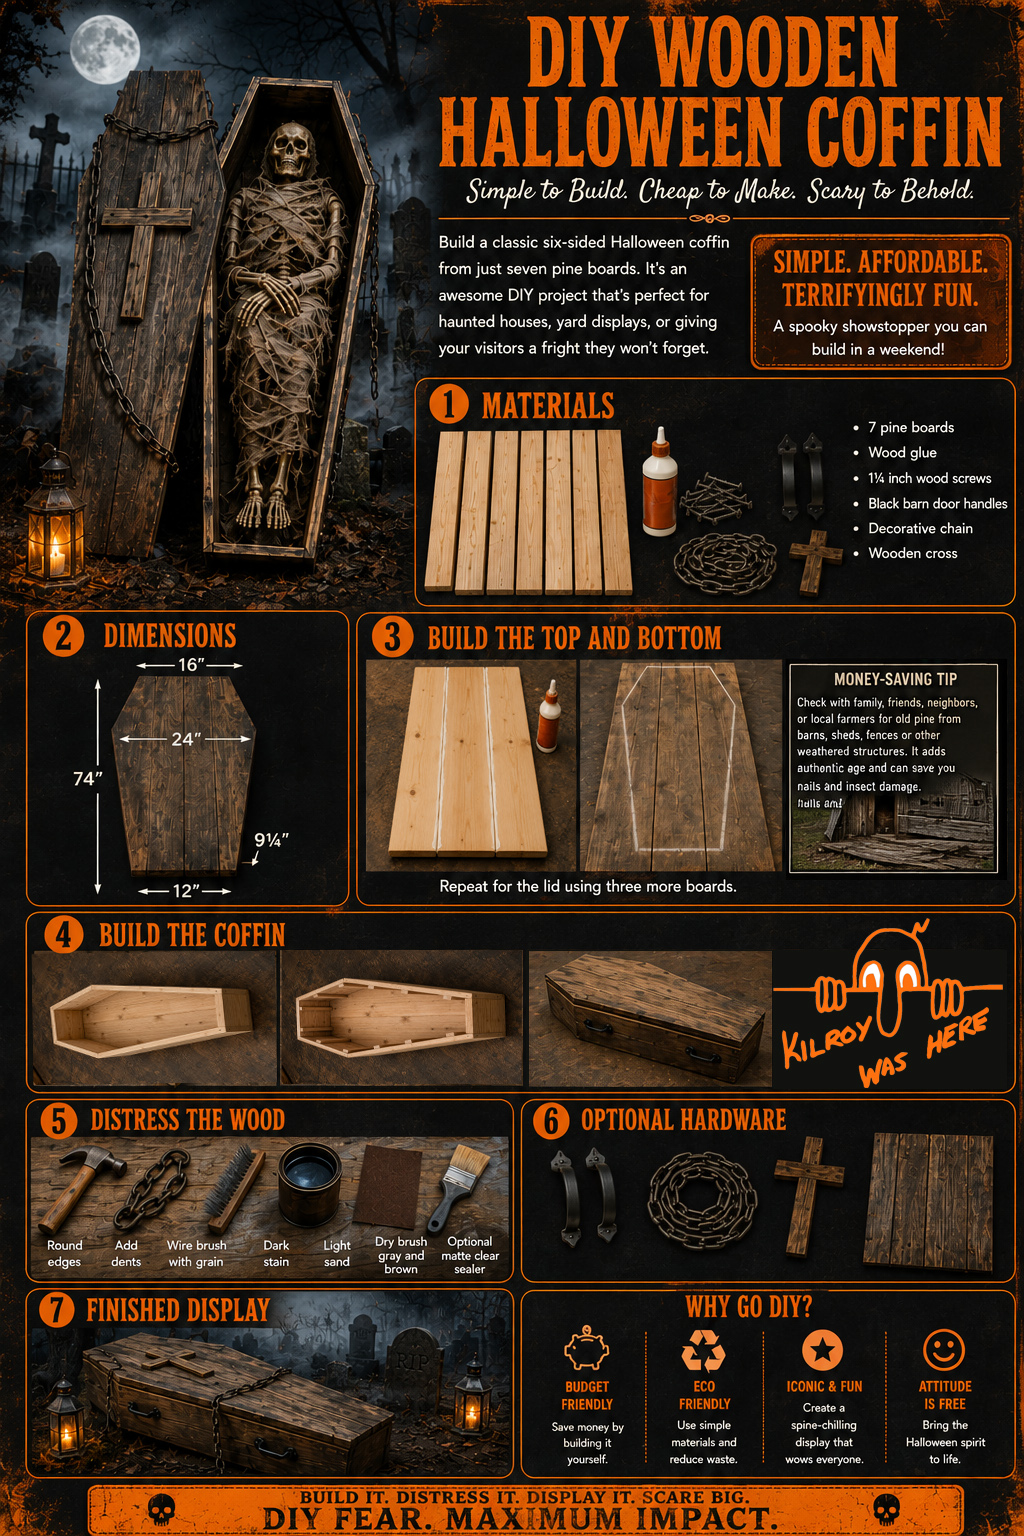
Click Image for full Infographic of the A DIY Halloween Coffin
🪵 Step 4: Build and Attach the Lid
Cut the lid using the same six sided outline as your bottom panel. Size it to rest just on top of the walls, not drop inside them. Splitting the lid into two separate hinged sections works best for most builds. A shorter section covers the head and shoulders area of the coffin. A longer section covers the rest of the body down to the feet.
That split makes the coffin far easier for one person to open alone. It also sets up a much better reveal moment at a party or haunt. Lifting one giant, heavy lid all at once rarely looks or feels dramatic.
Use two hinges per lid section for a lighter, mostly static display piece. Use three hinges per section instead if kids will open and close it often. A simple notched stick can prop the open section safely in place. That small addition matters, since an unsupported lid can swing shut unexpectedly. A gust of wind or an accidental bump is often all it takes.
If a lid section shows any tendency to flex or bow over time, add a brace. A thin interior brace across the underside works well. This keeps the panel flatter without adding any visible bulk from the outside. If you would rather skip the reveal moment entirely, that is perfectly fine too. Simply screw the lid down permanently, or just rest it unhinged on top, for a purely static display piece.
🕸️ Step 5: Age and Distress the Wood
This step is where a plain pine box turns into something genuinely convincing. Do all of your physical distressing before any stain touches the wood. Staining fresh damage looks very different from staining a smooth, untouched surface. Distress first, and the color soaks in evenly across every mark and texture.
Start by rounding over every sharp edge with sandpaper for a softer profile. Dampen the wood slightly before hammering it, since dry pine tends to bounce back. A light spray of water first makes every dent crisper and more permanent. Use a hammer to create small, random dents across the surface. Tap a short length of chain against the wood for additional irregular marks. A wire brush pulled with the grain adds real texture and roughs up the softer fibers.
Focus your heaviest distressing on the areas that would naturally show real wear. Corners, edges, the spots around future handles, and the bottom few inches near the ground. Keeping the flat center panels a little cleaner actually looks more convincing than distressing everything evenly. Avoid deep gouges or repeated, evenly spaced marks, since real aging is always irregular.
Once you're happy with the texture, apply a dark wood stain generously over the surface. Let it soak fully into the grain, especially inside every dent and chain mark. After it dries, lightly sand a few high spots to reveal hints of fresh wood underneath. This small trick adds real depth and a sense of age to the finish.
A shop rag or an old sock filled with steel wool works even better than a brush. Dip it lightly in stain for the next pass. It deposits color unevenly, the way decades of hands touching the same spots actually would. Focus that technique around the handle areas and the lid edges especially.
For an even more authentic aged tone, try a vinegar and steel wool soak before staining. Drop fine steel wool into a jar of white vinegar and let it sit for a full day. Brush that solution over the wood before your stain goes on. It grays the surface in a way that stain alone simply cannot fake.
Finish by dry brushing small amounts of gray and brown paint across the surface. This builds up the appearance of years of accumulated wear and weather. If the coffin will live outdoors or get reused every season, add a coat of matte clear sealer. That final layer protects your finish without adding any unwanted shine.
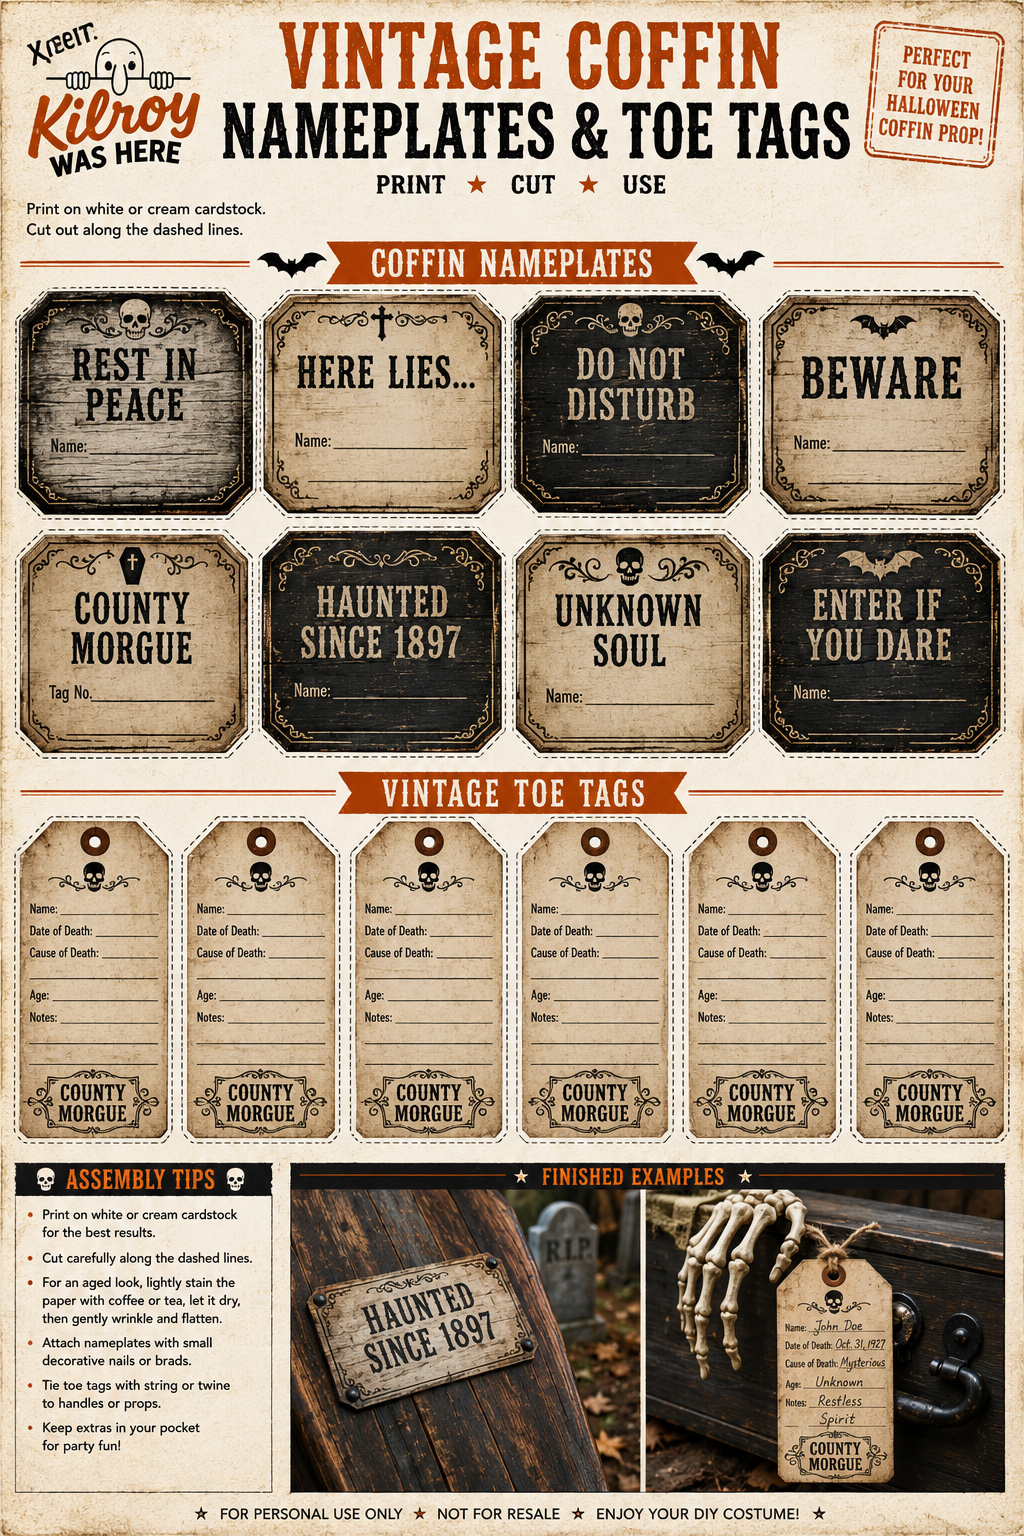
Click Image for full Free printable Toe Tags & Name Plates for your DIY Halloween Coffin
⛓️ Step 6: Add Hardware and Final Touches
Once your stain and paint have fully dried, it's time for the finishing details. These pieces are optional, but they add enormous character to the finished coffin.
Black barn door pull handles are a strong choice for this build. They are sturdy, simple, and carry that old fashioned look perfectly. Attach one handle to each long side using the hardware included with them. A short length of decorative chain draped near the lid adds a nice aged touch. A small wooden cross can be added to the lid if it fits your display's style.
New hardware almost always looks too shiny and modern straight out of the package. Scuff shiny metal lightly with fine grit sandpaper before painting it. Apply flat black spray paint over the hardware if needed for a base tone. Dry brush small amounts of brown, dark gray, or rust colored paint over the raised details. Wipe away most of that paint as you work, leaving small amounts in corners and around screw heads. That single technique makes brand new hardware look decades old almost instantly. These small details often make or break a convincing DIY Halloween Coffin.
🎃 Step 7: Stage the Display
Now comes the fun part, bringing your finished coffin to life. A front porch, a haunted house hallway, or a cemetery style yard display all work beautifully. Leave the lid slightly open to reveal a life size skeleton or glowing eyes inside.
Scatter faux spider webs, dried leaves, or aged looking fabric around the base. These small touches help the coffin blend naturally into a larger scene. Battery powered candles or flickering LED lanterns add eerie light without any real fire risk. A few plastic rats, crows, or scattered bones nearby make the whole display feel complete.
The best part of this build is how easily it changes every single year. Swap in a different skeleton, vampire, mummy, or zombie for a fresh look. A DIY Halloween Coffin built once can anchor your display for years to come.
💡 Why Go DIY?
Building your own coffin costs far less than buying a large commercial prop. Simple pine boards and basic hardware keep this project genuinely affordable for most budgets. That affordability does not come at the cost of visual impact either.
Customization is another huge advantage of building this yourself. Leave it looking freshly built, distress it heavily, or land somewhere comfortably in between. Add your own hardware, colors, or details to match your specific display's theme. No two homemade coffins ever really turn out exactly the same. That uniqueness is part of what makes a DIY Halloween Coffin worth building yourself.
A DIY Halloween Coffin is also a decoration you get to use for years. Store it carefully after the season, then bring it right back out next October. A fresh skeleton or monster inside keeps the display feeling new every single year. That kind of long term value is hard to beat for one weekend of building.
This project also connects your display to something with real history behind it. That toe pincher coffin shape carried real meaning on the frontier long before horror movies claimed it. Building one yourself taps into both halves of that story at once.
Safety matters here too, even for a decorative piece. This coffin is intended purely as a decorative Halloween prop. If it will be part of a photo opportunity or a haunted attraction, inspect it before each use. Make sure it is built securely and sitting on a stable, level surface. Never leave children unattended around the coffin at any point.
Build it once, distress it well, and let it haunt your porch for years to come.
🕸️ Related Halloween to Try
DIY Fake Blood
7 Ideas for a Spooky Psychic Halloween Party
15 DIY Haunted House Tricks: Simple Ways to Create Frightful Fun
31 Epic Hits for Your Ultimate Halloween Playlist
6-1/2" Black Gate Pull Handles
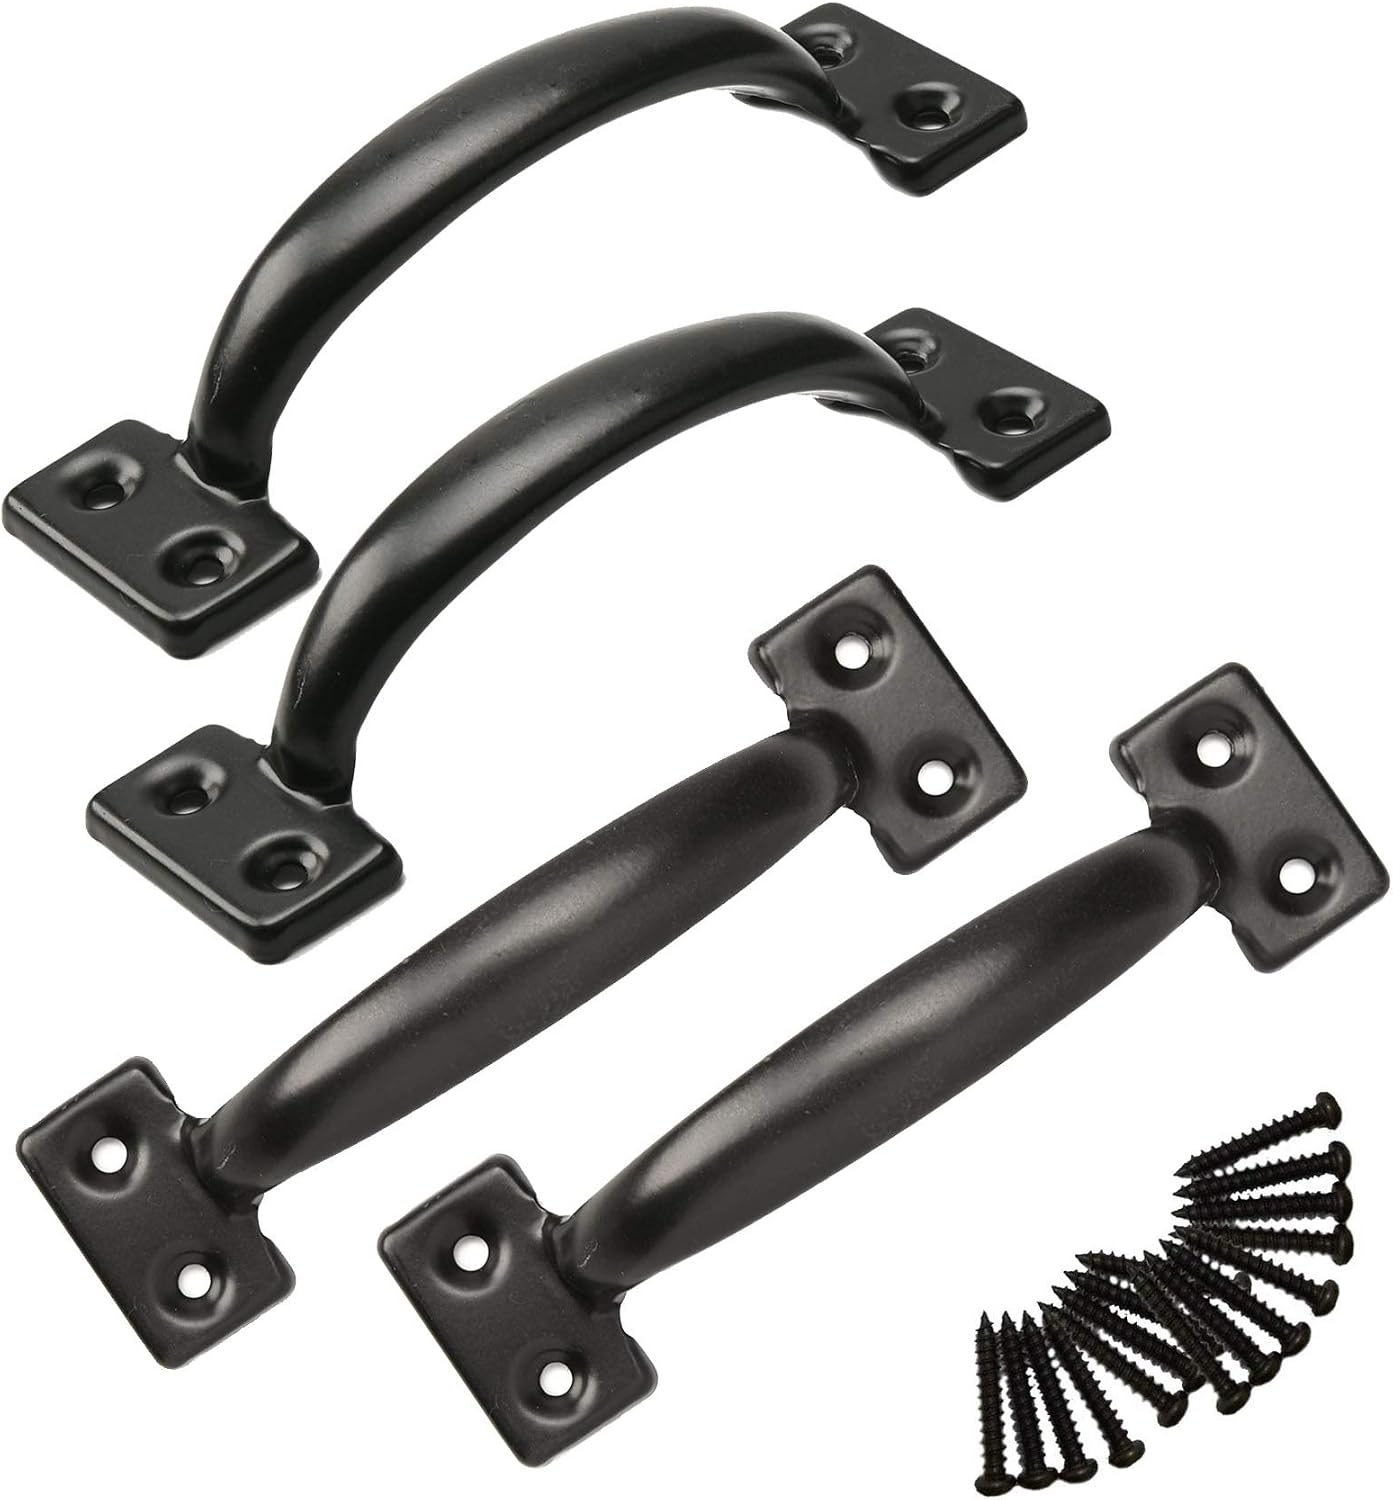
6-1/2" Black Gate Pull Handles for a DIY Halloween Coffin
Product Description:
Give your DIY Halloween Coffin a sturdy, old-fashioned appearance with these black steel pull handles. Their simple design looks right at home on a vintage-style coffin prop while providing solid handholds for moving it during setup, displays, haunted houses, or photo opportunities.
Key Features:
• Durable cold-rolled steel construction
• Classic matte black finish
• Easy installation with included mounting screws
• 6-1/2-inch overall length with 5-1/2-inch hole centers
• Great for coffin props, barn doors, storage sheds, gates, and rustic projects
Why This Works:
Adding side handles is one of the easiest ways to make a DIY Halloween Coffin look more authentic. These rugged black pulls complement distressed wood finishes and vintage hardware while making the coffin easier to carry, position, or use as a Halloween display or photo prop.
Buy on Amazon
Further Reading & Resources
📺 See: 33 Insanely Smart Eerie Haunted House Ideas for Halloween
🔍 More: 129 World`s Insanest Scary Halloween Haunted House Ideas

ML Lamp is the owner of Kilroy Was Here. After his 20 years of working in Las Vegas in the entertainment promotions field, Mr. Lamp retired in 2002 from his job to pursue his passion for collectibles. Now as a guest speaker and author he’s living the dream, and sharing his warmth with You.