DIY Fake Teeth: Prop Teeth for Halloween Like the Pros
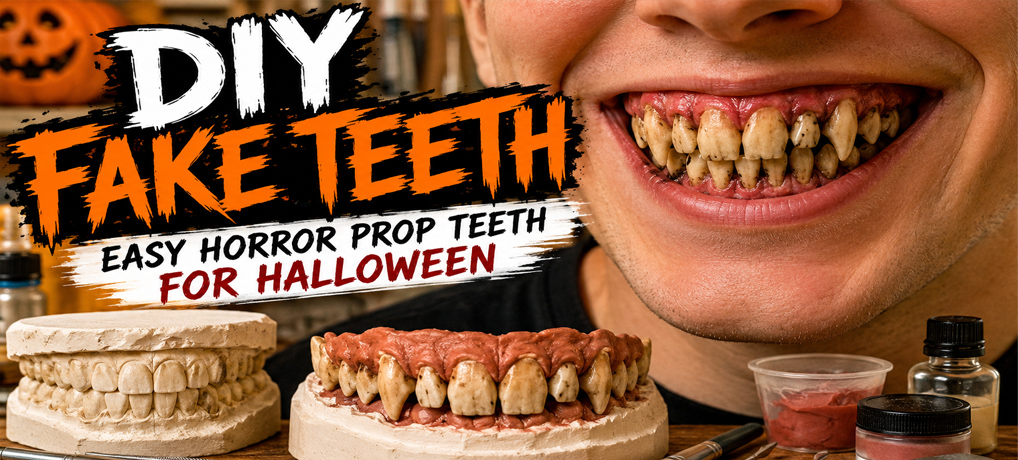
Halloween costumes can fall apart over one small detail, and teeth are a perfect example. You can have the torn clothes, gruesome makeup, and fake blood just right, but a clean, ordinary smile can ruin the whole effect. DIY fake teeth give zombies, monsters, witches, ghouls, and other creepy characters that extra touch people notice the moment you open your mouth.
You also do not need an expensive set of custom horror teeth to get a convincing result. With a few inexpensive materials and some careful shaping and coloring, you can create DIY fake teeth that are crooked, rotten, broken, pointed, or badly neglected to match almost any Halloween character. This guide walks through seven simple steps for making creepy horror prop teeth that look good up close and still read clearly across the room.
🧰 What You’ll Need to Make DIY Fake Teeth
The supply list may look a little long at first, but most of these items are inexpensive and easy to find online, at craft stores, or through dental supply sellers. You do not need professional sculpting equipment either. Basic tools will work fine for most of the shaping and detail work.
For this project, gather an eyedropper, oil-based modeling clay, small paintbrushes, dental impression trays, pink acrylic powder, tooth-colored acrylic powder, acrylic liquid, mixing sticks, dental alginate, dental plaster, small unwaxed paper cups, sculpting tools, a gram scale, latex or nitrile gloves, and petroleum jelly. You will also need a well-ventilated place to work.
A few optional supplies can help with the final appearance. Acrylic paints can add stains and discoloration, while a rotary tool such as a Dremel can help refine shapes and edges. Clear nail polish can also be used for selected finishing effects, depending on the materials you choose.
⚠️ A Quick Safety Note Before You Start
These DIY fake teeth are theatrical costume props. Anything placed inside your mouth needs to be treated carefully. Use only materials specifically labeled as suitable for dental or oral use for any part that will contact your teeth, gums, or mouth. Craft acrylics, paints, nail products, and similar materials should never be assumed to be safe inside the mouth.
Do not eat, drink, sleep, run, exercise, or perform strenuous activity while wearing removable prop teeth. A loose piece can become a choking or swallowing hazard. The teeth should only be worn temporarily for your costume, photographs, or similar controlled use. Remove them immediately if you experience pain, irritation, unusual pressure, or difficulty removing the appliance, and consult a dentist if you have any concerns.
🦷 Step 1: Make a Cast of Your Upper Front Teeth
The first job in making your DIY fake teeth is to create an accurate copy of your real upper front teeth. This cast will become the working model you use later, so take your time getting a clean impression. For this step, you will need dental alginate, dental plaster, an appropriately sized dental impression tray, a mixing cup, and a small disposable paintbrush.
Start by choosing an impression tray that comfortably fits over your upper teeth without pressing tightly against them. There should be enough room for the alginate to surround the teeth instead of having the tray rub directly against them. If you are caught between two tray sizes, the slightly larger one will usually give you more working room.
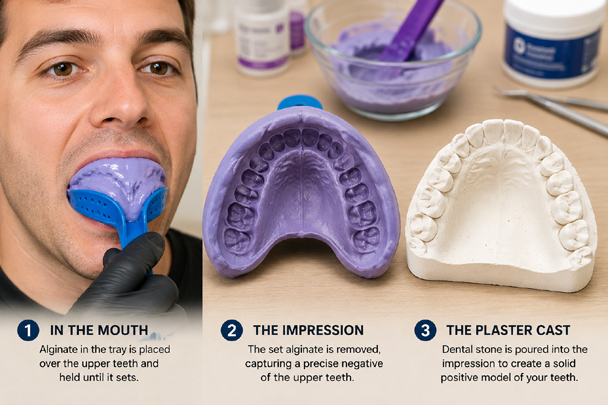
Mix the dental alginate according to the directions supplied by its manufacturer. The amount of water and working time can vary between products, so do not rely on a universal mixing ratio. Alginate can begin setting surprisingly quickly, especially when temperatures are warmer, so have your tray and other supplies ready before you start mixing.
Stir until the mixture is smooth and has a thick, pudding-like consistency with no pockets of dry powder remaining. Fill the impression tray with the mixed alginate. To help capture the small spaces and details around the teeth, use the disposable brush to place a thin amount of alginate directly over the teeth before inserting the loaded tray.
Carefully position the tray over your upper teeth and hold it steady. Some alginate squeezing around the edges is normal. Keep the tray still until the material has completely set according to the product directions. When ready, the exposed alginate should feel firm and rubbery rather than sticky or easily dented.
Once it has set, gently loosen the impression and remove the tray in one controlled movement. Do not twist or repeatedly rock it back and forth, since that can distort or tear the impression. Check the inside carefully. You want clearly defined teeth, gum lines, and spaces without large bubbles, tears, or missing areas.
The finished alginate impression is your mold. Dental plaster can then be mixed according to its package directions and carefully poured into the impression. Once the plaster has completely hardened, separate it from the alginate. You should now have a solid duplicate of your upper front teeth that you can use for the next stage of your DIY fake teeth.
🧟 Step 2: Sculpt Your Creepy New Teeth
Now you get to decide exactly what kind of horrible smile your DIY fake teeth are going to create. You will need the plaster cast from Step 1, oil-based modeling clay, petroleum jelly, and a few basic sculpting tools. A toothpick or similar pointed tool can also be handy for adding small details.
Begin by applying a very thin coat of petroleum jelly over the plaster teeth where you will be working. This helps prevent the clay from grabbing onto the plaster and makes it easier to remove your finished sculpture later. You only need a light coating, so wipe away any obvious globs.
Before reaching for the clay, spend a few minutes looking at reference pictures. Rotten human teeth, old dentures, monster teeth, zombie makeup, animal fangs, and horror movie characters can all give you ideas. Pay attention to more than just pointed teeth. Crooked lengths, uneven edges, chips, gaps, and teeth that lean slightly in different directions can make a creepy smile much more convincing.
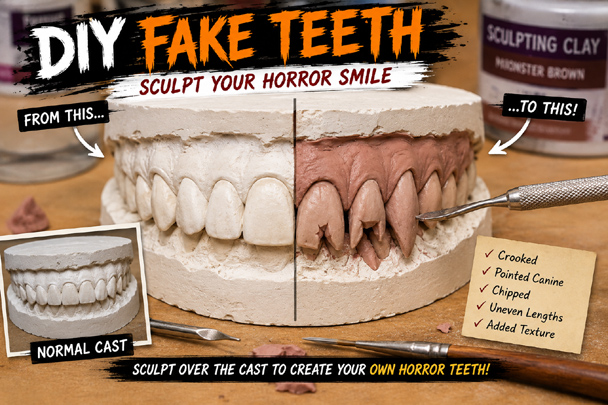
Work with small pieces of oil-based clay and roughly shape the new teeth before placing them onto your plaster cast. Press each piece over the appropriate plaster tooth, then use your sculpting tools to refine the shape. You are essentially building a new set of character teeth directly over the copy of your own teeth, which helps the finished prosthetic maintain the basic shape needed to fit.
Do not make every tooth identical. Horror teeth usually look better when something is slightly wrong. Make one tooth longer, another chipped, one slightly crooked, or give a canine a sharper point. You can even make a tooth appear partially missing. Keep checking the overall smile as you work instead of concentrating on one tooth at a time.
Once you are happy with the basic shapes, use a toothpick or fine sculpting tool to lightly define the spaces between individual teeth. These lines only need to create the illusion that the teeth are separate. Do not cut all the way through the clay until you reach the plaster underneath.
Finally, clean up rough surfaces and fingerprints with your sculpting tools and a small stiff brush. Work gently so you do not erase the little imperfections that make the teeth interesting. At this stage, concentrate on the teeth themselves rather than trying to create a finished gum line. We will deal with that part later.
Take a good look at the cast from several angles before moving on. This is your easiest opportunity to change the length, shape, spacing, or amount of damage. If your new smile already looks unsettling while it is still made from clay, you are headed in the right direction.
🧪 Step 3: Make a Mold of Your Sculpted Teeth
Your creepy teeth now have the shape you want, but they are still only clay. The next step is to capture that sculpture in a mold that can be used to create the actual prosthetic. You will need dental alginate, a dental impression tray large enough to hold the entire sculpture, a mixing cup, a spoon or spatula, petroleum jelly, a small disposable paintbrush, and your sculpting tools.
Start by giving the clay teeth a very light coating of petroleum jelly. This will help the sculpture release from the alginate later. Do not bury your carefully sculpted details under a thick layer. A thin, even coating is all you need.
Mix a fresh batch of dental alginate according to the manufacturer's directions. Prepare enough to generously fill your impression tray. As before, have everything sitting within reach before you begin. Once alginate is mixed, you may not have much working time.
Fill the tray with alginate, then use your small brush to gently dab some of the mixture over the surface of the clay teeth. Pay particular attention to the spaces between teeth, pointed tips, chips, cracks, and other details you sculpted. This helps push alginate into those little areas and reduces trapped air that could leave unwanted bubbles or bumps in the finished prosthetic.
Be gentle with the brush. The clay sculpture can still be damaged, and stabbing at it with the bristles can ruin details you spent time creating.
With the teeth lightly covered, carefully press the entire sculpted section, including the plaster cast beneath it, into the alginate-filled tray. Hold everything steady and allow the alginate to set completely according to its instructions. Avoid shifting the cast while the material is setting because movement can distort the mold.
Once the alginate is firm, carefully separate the plaster cast and clay sculpture from the new mold. Work slowly around the edges rather than yanking everything apart. Alginate is flexible, but it can tear. A damaged area around a tooth, fang, or other important detail may mean making the mold again.
Now inspect your new mold closely. You should be able to see clean impressions of the individual teeth and the creepy details you sculpted. Look for tears, large air pockets, missing tooth tips, or other obvious defects before going any further. It is much easier to remake the mold now than discover a problem after casting your finished teeth.
If everything looks good, remove the remaining clay from your original plaster teeth. A wooden sculpting tool works well because it is less likely to scratch or chip the plaster than a sharp metal tool. Clean away the clay carefully because you are going to need that original plaster cast again.
And if the mold tears and you have to redo it? Congratulations. You have just experienced one of the less glamorous traditions of special-effects work.
🧛 Step 4: Cast Your New Horror Teeth
This is the step where your clay creation finally becomes an actual set of DIY fake teeth. You will need your finished alginate mold, original plaster cast, dental acrylic powder in tooth and pink shades, the matching acrylic liquid, an eyedropper, small unwaxed paper cups, mixing tools, a small brush, petroleum jelly, gloves, and a nail file or rotary tool for finishing.
Before starting, check the labels on your acrylic products. Because the finished prosthetic will be worn in the mouth, use a dental acrylic system intended by its manufacturer for this type of dental appliance. Do not substitute ordinary craft acrylic, casting resin, hardware-store plastic, or similar products.
Work in a well-ventilated area and follow all ventilation, protective-equipment, mixing, curing, and handling instructions supplied with your particular acrylic system. Dental acrylic products can have strong fumes, and different products may require different proportions and curing procedures.
Clean every trace of modeling clay from your plaster cast. Once it is clean and dry, apply another very thin coat of petroleum jelly as a release layer. Yes, the petroleum jelly is back. Making special-effects props involves quite a bit of doing the same little jobs over and over.
Prepare the tooth-colored acrylic according to its manufacturer's directions. Work in a small paper mixing cup and make only as much as you need. Once mixed, carefully introduce the acrylic into the tooth cavities of your alginate mold.
Try to fill the deepest areas first. Fangs, pointed canines, chipped corners, and narrow spaces between teeth are particularly good places for air to become trapped. Adding the material gradually from one side can help air escape rather than becoming sealed inside your casting.
While the acrylic is still at the proper working stage specified for your product, carefully return the petroleum-jelly-coated plaster cast to the mold. Line it up with the original impression. The back teeth and their impressions can serve as useful landmarks for getting everything back into its original position.
Allow the acrylic to cure completely according to the manufacturer's instructions. Do not rush this part. Once it has fully cured, carefully separate the plaster cast from the alginate mold. Try to preserve the alginate if possible. If you discover a bad bubble or another casting problem, an intact mold may save you from having to sculpt the entire set of teeth again.
Inspect the casting before removing it from the plaster model. A tiny surface flaw may be repairable later, but large voids, missing tips, or badly formed teeth are good reasons to make another casting while your mold is still usable.
Next comes one of the most delicate parts of the project. Slowly work the acrylic prosthetic away from the plaster teeth. Do not force it. A wooden tool, toothpick, or suitable sculpting tool can help loosen stubborn areas, but avoid digging aggressively between the acrylic and plaster. Breaking a plaster tooth inside your new prosthetic can damage the carefully formed interior that gives it its custom fit.
Once the prosthetic comes free, you will probably have thin edges or excess acrylic around the casting. Carefully trim these areas with a fine nail file or appropriate rotary tool. Take off a little at a time. You can always remove more material, but you cannot put it back once you grind too far.
The rough casting should now resemble the horror teeth you sculpted back in Step 2. Do not worry if they still look a little too clean or unfinished. We have not given them their gruesome personality yet.
Before moving ahead, check that there are no sharp edges, rough projections, loose pieces, or other obvious defects. Anything that causes pain, cuts the gums, or requires force to put on or remove should not be worn. A dental professional is the appropriate person to assess the fit and safety of any custom appliance intended to be placed over natural teeth.
If everything has worked, though, take a moment to appreciate what just happened. That ugly little clay smile you sculpted is now a real set of horror prop teeth. The fun part is next: making them look like they belong in a monster's mouth.
15 DIY Haunted House Tricks: Simple Ways to Create Frightful Fun
🩸 Step 5: Give Your Horror Teeth a Gum Line
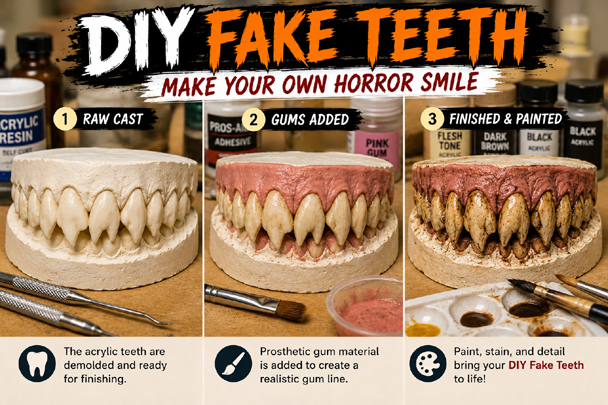
The teeth may have the right shape now, but without gums they can still look like a row of plastic teeth sitting over your real smile. Adding a gum line helps turn those separate teeth into one convincing horror prosthetic. For this stage, you will need the plaster cast, your acrylic teeth, petroleum jelly, pink dental acrylic powder, its matching acrylic liquid, eyedroppers, wooden mixing sticks, a small soft brush, and basic sculpting tools.
Start by applying another thin layer of petroleum jelly to the plaster model, paying extra attention to the area around the gum line. Yes, petroleum jelly makes another appearance. By now you can probably see why keeping the jar beside your work area is a good idea.
Place your finished acrylic teeth back onto the plaster cast and make sure they are seated in their original position. Before adding anything, look at where your natural gums meet the teeth. That line will help you decide where the prosthetic gums should begin and end.
Use only the compatible dental acrylic products intended for your particular system, and follow the manufacturer's instructions for handling, curing, ventilation, and protective equipment. Do not substitute craft acrylic or ordinary plastic products for material that will be part of a mouth-worn prosthetic.
Working on a small section at a time, build the gum area with the pink acrylic system. This is one of those jobs where patience pays off. It is much easier to add a little more material than to deal with a huge blob covering half of your carefully sculpted teeth.
Keep the pink material concentrated around the gum area rather than allowing it to creep too far down the fronts of the teeth. While the material is still at the workable stage specified for your product, use a wooden stick or small suitable brush to shape the edge where the gums meet the teeth. Follow the irregular shapes around individual teeth instead of making one perfectly straight line. Real gum lines have curves, dips, and small differences from tooth to tooth.
You can also give the gums a little character. Slightly uneven contours can work particularly well for zombies, monsters, ancient vampires, and other creatures that probably have not scheduled a cleaning lately. Keep the surface reasonably smooth, however, especially anywhere that could contact the inside of the mouth.
If the pink acrylic looks too opaque or unnatural, check the manufacturer's guidance for compatible shades or blending materials. Some dental acrylic systems allow colors to be combined, but do not experiment with unrelated powders, pigments, or craft products on something intended to be worn in the mouth.
Once the gum material has completely cured, carefully remove the prosthetic from the plaster cast using the same patient approach you used in Step 4. Never force it off if it seems stuck.
Inspect the edges and trim away unwanted excess with a fine nail file or an appropriate rotary tool. Work slowly around the gum line. Sharp corners and thin projections need to be removed, but aggressive grinding can quickly ruin the shape or fit you have spent all this time creating.
When you are finished, step back and look at the whole piece. You should no longer see just a collection of fake teeth. The added gum line ties everything together and makes the prosthetic look much more like one wonderfully unhealthy Halloween smile.
🎨 Step 6: Add the Grime, Stains, and Rotten Details
Right now your DIY fake teeth probably look far too fresh for a proper horror character. Coloring is where you can turn that clean acrylic smile into old vampire fangs, neglected monster teeth, a zombie mouth, or something that looks like it has not encountered a toothbrush in several centuries.
For this step, use stains, tints, and sealers specifically made for dental appliances and compatible with the acrylic system you used to make the teeth. You will also need a few small brushes and whatever applicators are recommended for your coloring products. Because the finished piece goes into your mouth, ordinary craft paint and clear nail polish are best left out of this project.
Before adding color, decide what kind of mouth your character should have. Even healthy human teeth are rarely refrigerator white. A very subtle ivory or yellow cast can immediately make bright acrylic teeth look more believable. Horror teeth can then be pushed much further with brown, gray, reddish, or darker staining where appropriate.
The secret is restraint. Start with very little color and gradually build it. Concentrate staining around the spaces between teeth, near the gum line, inside cracks, around chips, and in recessed areas. These are the places where discoloration naturally collects and where a little shading creates the most depth.
For rotten teeth, vary the color instead of coating everything with the same brown stain. One tooth might be noticeably darker while the tooth beside it only has discoloration near the gum. A chipped area can be shaded more heavily, while a pointed fang might need only a faint yellow cast. Uneven coloring usually looks far more convincing than painting every tooth alike.
The gums deserve attention too. Perfect bubble-gum pink can look artificial, particularly on a horror character. Compatible dental tints can be used to create subtle variations around the gum line. Depending on your character, you might want the gums to appear slightly darker, irritated, unhealthy, aged, or just less perfectly uniform.
Keep stepping back and looking at the entire smile as you work. It is surprisingly easy to get carried away with rotten teeth. If every surface is black, brown, and bloody, all those details you carefully sculpted can disappear into one dark mess. A few strategically disgusting areas usually sell the illusion better.
Once you are satisfied with the coloring, finish the prosthetic only with a dental sealer or coating that the manufacturer identifies as compatible with your materials and appropriate for its intended use. Follow its curing directions completely before the prosthetic goes anywhere near your mouth.
When you are finished, compare the teeth with the plain acrylic version you started with. A little discoloration, some carefully placed shadows, and a few rotten details can make an enormous difference. Your Halloween character finally has the terrible dental history they deserve.
31 Epic Songs for Your Ultimate Halloween Playlist
😬 Step 7: Check the Fit and Finish the Edges
You have made it to the final step. Before your new horror teeth make their Halloween debut, check the entire prosthetic for comfort, rough spots, and sharp edges. A creepy smile is the goal. A painful one is not.
Carefully inspect every edge with your fingers before trying the teeth in your mouth. Look for thin pieces of acrylic, sharp corners, rough casting marks, or anything else that could scrape your lips or gums. Minor roughness on an appropriate dental acrylic may be carefully smoothed with a fine file or suitable rotary tool, following the material manufacturer's directions. Remove as little material as possible because excessive grinding can change the fit or weaken the prosthetic.
Pay special attention to the center above your two upper front teeth. There is a small fold of tissue connecting the inside of your upper lip to the gum. This is called the labial frenulum, and the prosthetic should not press or pinch against it. The gum portion may need adequate clearance in this area rather than running straight across that sensitive tissue.
Once everything feels smooth, gently try the prosthetic in place. It should sit securely without requiring painful pressure. Try smiling, talking, and making a few exaggerated monster faces in front of a mirror. There should be no stabbing, pinching, cutting, or painful pressure against your natural teeth or gums.
Never force a prosthetic into place or grind away substantial portions in an attempt to make a poor fit work. If it hurts, becomes stuck, affects your breathing or swallowing, or does not come off easily, stop using it. A dentist is the right person to correct a questionable fit.
And remember that these are temporary theatrical teeth, not dentures. Do not eat, drink, sleep, smoke, exercise, or perform strenuous activity while wearing them. Put them in for the costume, photographs, or controlled appearance, then take them back out.
Now give yourself one final look in the mirror. If those crooked, rotten, pointed teeth make you hesitate before smiling back, you did your job.
🎭 Why Go DIY?
There is a big difference between slipping a pair of inexpensive plastic fangs over your teeth and building a prosthetic specifically around your own smile. With this method, you start with a cast of your actual teeth, sculpt the character teeth over that cast, create a mold, cast the prosthetic, add gums, and finish everything with color and detail. It takes more work, but it also gives you control over exactly how the finished character looks.
That is why the basic ideas behind this project will feel familiar to anyone interested in theatrical and special-effects work. Custom dental appliances and character teeth have long been part of professional makeup for stage, film, television, haunted attractions, and live performance. Professional versions are made by trained dental and special-effects artists using materials and procedures appropriate for the performer, but the creative process is much the same: start with the performer, design the character's new smile, mold it, cast it, fit it, and finish it for the camera or stage.

🎬 Your Character Has a New Smile
Great horror makeup is often built from details the audience does not consciously notice. Teeth are one of them. A zombie with perfect white teeth looks like someone wearing zombie makeup. Give that same character crooked, stained, damaged teeth and unhealthy-looking gums, and suddenly the illusion carries right through the smile.
That is the real advantage of making your own DIY fake teeth. You are not limited to whatever happened to come in a Halloween package. You can create the teeth your particular character needs, whether that means long vampire canines, a rotten zombie mouth, jagged monster teeth, an ancient witch's neglected smile, or something completely original.
You have also worked through the basic stages that turn an idea into a finished character prosthetic: casting, sculpting, molding, acrylic work, detailing, coloring, and fitting. Those same broad skills are part of the world of professional theatrical and screen prosthetics, even though professional artists may use different materials, equipment, and techniques for a particular production.
So when somebody asks where you bought those horrible teeth, you get the best answer possible:
“I didn't. I made them.”
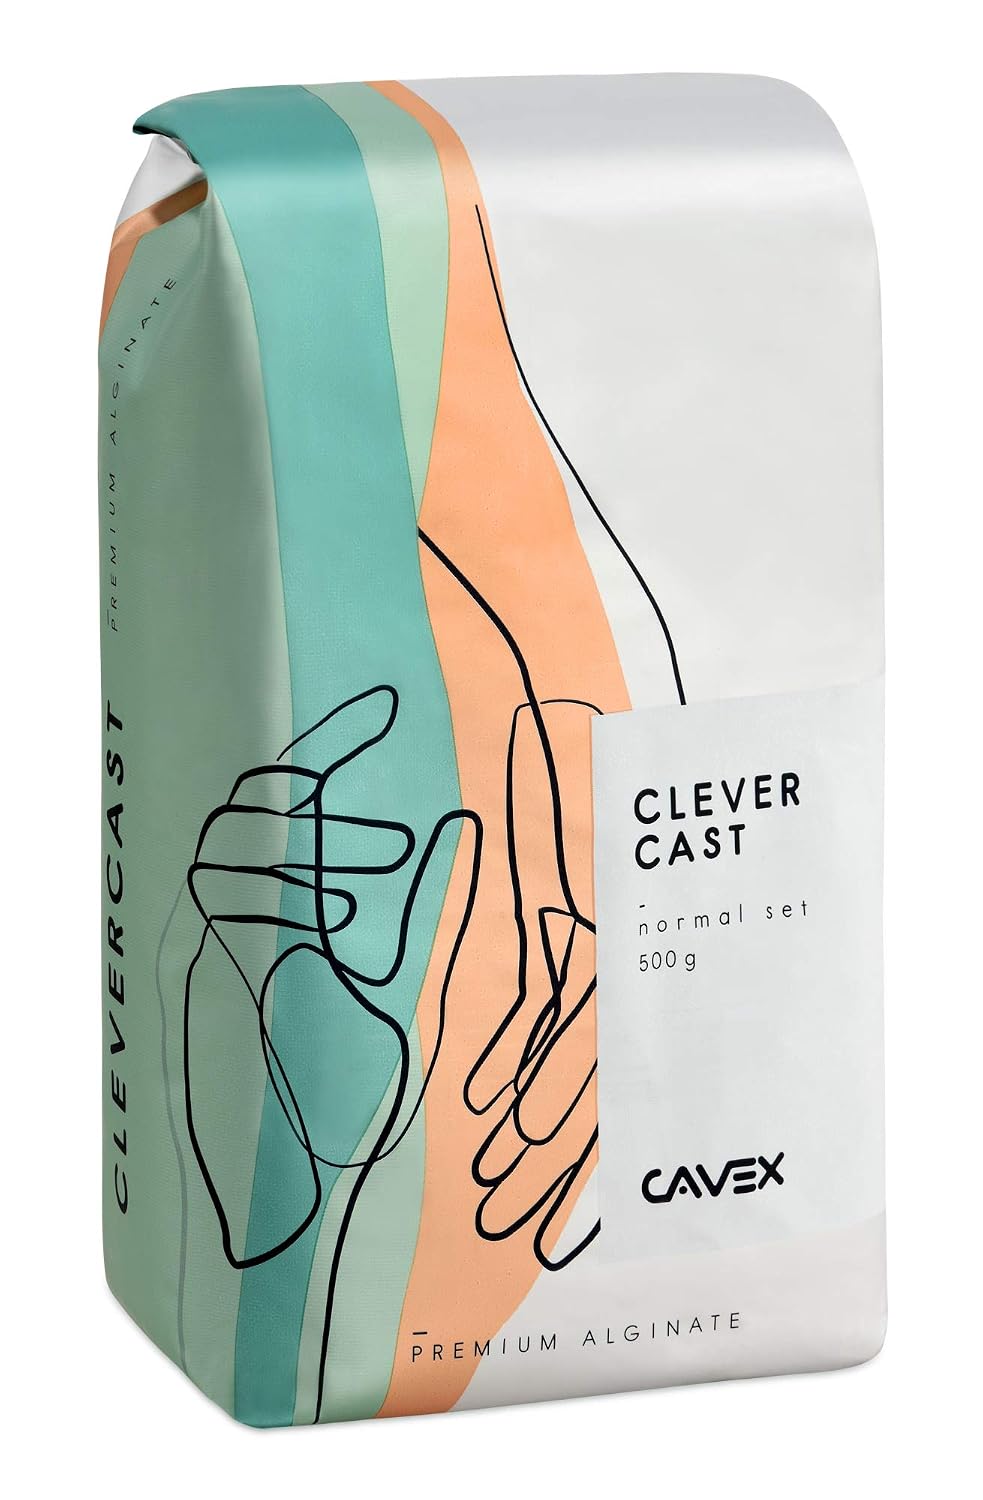
Premium Alginate Molding Powder
Product Description:
Creating realistic custom fangs and monster teeth starts with an accurate mold. This premium alginate molding powder is an excellent choice for anyone making a DIY Fake Teeth project because it captures fine detail while remaining easy to mix and safe to use. A quality impression gives your finished teeth a better fit and a more professional appearance.
Key Features:
• Premium alginate designed for highly detailed impressions
• Mixes into a smooth, creamy consistency with minimal air bubbles
• High elasticity and tear resistance for easy mold removal
• Dust-free, non-toxic, and non-allergenic formula
• Flexible mixing ratios for both small and large molding projects
Why This Works:
A detailed impression is the foundation of any successful DIY Fake Teeth project. Whether you're making vampire fangs, monster teeth, zombie effects, or custom Halloween prosthetics, this alginate captures fine details that help produce a more comfortable and realistic final result. It's an excellent material for hobbyists, prop builders, and Halloween enthusiasts looking to create professional-looking special effects at home.
Buy on Amazon