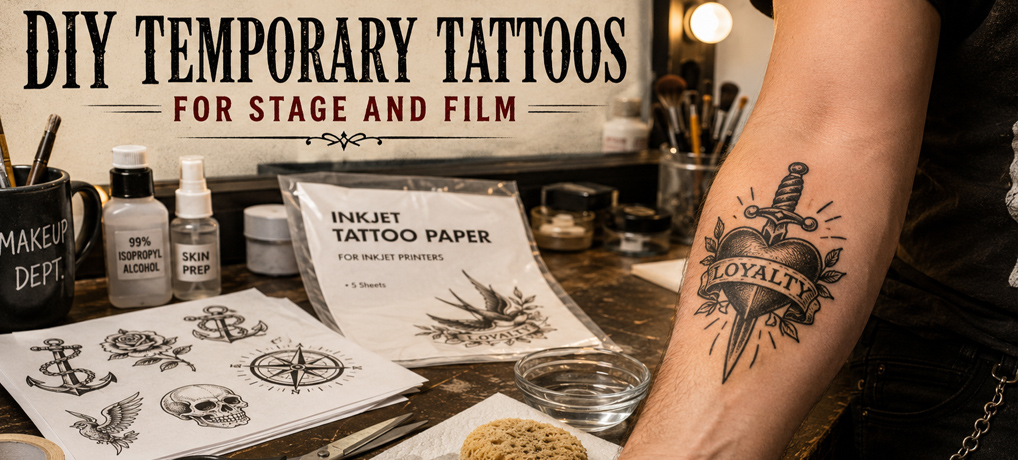
Making DIY Temporary Tattoos gives you something that drawing directly on the skin cannot: the ability to create the same tattoo again and again.
A fake tattoo can look perfect when you draw it the first time. The problem comes tomorrow, when you have to draw exactly the same tattoo again.
For a Halloween costume, being a little different the second time may not matter. For a stage production or movie, it does. The tattoo may need to appear in exactly the same place for days or even weeks. A tattoo may need to stay in the same place, at the same size, and with the same details through several performances or shooting days. Drawing it freehand every time makes that harder than it needs to be.
Professional makeup departments solved this problem years ago by working from repeatable designs and tattoo transfers. It is the same basic idea behind many of the tattoos you see on actors in movies and television.
You can use that idea at home.
In this guide, you will learn how to create a master tattoo design, turn it into printable temporary transfers, apply it consistently, and make it look less like a store-bought temporary tattoo and more like part of the character. Once the original is made, you can print another identical copy whenever you need one.
🎨 What You’ll Need to Make DIY Temporary Tattoos
Making your own repeatable DIY Temporary tattoos is surprisingly simple. You do not need professional tattoo equipment, and once you have created the design, you can print identical copies whenever you need them.
- Printable temporary tattoo paper made for your type of printer
- Inkjet or laser printer
- Computer or tablet for sizing and arranging the designs
- Tattoo artwork you have drawn, scanned, or created digitally
- Small scissors for cutting around each tattoo
- Water and a damp cloth or sponge for applying the tattoo
- Rubbing alcohol for cleaning the skin before application
- Translucent setting powder to reduce shine after application
The real advantage is consistency. Save your finished tattoo design, and you can make the same tattoo again for every performance, filming day, rehearsal, or costume appearance.
🎬 How Fake Tattoos Were Made for Movies Before Printable Transfers
Long before temporary tattoo paper and home printers, movie and television makeup artists had to create fake tattoos by hand. If a character needed the same tattoo throughout a production, keeping it consistent could be surprisingly difficult.
One of the oldest methods was simply drawing the tattoo directly onto the actor’s skin. Makeup artists used greasepaint, theatrical makeup, cosmetic pencils, or specialized inks. They often worked from photographs, sketches, or measurements so they could reproduce the design in roughly the same place each day.
For more complicated tattoos, artists could make stencils or tracing patterns. The design was transferred or outlined onto the skin, then filled and detailed by hand. A stencil helped keep the size, shape, and placement consistent, but the finished tattoo still depended heavily on the makeup artist.
Productions also used professionally made decal-style transfers. These were prepared ahead of time and applied much like later temporary tattoos. This was especially useful when several identical tattoos were needed or when a design was too detailed to redraw every shooting day.
Makeup artists also had to make the tattoo look believable. Fresh black artwork could look too sharp under movie lights, so color, powder, makeup, or stippling might be added to soften it and make the tattoo appear as though it had been on the character for years.
Today, printable temporary tattoo paper lets a DIY costume maker borrow the same basic idea. Create one master design, print identical copies, and the tattoo can appear in the same place and at the same size every time.
🎥 The Tattoo Movie and the Birth of Modern Film Tattoos
The 1981 thriller Tattoo, starring Bruce Dern and Maud Adams, came along at an interesting point in the history of movie makeup. Dern plays Karl Kinsky, a tattoo artist whose obsession with a fashion model takes a disturbing turn.
For a film built around tattooing, the tattoos could not simply look convincing in one scene. Designs had to remain consistent through different camera angles, shooting days, and close-ups. That made repeatability especially important.
The film is often associated with Thomas Burman, the veteran makeup effects artist whose work included creating the tattoo effects used on Bruce Dern and Maud Adams. Rather than relying entirely on an artist to redraw complicated designs on the actors every day, the production used carefully prepared tattoo applications that helped maintain continuity.
As transfer methods improved, makeup artists no longer had to depend entirely on redrawing a complicated tattoo by hand. A finished design could be reproduced and applied again when the actor returned for another day of shooting. Professional productions increasingly relied on tattoo transfers that could be reproduced from a master design and applied in the same position whenever needed.
The equipment has changed, but the problem is the same one we are solving here: how do you put the same tattoo back on the same character tomorrow? Instead of trying to draw the same tattoo perfectly every time, you create a master design and make identical transfers from it.
✏️ Step 1: Create the Original Tattoo Design
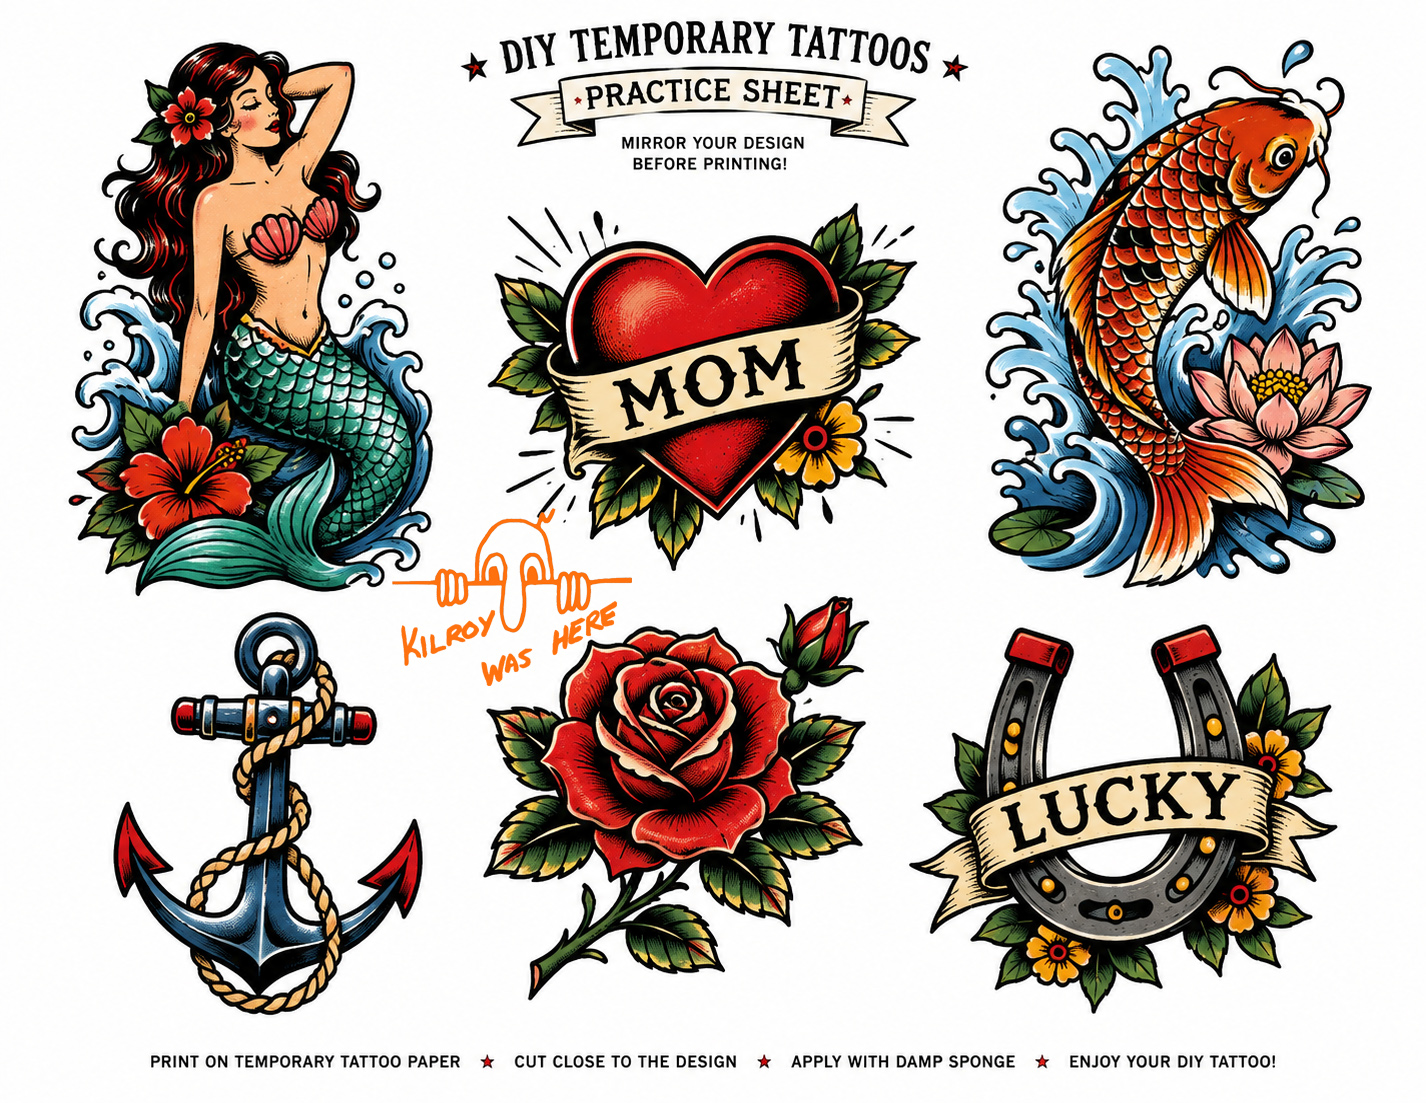
Start with the tattoo exactly as you want it to appear on the character. You can draw the design by hand, create it on a computer, or scan an existing drawing and clean it up digitally.
Your tattoo does not have to be black. DIY Temporary Tattoos can use full-color artwork, including traditional red, blue, green, yellow, and other tattoo colors. Just remember that printer ink is not opaque, so colors can look different once transferred onto skin. Always make one test tattoo before printing a full batch, especially when the design uses several colors.
For stage, stronger colors usually work best because pale shades can disappear at a distance. For film and close-up photography, you can use more subtle colors, but check the finished tattoo under the lighting and camera you will actually use.
Keep the design simple enough to reproduce clearly. Bold outlines, solid shapes, and strong lettering usually work better than tiny details, especially for stage performances where the audience will see the tattoo from a distance.
If you are recreating a tattoo for a specific character, study reference photos carefully. Look at the size, shape, location, colors, and direction of the original tattoo rather than concentrating only on the artwork itself.
Before you start resizing, flipping, or arranging copies for printing, save the original artwork. Never work from your only copy. If something goes wrong later, you can always return to the original design and start again.
20-Foot Rule: If the tattoo is important to recognizing the character, make sure its major shapes and colors can still be understood from across a room.
Free Printable 1: Classic Color Tattoo Designs
📏 Step 2: Size the Tattoo for the Actor
A tattoo that looks right on a computer screen may be completely wrong once it is placed on the body. Before printing a full sheet, decide exactly how large the finished tattoo needs to be.
Measure the area where the tattoo will be applied. For example, if the design needs to cover about three inches of the upper arm, size the artwork to three inches before printing. Do not simply guess based on how large it looks on the screen.
How to Set the Printed Size
You do not need professional design software to size DIY Temporary Tattoos. Most image editors, word processors, and page-layout programs let you select an image and enter its width or height in inches.
If you want the finished tattoo to be 3 inches wide, for example, set the image width to 3 inches. Keep the proportions locked so the program automatically adjusts the height without stretching or squashing the artwork.
Print a test on ordinary printer paper and measure it with a ruler. If the printed design is supposed to be 3 inches wide, make sure it actually measures 3 inches before using your temporary tattoo paper.
When you print the final sheet, choose 100%, Actual Size, or the equivalent setting in your printer window. Avoid options such as Fit to Page, Shrink to Fit, or Scale to Fit, because they can change the size of every tattoo on the sheet.
Print a test copy on ordinary paper first. Cut it out and hold it against the skin to check the size and placement. This saves tattoo paper and lets you make adjustments before printing the real transfer.
For film or photography, compare the test design with your reference images. Small differences in size or position can become obvious in close-ups.
For stage, remember the 20-Foot Rule. A tattoo that looks beautifully detailed from two feet away may disappear completely from the audience. Important tattoos may need stronger lines, larger lettering, or slightly exaggerated details so they remain visible from a distance.
Once you have the correct size, write it down or save it with the master file. That way, every replacement tattoo will print at exactly the same dimensions.
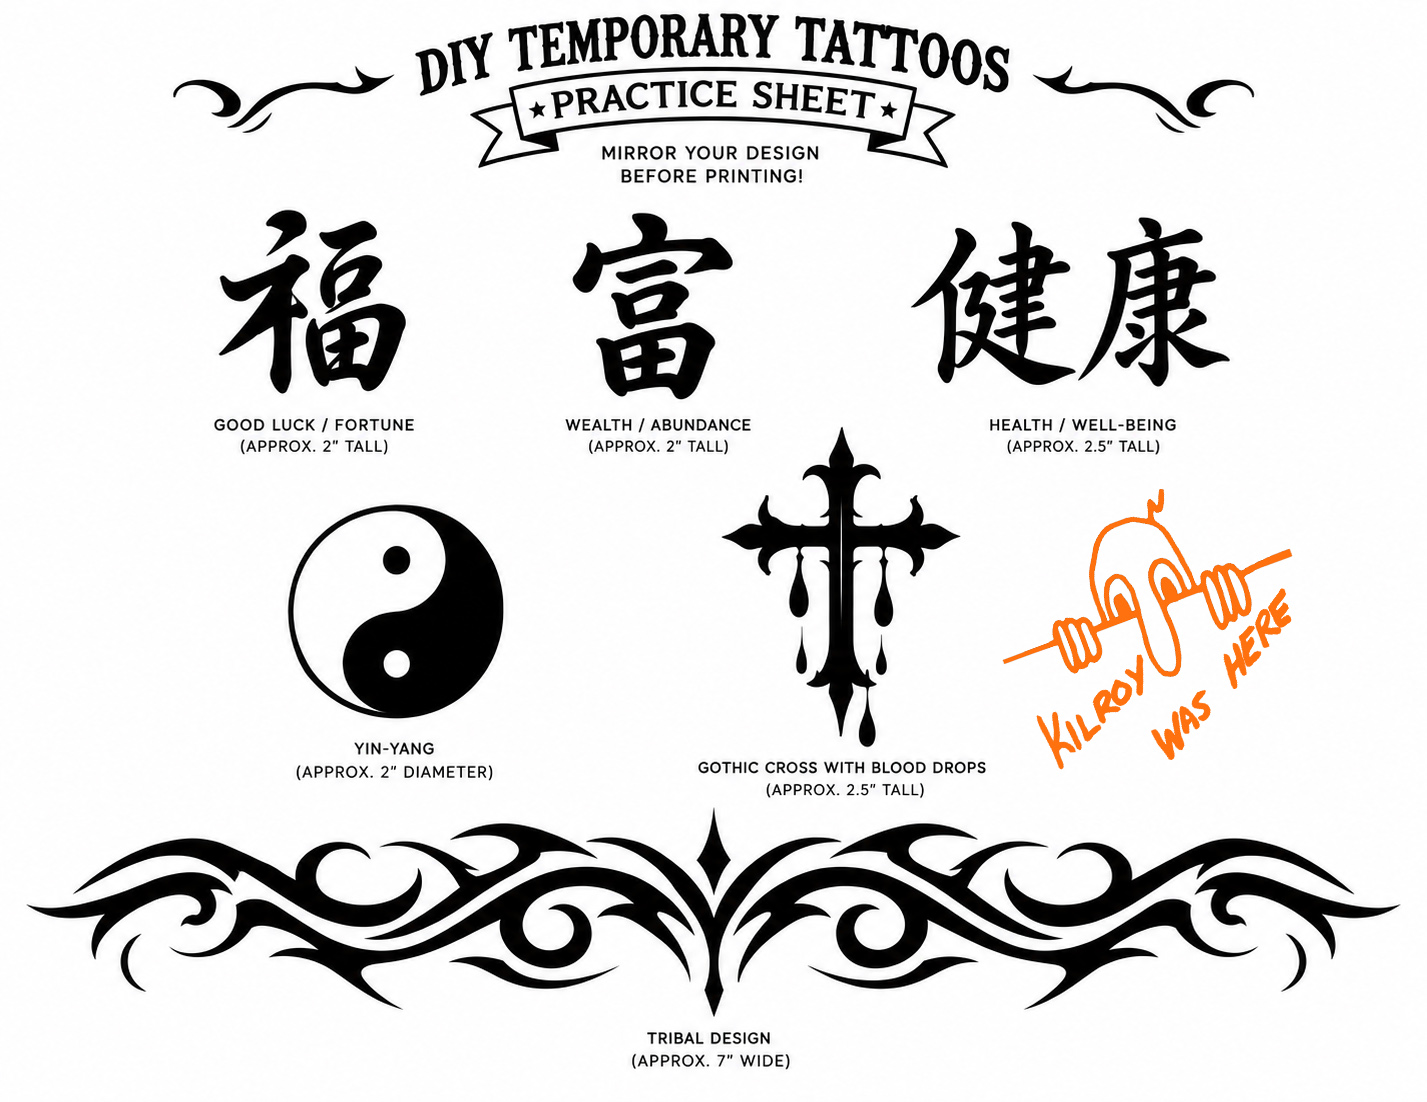
Free Printable 2: Modern Black Tattoo Designs
🖨️ Step 3: Create a Printable Tattoo Master Sheet
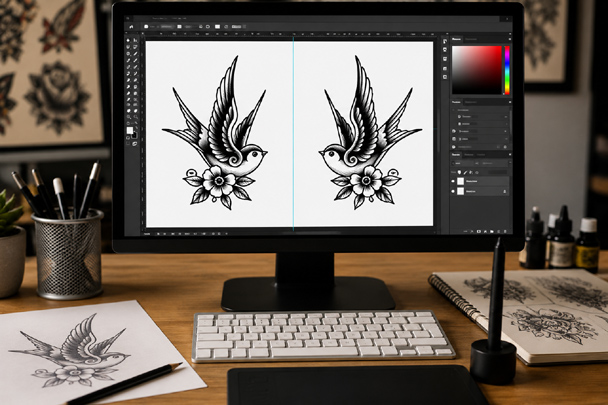
Once the tattoo is the correct size, turn it into a master sheet that you can save and print again whenever the character needs a fresh tattoo.
Place several copies of the tattoo on one page rather than printing only one. Leave enough space between each design so you can cut them apart easily. If the character has several different tattoos, you can arrange all of them on the same sheet.
Before printing, check the instructions that came with your temporary tattoo paper. Many types require the artwork to be mirrored or flipped horizontally before printing because the printed side is placed face-down against the skin.
This matters most with words, names, dates, numbers, logos, and directional designs. If your tattoo says MOM, you might never notice the mistake. If it says LUCKY 13, you certainly will.
When in doubt, print the design on ordinary paper first and check the instructions for your particular tattoo paper before using an expensive sheet.
Add a small label beside each design on your working master if you have tattoos for different parts of the body, such as “left arm,” “right shoulder,” or “neck.” Keep those labels outside the area that will actually be transferred.
Save the finished sheet as your Tattoo Master Sheet. Do not resize it when you print replacements. As long as you use the same master at 100% scale, every copy will be the same size and proportions as the original.
For stage or film work, print several extras at once. If a tattoo becomes damaged by sweat, costumes, makeup, or movement, you can replace it without having to recreate the artwork.
📄 Step 4: Print the Design on Temporary Tattoo Paper
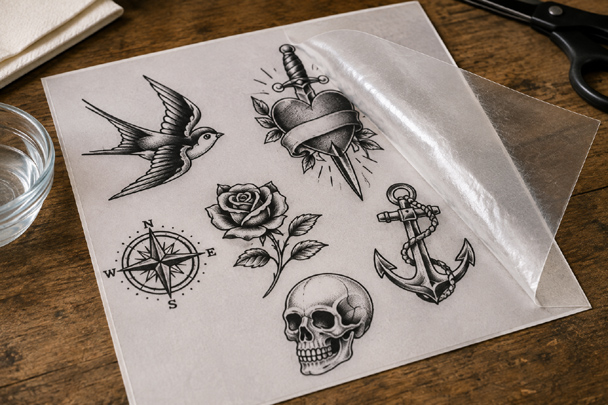
Temporary tattoo paper usually comes in two parts: the printable sheet that receives the design and a clear adhesive sheet that is applied afterward. Always read the directions for your particular brand before printing because the process can vary.
Make sure you are using tattoo paper designed for your printer. Inkjet and laser tattoo papers are not interchangeable. Using the wrong type can ruin the sheet and may damage some printers.
Load one sheet into the printer so the design prints on the correct side. Print your Tattoo Master Sheet at 100% or actual size. Do not select “fit to page,” since that can change the size of the tattoos you carefully measured in Step 2.
After printing, allow the ink to dry completely before touching the designs or applying the adhesive sheet.
If your tattoo paper uses a separate clear adhesive layer, carefully apply it over the printed sheet according to the manufacturer's directions. Smooth it down slowly to avoid wrinkles and air bubbles.
Before making a large batch, print and apply one test tattoo. This lets you check the size, direction, color, and transfer quality before using the rest of your tattoo paper.
Printable Temporary Tattoo Paper
Product Description:
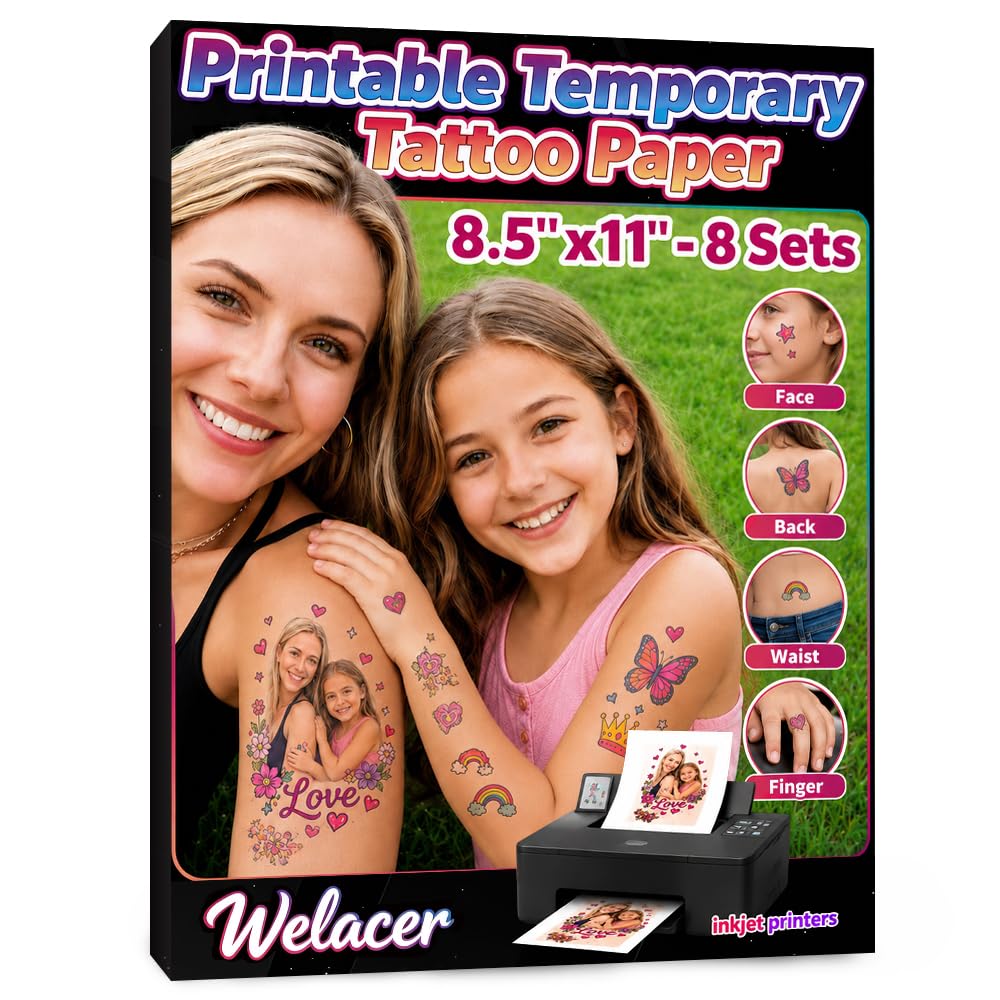
Take your DIY Temporary Tattoos to the next level by creating your own custom designs at home. This printable tattoo paper lets you transform artwork, logos, text, movie-inspired graphics, or original illustrations into realistic temporary tattoos using a standard inkjet printer. It's perfect for Halloween costumes, stage productions, cosplay, school projects, and themed parties.
Key Features:
• Print custom temporary tattoos with any inkjet printer
• Simple two-sheet transfer process with no special equipment required
• Ideal for Halloween, cosplay, theater, parties, festivals, and craft projects
• Tattoos typically last 1 to 2 days and remove easily with baby oil or rubbing alcohol
• Great for creating matching tattoos for groups, performances, or costumes
Why This Works:
One of the biggest challenges with hand-drawn tattoos is making every design look identical. This printable paper solves that problem by allowing you to print the same artwork over and over with professional-looking results. Whether you're creating biker tattoos, pirate tattoos, fantasy symbols, horror effects, or movie-inspired body art, this paper makes DIY Temporary Tattoos faster, cleaner, and far more consistent.
Buy on Amazon
✂️ Step 5: Cut and Prepare the Tattoo Transfer
Once the printed sheet is completely dry and the adhesive layer has been applied, cut out the individual tattoo you want to use.
Trim fairly close to the outside edge of the design. You do not have to follow every tiny curve, but leaving a large border can make the clear transfer film more noticeable on the skin.
For complicated designs, small scissors give you better control than standard household scissors. Rounded corners are also less likely to lift than sharp square corners.
If you printed several identical tattoos on your master sheet, cut apart only the ones you need. Leave the extras on the sheet until they are needed so they stay clean and protected.
Keep prepared tattoos flat in a clean envelope, plastic sleeve, or small storage container. For a stage production or film shoot, label them by character and body location so the correct tattoo can be found quickly.
Before application, double-check the design. Check it one last time before application, especially if the tattoo contains words, numbers, or an image that must face a particular direction.
Check out the DIY Old Age Makeup Article
💧 Step 6: Apply the FX Tattoo to the Skin
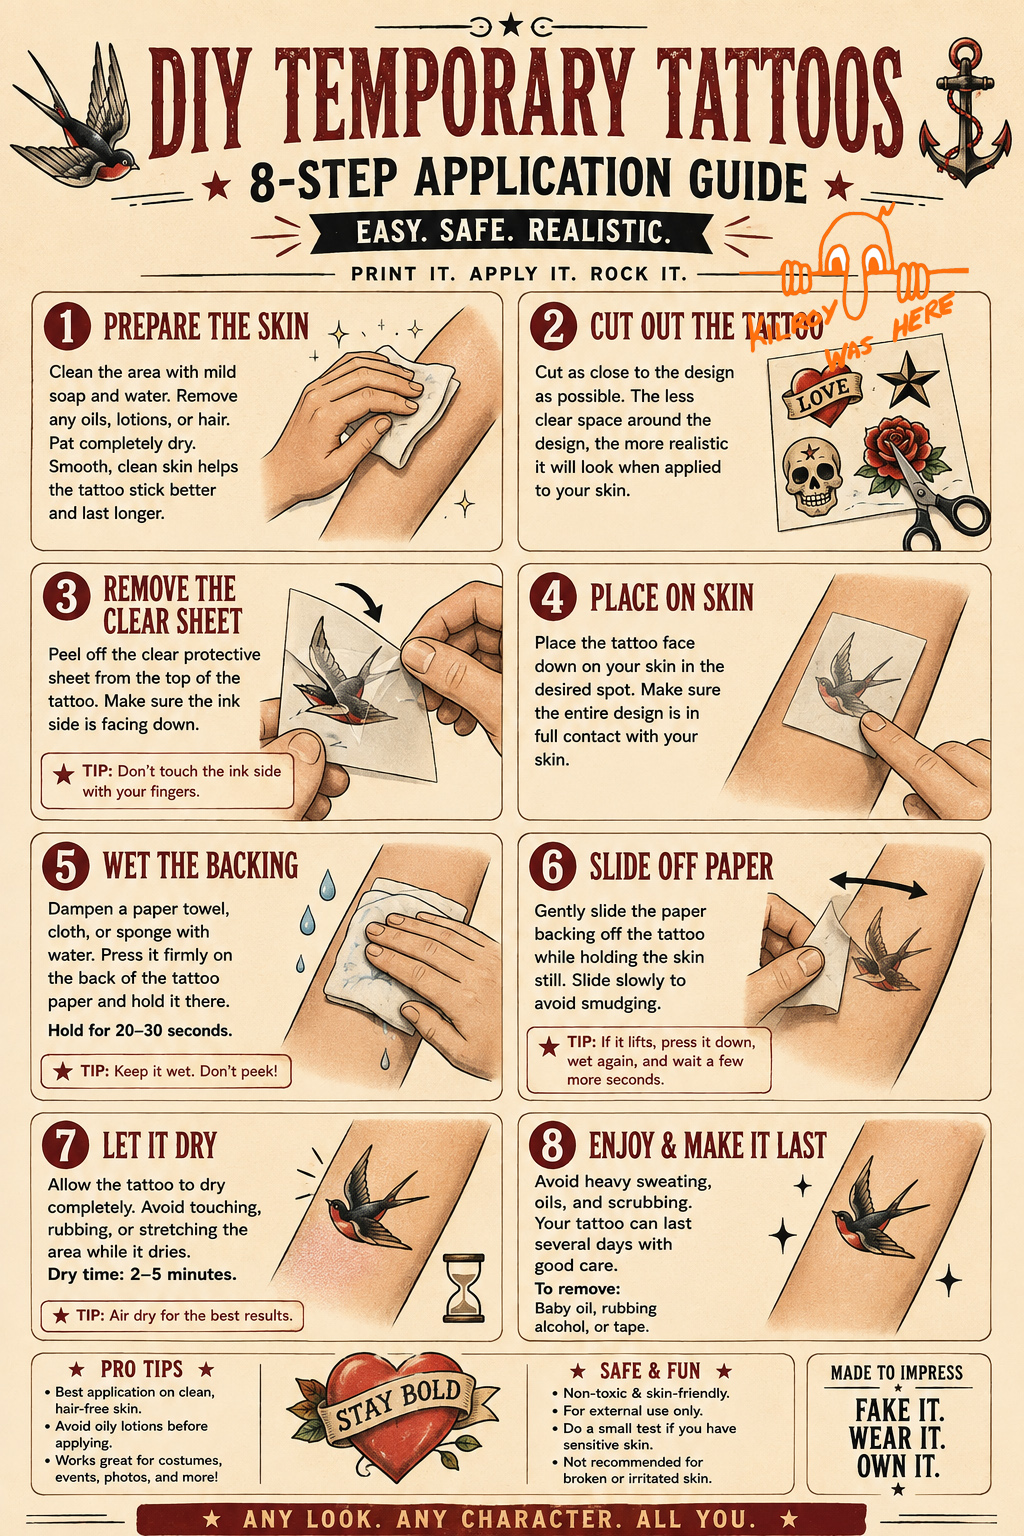
Start with clean, dry skin. Oils, lotion, sweat, and makeup can keep the tattoo from sticking properly, so wipe the area with rubbing alcohol and allow it to dry completely.
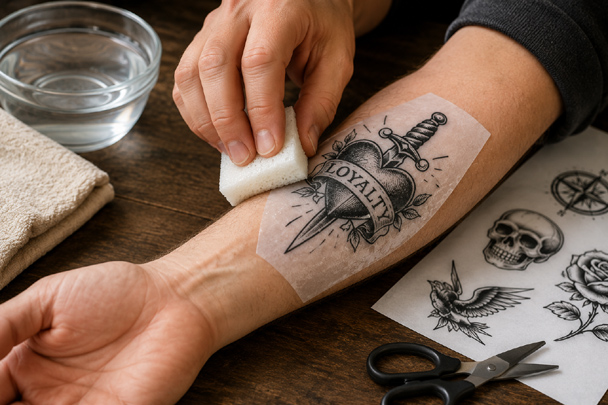
Remove the protective covering from the tattoo and place the design side against the skin in the position you chose earlier. Take a moment to check the angle and placement before applying water. Once the transfer begins, moving it can ruin the tattoo.
Press a damp cloth or sponge firmly against the paper backing. Make sure the entire tattoo becomes wet, including the edges. Hold it in place for the amount of time recommended by the tattoo paper manufacturer.
Carefully lift one corner of the backing paper. If the design has transferred completely, slowly peel the paper away. If part of the tattoo is still attached to the backing, put it back down and apply a little more water and pressure.
Allow the finished tattoo to dry naturally before touching it or adding makeup. Do not rub the surface while it is still wet.
For repeated performances or filming days, take a quick reference photo after the first successful application. Include enough of the surrounding body area to show the exact position, angle, and distance from nearby landmarks. That photograph makes it much easier to put the replacement tattoo in the same spot every time.
🎨 Step 7: Blend the Tattoo Into the Skin
A freshly applied temporary tattoo can look too clean, too dark, or too shiny. That may be fine for a costume party, but stage and film tattoos usually need a little finishing work to make them look like they belong on the character.
First, let the tattoo dry completely. Lightly dust translucent setting powder over the area to reduce the glossy finish that temporary tattoo paper can leave behind.
If the clear edge of the transfer is visible, use a small amount of foundation or skin-tone makeup around the outside of the tattoo. Blend outward onto the surrounding skin rather than covering the artwork itself.
For an older tattoo, lightly soften the design with translucent powder or a very thin layer of matching makeup. Real tattoos usually do not look like freshly printed black ink sitting on top of the skin.
You can also change the appearance to fit the character. A weathered biker, sailor, prisoner, soldier, or aging character might need a tattoo that looks faded and imperfect rather than freshly applied.
For film and photography, check the finished tattoo through the camera before deciding it is done. For stage, step back and use the 20-Foot Rule. The tattoo should look believable up close while remaining strong enough to be seen by the audience.
🕰️ Step 8: Make a Tattoo Look Fresh, Healed, Old, or Faded
Not every character should have a tattoo that looks the same age. A tattoo supposedly received yesterday should look very different from one the character has worn for twenty years.
Fresh Tattoo: Keep the colors strong and the lines sharp. Add a little pink or red makeup around the design to suggest recently irritated skin. A very small amount of cosmetic shine can give the area the slightly moist appearance of fresh work.
Healed Tattoo: Remove the shine with translucent powder and leave most of the original color intact. Blend the edges into the surrounding skin. This is the everyday appearance you will probably use for most characters.
Old Tattoo: Lightly soften the design with translucent powder or skin-tone makeup. Black ink can be toned down so it appears more gray or blue-gray. Avoid covering the tattoo evenly. Do not fade every part equally. Some lines can remain dark while others are softer, just as you would see in an older real tattoo.
Faded Tattoo: Use a makeup sponge to lightly stipple skin-tone makeup over selected areas. Break up some of the darkest lines and soften portions of the design. The goal is to make the tattoo appear as though years of sun, skin changes, and ordinary wear have affected it.
For stage, do not fade the tattoo so much that the audience can no longer see it. The 20-Foot Rule still applies. Film and close-up photography allow much subtler aging because the camera can see details that an audience cannot.

🎭 Making FX Tattoos Work for Stage
A tattoo that looks convincing from three feet away may disappear completely once the actor walks onto a stage. For theater, the goal is not tiny photographic detail. The audience needs to recognize the tattoo from across the room.
DIY Temporary Tattoos made for stage often need stronger lines and simpler details than tattoos intended for film or close-up photography.
Use the 20-Foot Rule when designing and testing your tattoos. Apply the finished tattoo, then step at least 20 feet away and look at it under lighting similar to what will be used during the performance.
For stage tattoos:
- Use thicker outlines. Fine lines that look excellent up close can vanish under stage lighting.
- Choose strong colors. Black, dark blue, red, and other solid colors generally remain easier to see at a distance.
- Avoid tiny lettering. Small names, dates, and detailed lettering may become unreadable from the audience.
- Simplify complicated artwork. Preserve the recognizable shapes rather than every small detail.
- Consider the costume. Make sure sleeves, collars, jewelry, or other costume pieces do not accidentally cover an important part of the tattoo.
- Check it under stage lights. Bright lighting can wash out colors and make a tattoo appear lighter than it does backstage.
If the tattoo identifies the character, it is perfectly reasonable to make it slightly larger, darker, or bolder than a real tattoo would be. The audience will never see it from the same distance you did while applying it.
Before opening night, photograph the finished tattoo and record its exact placement. That gives the makeup or costume crew a reference so the tattoo can be placed in the same position for every performance.
🎥 Making FX Tattoos Work for Film and Close-Up Photography
Film and close-up photography are much less forgiving than stage. The camera can see the clear edge of a transfer, excessive shine, uneven makeup, and small air bubbles that an audience would never notice.
DIY Temporary Tattoos can work very well on camera, but close-up photography makes careful application and finishing especially important.
For film and photography:
- Keep the details sharp. Fine lines and small details can work well because the camera may be only a few feet away.
- Remove the shine. Temporary tattoo film can reflect studio lighting. A light application of translucent setting powder can help reduce it.
- Blend the edges carefully. If the clear border is visible, lightly blend skin-tone makeup around the outside edge.
- Watch the color. A tattoo that looks black to your eye may photograph much darker than expected. Check it through the actual camera whenever possible.
- Avoid wrinkles and bubbles. Even a tiny flaw can become obvious during a close-up.
- Match the placement exactly. Continuity matters when scenes filmed days apart are edited together.
Take clear continuity photographs after the tattoo has been approved. Photograph the tattoo straight on and include recognizable points on the body, such as the elbow, shoulder, wrist, or collarbone. These give you references for both placement and angle.
It also helps to measure the tattoo's position from a fixed point on the body and write the measurement down. If the tattoo must be replaced several days later, you are not relying on memory or guesswork.
Before filming begins, look at the tattoo through the camera under the lighting being used for the scene. What looks convincing in the makeup chair is not always what the camera sees.
Check out the DIY Fake Teeth Article
📸 Creating a Tattoo Continuity Record
If the same character will wear the tattoo more than once, create a simple continuity record the first time you get the placement right. Do this while the tattoo is still on the actor. A week later, “I think it was about here” is not good enough for a close-up.
Take several clear photographs of the finished tattoo. Include enough of the actor’s body in at least one photograph to show exactly where it sits. Then take a closer photograph that clearly shows the tattoo’s angle and orientation.
Record a few basic details with the photographs:
- Body location: Left forearm, right shoulder, chest, neck, or other location.
- Tattoo size: Record the actual width and height of the printed design.
- Placement: Measure from a fixed landmark such as the wrist, elbow, shoulder, collarbone, or knee.
- Angle: Note whether the tattoo sits straight or is tilted in a particular direction.
- Master file: Record which printable Tattoo Master Sheet was used.
- Finishing makeup: Note any powder, foundation, aging colors, or other makeup used over the transfer.
If several characters have tattoos, keep a separate record for each character. You can also photograph the tattoo beside a small ruler before or after application to provide an additional size reference.
For a film production, this record helps prevent a tattoo from suddenly moving between shots filmed on different days. For theater, it allows the tattoo to be placed consistently throughout the entire run.
Once you have the master design, exact measurements, and continuity photographs, you have something much more useful than a one-time fake tattoo. You have a repeatable character makeup effect.
📋 Build a Tattoo Continuity Sheet
For a stage production, film, or photo shoot, a simple Tattoo Continuity Sheet keeps all the information needed to recreate the tattoo in one place. You do not need special production paperwork. A printed page with photographs, measurements, and a few notes is enough.
Include the following information:
- Character name: Identify who wears the tattoo.
- Tattoo name or number: Give each tattoo a simple name if the character has more than one.
- Body location: Record the exact arm, shoulder, leg, chest, neck, or other location.
- Finished size: Write down the tattoo's width and height.
- Placement measurements: Measure from a fixed body landmark such as the wrist, elbow, shoulder, knee, or collarbone.
- Direction and angle: Record which way the tattoo faces and whether it sits straight or at an angle.
- Reference photographs: Include one wider placement photograph and one close-up.
- Master sheet: Note the file or sheet containing the printable replacement tattoo.
- Finishing notes: Record any powder, foundation, aging makeup, or other treatment used.
- Application notes: Write down anything unusual that will help reproduce the effect next time.
Leave a small area at the bottom for additional notes. During a production, you may discover that a particular costume rubs against the tattoo or that one area needs extra powder under strong lighting.
Keep the continuity sheet with your saved Tattoo Master Sheet. The next time the character needs the tattoo, you can print a fresh copy, check the photographs and measurements, and recreate the original effect without starting over.
Infographic: 8-Step Application Guide
🖨️ Printing Enough Tattoos for a Production
Once you have a finished Tattoo Master Sheet, print enough transfers to cover the entire production plus a few extras. The last thing you want is to discover before a performance or filming day that you have run out.
For a stage production, start by counting how many performances require a fresh tattoo. If the show runs for eight performances, do not print exactly eight tattoos. Print several extras for mistakes, damaged transfers, dress rehearsals, or unexpected replacements.
For film, the number can be harder to predict. Sweat, costume changes, water, makeup, physical scenes, and long shooting days can damage a transfer. Have several identical replacements ready whenever the tattoo is important to continuity.
A good working rule is to prepare at least 25 percent more tattoos than you expect to use. A production needing 20 applications, for example, should have at least 25 transfers ready.
Arrange multiple copies on each sheet to avoid wasting temporary tattoo paper. Fill unused areas with smaller tattoos or additional copies that might be useful later.
Label completed sheets with the character name, tattoo location, size, and date printed. Store them flat in a clean, dry envelope or folder so the adhesive and transfer surfaces remain protected.
Most importantly, keep the original digital Tattoo Master Sheet. If the production gets extended, a tattoo is ruined, or additional scenes are scheduled months later, you can simply print another identical batch.
⚠️ Skin Safety, Adhesives, and Tattoo Removal
Temporary tattoos may be fake, but they are still being applied directly to someone's skin. Treat every product used in the process as a cosmetic product and follow the manufacturer's directions.
Use temporary tattoo paper specifically sold for application to human skin and follow its instructions. Do not assume that any printable transfer or decal paper is suitable simply because it works the same way.
Craft waterslide decals, model-making decals, sticker paper, printer labels, and other printable transfer materials may contain coatings or adhesives that were never intended to touch skin.
The same rule applies to anything you put over or under the tattoo. Makeup, powders, sealers, and adhesives should all be products intended for cosmetic or theatrical use on human skin.
Before using a new tattoo paper or adhesive, test a small piece on an inconspicuous area of skin. If redness, itching, burning, swelling, or other irritation develops, remove it and discontinue use.
Never apply an FX tattoo over:
- Cuts, scrapes, or broken skin
- Rashes or irritated areas
- Sunburn
- Existing skin infections
- Areas that have reacted badly to adhesives before
Be particularly careful with additional adhesives. If a transfer begins lifting, do not reach for household glue, craft adhesive, or products such as super glue. Use only a skin-safe cosmetic or theatrical adhesive intended for use on the body.
For removal, follow the instructions supplied with the tattoo paper. Many temporary tattoos can be loosened with cosmetic remover, baby oil, mineral oil, or another product recommended by the manufacturer. Let the remover soften the transfer before gently wiping it away rather than aggressively scrubbing the skin.
For stage or film productions, keep the packaging or instructions for every tattoo paper, adhesive, makeup, and remover being used. That way, you know exactly what was applied if an actor develops a reaction.
And remember one simple rule: if the skin starts burning, itching, swelling, or becoming unusually red, remove the effect immediately.
Check out the DIY Fake Blood Article
🎬 FX Principle: A Tattoo Should Look Like It Is in the Skin, Not on the Skin
One of the easiest ways to spot a fake tattoo is when it looks like a picture stuck on top of the skin. Real tattoo ink sits beneath the surface, so it becomes part of the skin rather than covering it.
That difference should guide every finishing decision you make.
A temporary transfer may begin with sharp edges, strong color, and a slight shine. Your job is to soften those clues without destroying the design. Translucent powder can reduce shine, while a small amount of skin-tone makeup can help hide the edge of the transfer.
Do not make every tattoo perfectly black. Older black tattoos often appear softer, with gray, blue, or green undertones depending on the ink, age, skin, and lighting.
Also pay attention to the skin surrounding the tattoo. Freckles, wrinkles, body hair, veins, and natural changes in skin tone do not stop because a tattoo is there. Makeup that completely covers those details can make the effect look artificial.
For film, examine the tattoo under the actual lighting and through the camera. For stage, walk away and check it from the audience's point of view.
The best FX tattoo should not make someone think, “That is a good temporary tattoo.”
It should simply make them believe, “That character has a tattoo.”
🎭 Why Go DIY?
The biggest advantage of making DIY Temporary Tattoos is control. You decide exactly what the tattoo looks like, how large it is, where it sits, and how many identical copies you need.
For a one-night Halloween costume, that may simply mean creating a tattoo that matches the character better than anything you can buy at a costume store. For theater or film, the advantage becomes much more important.
Once you have created the master design, you can:
- Print identical replacements whenever they are needed.
- Keep placement consistent from one performance or shooting day to another.
- Create tattoos specifically for your character instead of settling for generic temporary tattoos.
- Adjust the design for stage or camera depending on how it will be seen.
- Make several copies at once for rehearsals, performances, retakes, and replacements.
- Save the master artwork and reproduce the same tattoo months or even years later.
You also do not have to be a professional makeup artist. The first tattoo may take some experimenting with size, placement, and finishing, but once you get it right, most of that work is finished.
That is really what makes this technique useful. You are not creating one temporary tattoo.
You are creating a repeatable FX makeup effect.
Check out the DIY Black Eye Makeup Article
🖋️ Design It Once, Then Reproduce It Every Time
That is the real advantage of this entire method.
Instead of drawing a tattoo on the actor before every performance or shooting day, you do the difficult work once. Create the artwork, find the correct size, establish the placement, test the finished effect, and save everything as your master.
From that point forward, recreating the tattoo becomes much easier.
Your Tattoo Master Sheet gives you identical artwork. Your continuity photographs and measurements tell you exactly where it belongs. Your finishing notes tell you how it was powdered, blended, aged, or faded.
Once you have the master sheet and continuity record, most of the work is finished. If a tattoo gets damaged, tomorrow's performance needs a fresh one, or a scene has to be reshot three weeks later, you already have what you need to reproduce it.
That is why saving the master is so important. You are no longer trying to recreate yesterday's work from memory. You are simply making another copy of something you already know works.
This is the same basic problem professional makeup departments have always faced: continuity. The audience should never notice that a tattoo was removed and reapplied between scenes, performances, or shooting days.
For a Halloween costume, this method gives you a better character detail. For theater, it gives you consistency throughout the run. For independent filmmakers, it provides a simple way to maintain continuity without having someone redraw complicated tattoos by hand every day.
Create it once. Save the master.
Then make the same tattoo again whenever the character comes back.
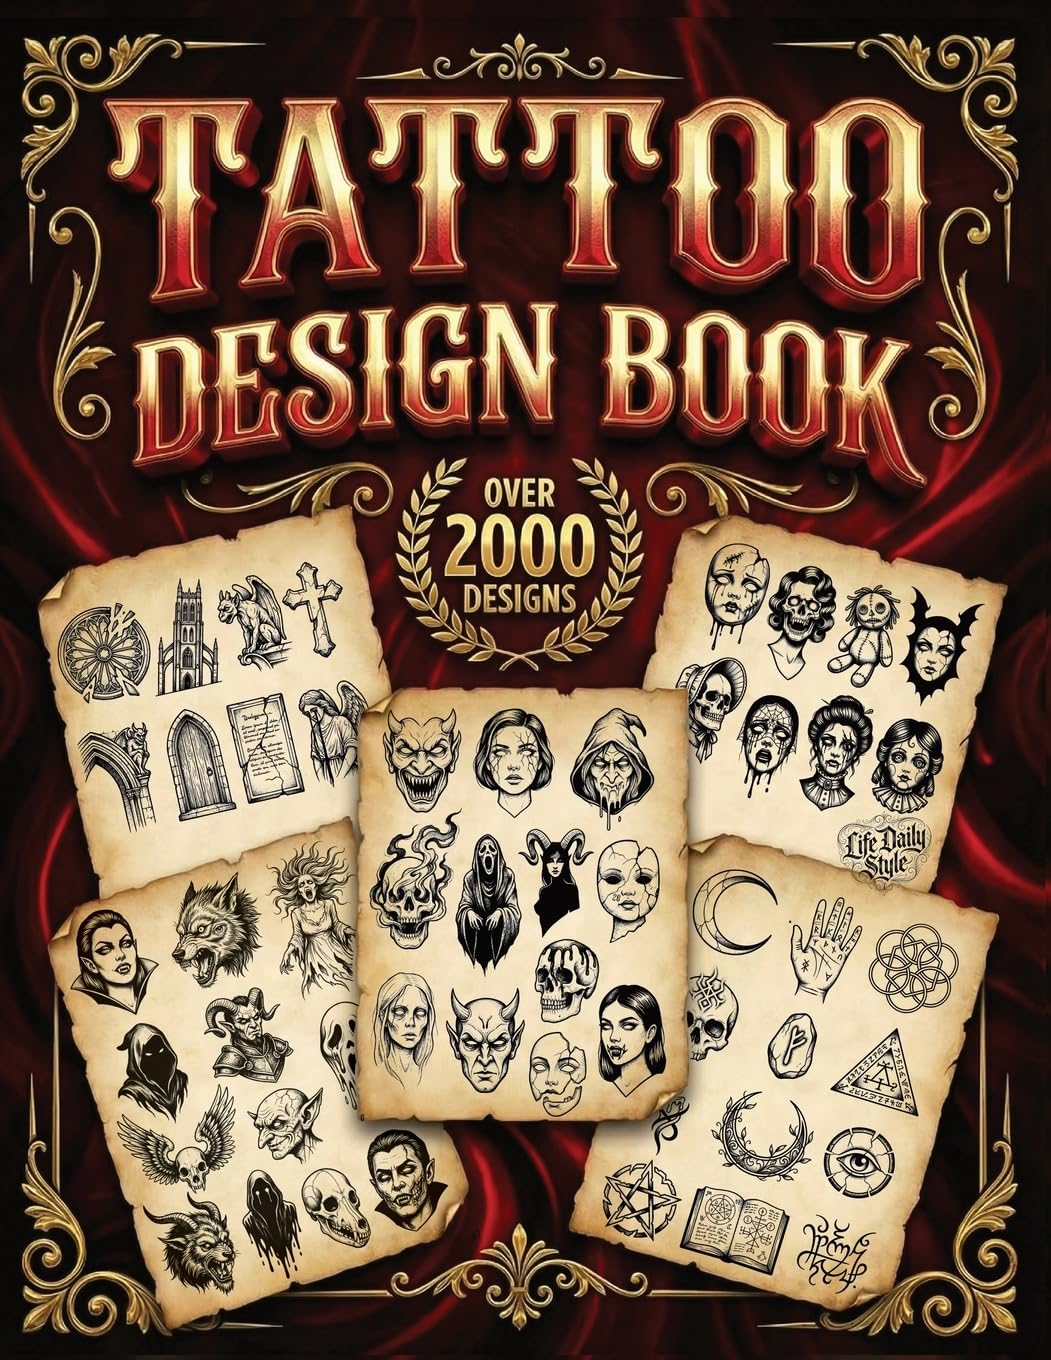
Tattoo Design Book: 2,000 Unique Tattoos
Product Description:
Looking for fresh ideas before creating your own DIY Temporary Tattoos? This collection of more than 2,000 tattoo designs is packed with bold black-and-white artwork that can inspire everything from Halloween body art to stage makeup, cosplay, printable tattoos, and creative craft projects. Whether you're designing a single custom tattoo or an entire themed sheet, this book provides an endless source of visual inspiration.
Key Features:
• More than 2,000 original black-and-white tattoo designs
• Features skulls, ravens, portraits, gothic architecture, symbols, creatures, and traditional tattoo art
• Artist-friendly layout with improved organization and easy browsing
• Excellent reference for custom temporary tattoos, flash art, and concept sketches
• Perfect for Halloween, cosplay, special effects makeup, printable tattoo projects, and creative inspiration
Why This Works:
One of the best parts of creating DIY Temporary Tattoos is designing artwork that's completely your own. Instead of copying existing tattoos, this book gives you thousands of professional-quality ideas that can be adapted, combined, or modified into unique temporary designs. It's an outstanding reference for artists, prop builders, costume designers, and anyone who wants original tattoo artwork for printable tattoo paper.
Buy on Amazon